I’ve found Office Lens useful over the last few year in class. It is a good way to get some text into a document for editing. The workflow for me is a wee bit clunky, snap on phone, open app, upload. Then either open in word or switch to desktop and open from OneDrive there when it syncs.

Today I found OCR.space a free online service. I gave it a quick try on my phone.

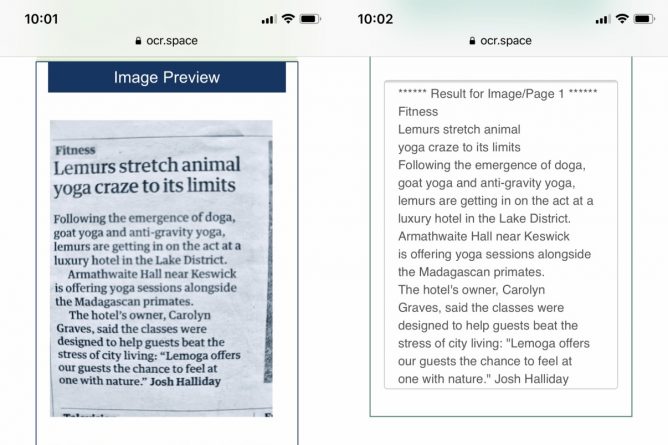
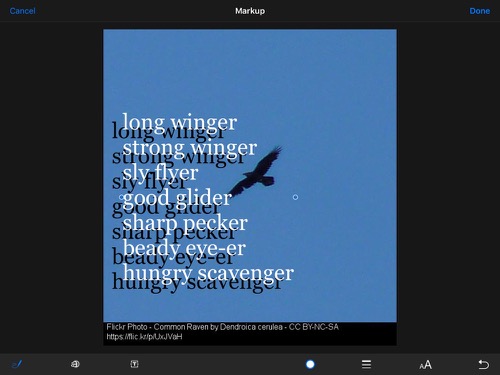
The first attempt failed, I had to edit the photo to B&W and brighten it a little (as per screenshots above), but the results were impressively quick. There was no swapping back and forward between apps.

I’ve tried a multi-column image too using the same image I used back in 2015 with office lens. The results are just as good and fit my preference for text I can copy as opposed to a document I need to open.

Here is the docx Office Lens converted, and here is the OCR.space one, from This image, I had to shrink it a bit to get under 5mb for ocr.space, I don’t think Id need to do that iif I was going straight from the phone when the image would be a smaller png.

I hope to give ocr.space a test in the real world next term.

I’ve also found dictation on my phone a great way to get documents into text. Reading someone elses words seems to work better for me that thinking up my own as I go.

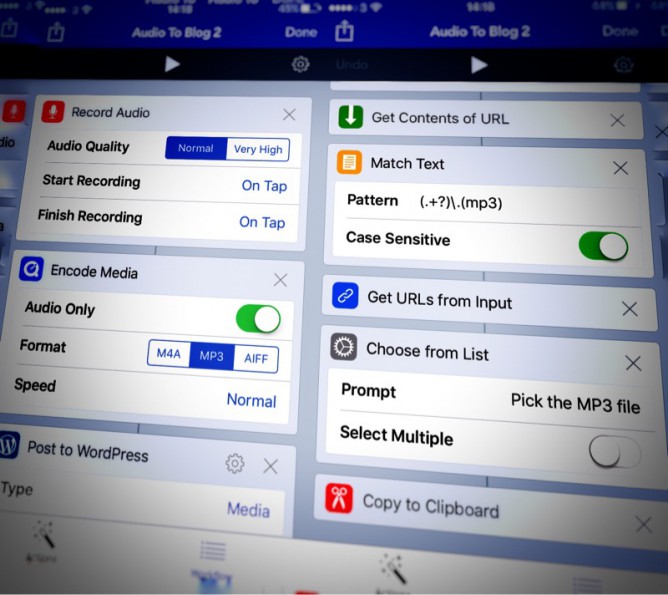
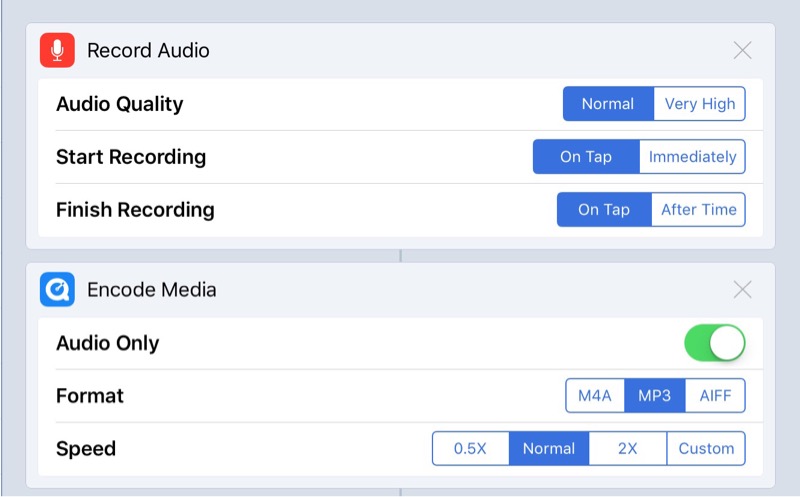
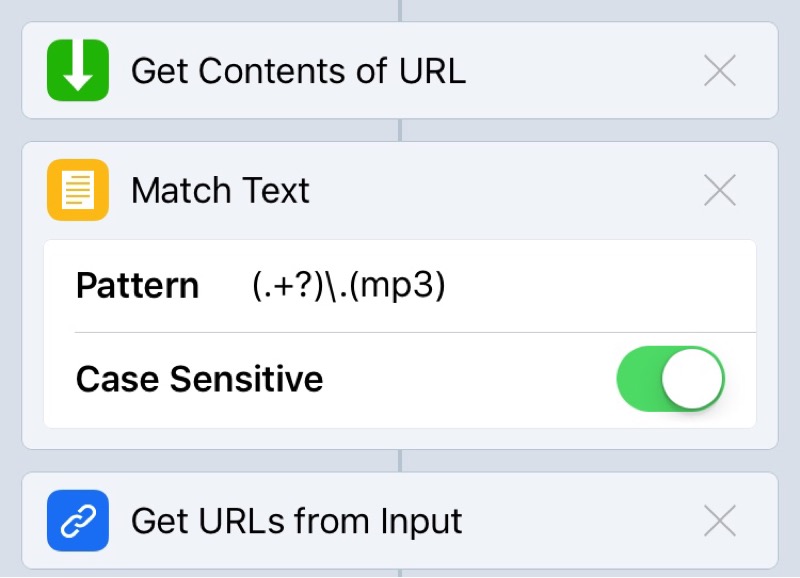
I found ocr.space via OCR Shortcut : shortcuts on reddit, butI’ve not tried the shortcut, the webpages seems quick enough.

This is pretty basic stuff but I’ve found it useful in class.

I’ve often combined writing poetry with digital tools in the classroom. There are a lot of short forms that mean even the slowest typist can produce something good in limited time. From a pupil blogging perspective pupils of varying ability often get great results they can be proud of publishing.

When I started using iPads in teachers training and with pupils, I started using simple poetry forms as a way to produce something quickly that could develop from text be combined with images, video and audio.

Good, IMO, forms are kennings, lunes, haiku and six word stories.

Back then we used skitch and comic life to added text to pictures. More recently I moved on to the free version of pic collage 1.

When I arrived back in the classroom with a pile of iPads I’ve been using the technique quite a bit.

More recently 2 I’ve cut out third party apps to use the newish built in markup in the Photos app. Recently I demoed the process at an interview and saw Jenni Robertson show it at an Apple event in Glasgow. On both occasions I was surprised to find that it was a new concept to most of the audience. I though it might be worth a post here. There is a video embedded at the bottom of this post, but here are some written instructions.

Start with an image

This is a good opportunity to talk and demo a wee bit about copyright and attribution. In class we often use the Morguefile or my own FlickrCC Stampr.

write some words

I believe it is best to use the notes app for this, avoiding thinking about how the text looks, where it goes etc.

Copy the text to the clipboard.

Combine the words and pictures

Open photos

Select and view the image.

Click on the adjustment icon

When the photo opens click on the ellipses and then Markup

On the markup screen click the T tool to add a text box and then press on the box to edit it.


Paste in your poem.

Adjust the size, colour and placing of the text.

Bonus Tip – drop shadow

Duplicate the text, change the colour of one and move the top one over the bottom leaving a nice ‘old style’ drop shadow. I think this is worth it as a intro to layers in graphics. It can also hep readability on complex backgrounds.


Although this is a very simple lesson I think it give the opportunity to teach a few different things over and above literacy involved in the writing:

  • Copyright and creative commons
  • Combining apps (safari, notes, photos) in a workflow.
  • Layers

It has the potential for being extended into video & audio editing (groups pictures perhaps) and sharing the results.

Here is a quick screencast.


1. Some examples from my class using pic collage Frosty Photos and Poems – Banton Biggies

2. For example Kennings, we know about animals – Banton Biggies

The audio on this post was recorded and uploaded with the Workflow.app on my phone. The images were too. The posts was written in drafts and posted from there with a Workflow action.

Yesterday’s post was just about using workflow.app to post to a blog in a way that other tools can do. The method might suit some people’s needs better than using the WordPress app or the browser. It could be altered and improved too. But essentially it is just another way of doing something. I think this next step is a much bigger deal.

Workflow has actions that allow you to record audio or take video. It also has an encode media action.

record-encode-screenshot

This looked promising. I have now got a workflow that will record audio, encode to MP3 and upload to my blog.

I will end up with the link to the MP3 on the clipboard ready to paste into a post.

Getting the url to the MP3 took me a while to figure out. The action returns the url to the attachment page. I had to uses a few more actions to get the content of that page and then get the url to the MP3 with a regular expression. I don’t know much about regEx and less about the flavour used by Worpflow.app. I got there in the end.

workflow-regEx

A couple of OSs ago this seemed impossible on iOS. Now you can save an MP3 created with one of the myriad of audio apps to Dropbox, iCloud, one drive ect and upload through mobile safari.

I like to think this is a bit better. It is certainly a wee bit quicker if you do not need to edit the audio.

There were always apps that would record and publish audio to the Internet. What I like about this method is it goes along with the idea of owning your own data, posting to your own domain and having a little more control.

I am now wondering if it would be worthwhile seeing if you can trigger workflows from a draft.app custom script. This post on the drafts blog: Drafts 4.1.2 – Workflow Integration | Agile Tortoise makes it look as if that would be possible. This would turn the drafts app into a WordPress editor. One could upload images and audio directly from drafts, perhaps inserting the image or audio code at the insertion point.

Posting to WordPresss is pretty simple on the go. Recent versions of WordPress have a fairly good performance on Mobile Safari. the WordPress app performs a little better the body field is less ‘jumpy’ and uploading photos a little simpler.

There are a few other blogging apps but I’ve not stuck with any.

I tend to write posts in drafts as there is even less chrome and more space to type. It also has some clever shortcuts, helps with markdown and can do cleaver stuff with text and scripts.

A while back I noticed that the new version of Workflow had actions for posting to WordPress. I made some quick tests sand it seemed to do the trick.

Today I started thinking about it again. Workflow allows you to make posts, pages and media. When I tried uploading media I was disappointed that uploading an image returns the url to the attachment webpage rather than the attachment itself.

I’ve tried to extract the url form the page but the best I have is to extract all of the urls on the page and present this as a list to choose from. This is copied to the clipboard.

image upload

So I have an workflow that is an action extension. This allow me to pick a photo then run the workflow. It is presented as a document picker in other apps, for example pixelmator. When this workflow runs it resizes the image and uploads it to my blog. It then grabs the attachment page and pulls a list of links out of that. I can pick a link to copy to the clipboard.

Making a post

The next workflow I have is one for making a post. This runs from drafts.
It first set a variable to the draft. Then it shows the photo library. When a phot is picked it uploads the photo to the blog. As in the first script it downloads the attachment page, extracts the urls and let’s me pick one. This time the one picked is put in another variable.

The workflow then get the first variable, and posts it to the blog as a draft. It asks for a title and used the url to the uploaded image as the posts featured image.

It also asks for tags when it runs.

The featured image for this post is a couple of screenshots taken on my phone. They were stitched together with workflow and the result edited a bit in snapseed.

I quite enjoy scripts and things that make my computing life a we bit easier. I’ve blogged a few times about AppleScript which I find very handy on my mac. On my iPhone I’ve never really found a way of automating things that stuck with me. I’ve downloaded and played with a few apps, but mostly they have felt a bit too convoluted for me.

I do regularly combine application to get a result, the so called app smashing, although I prefer the less destructive sounding playflow (I think I am the only person who does).

Workflow Icon

I’ve now found an application which looks like making this sort of thing on iOS a bit simpler: Workflow.

Workflow is more like Automator than AppleScript as it uses the same sort of block steps. You can combine any of the actions to create workflows. These steps or rather actions can deal with images, text, maps in all sorts of ways.

The think that makes this application stand out is that it has arrived hot on the heels of the iOS 8 improvements to inter application communication. You can set the application to the a Action Extension, this means it can be run from the share sheet in other applications. As you can set the input for a workflow to accept different things you can control the sheets where it will show.

In the screenshot below I’ve selected 2 photos and then hit the share button. When I click the Run Workflow button I can choose a workflow from the next screen(shown on the right) . In this case one choice is a simple workflow I made to downsize image an save it to the camera roll.

Sharesheet

These workflows are made by dragging and dropping action blocks onto a workflow. Workflows can be set to be run from a icon added to your home screen, the Launch Center app or from share sheets in other apps. The latter can be set to accept different types of data and will then show up in the appropriate apps.

So far I’ve only made a few very simple workflows with two or three block, but there is potential to loop and have if-then type decision making.

Some Workflows

There are over 150 actions you can use to build a workflow:

Actions

I’ve only scratched the surface of workflow over the last week or so, but it looks like it could make iOS more fun and effective.

A few links:

Clarify icon

I’ve spent a fair bit of time when working at North Lanarkshire and back in school in creating howto instructions for software or computer tasks. Generally this involves organizing a bunch of screenshots and text on a page. I usually use Pages (or sometime comiclife) occasionally Word. I’ve though of myself as quite competent in grabbing screenshots (cmd-shift-4 on a mac, spacebar toggles rect/window capture), switching to pages (cmd-tab repeat tab until pages is selected and let go), and pasting the image in (cmd-v) before command tabbing back to where ever the screenshots are coming from.

Recently I’ve been making a few help sheets for glow blogs and on a whim remembered Clarify. I’d tested it but not been impressed for reasons I can’t recall. I got the application through a macheist software bundle a while back. Given I’ve quite a lot of screen-shooting to do I though I’d give it another go. I was quite please to find that I qualified for a free update to Clarify 2 My first impressions of the application have been overturned.

Workflow

Clarify 2 is great for making documents that consist of a series of screenshots and text. The great advantage the application has from a more manual approach is workflow.

  1. You launch the application
  2. Switch to the application you want to explain
  3. Work through the process taking screenshots (cmd-shift-2) as you go.
  4. The screenshots are placed in a clarify document. Clarify stays in the background.
  5. After taking all of the screenshots you can switch to clarify.
  6. Work through the sections, adding titles, descriptions and annotating the images with the built in tools.
  7. Export to word, pdf, html.

You can copy and paste as rtf or publish to WordPress, dropbox or clarify-it.com (the latter is a free beta at the moment).

As you work through the clarify document you can resize the screenshots, annotate them and combine them. The defaults are sensible and the annotation tools are both simple and powerful.

Clarify Interface

The exports can be further enhanced with templates, but I’ve not tried that yet. The publishing to wordpress has worked well in a couple of tests.

To round up, clarify seems to save time buy improving the workflow, decreasing the amount of tinkering and adjusting to be done and exporting to several useful formats. The application costs £18.70 for mac or windows and there is a Mac/Windows Cross-Platform License at £24.94. Well worth the money in my opinion.