I’ve spent a fair bit of time when working at North Lanarkshire and back in school in creating howto instructions for software or computer tasks. Generally this involves organizing a bunch of screenshots and text on a page. I usually use Pages (or sometime comiclife) occasionally Word. I’ve though of myself as quite competent in grabbing screenshots (cmd-shift-4 on a mac, spacebar toggles rect/window capture), switching to pages (cmd-tab repeat tab until pages is selected and let go), and pasting the image in (cmd-v) before command tabbing back to where ever the screenshots are coming from.
Recently I’ve been making a few help sheets for glow blogs and on a whim remembered Clarify. I’d tested it but not been impressed for reasons I can’t recall. I got the application through a macheist software bundle a while back. Given I’ve quite a lot of screen-shooting to do I though I’d give it another go. I was quite please to find that I qualified for a free update to Clarify 2 My first impressions of the application have been overturned.
Workflow
Clarify 2 is great for making documents that consist of a series of screenshots and text. The great advantage the application has from a more manual approach is workflow.
- You launch the application
- Switch to the application you want to explain
- Work through the process taking screenshots (cmd-shift-2) as you go.
- The screenshots are placed in a clarify document. Clarify stays in the background.
- After taking all of the screenshots you can switch to clarify.
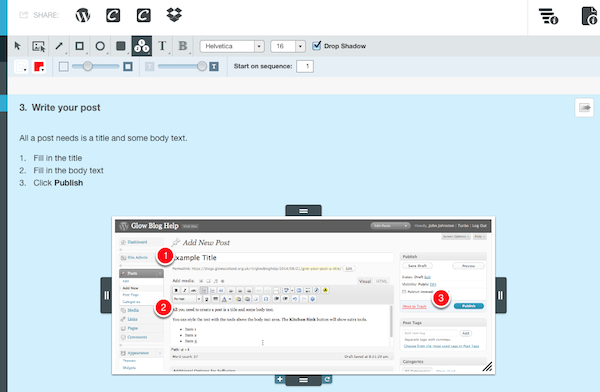
- Work through the sections, adding titles, descriptions and annotating the images with the built in tools.
- Export to word, pdf, html.
You can copy and paste as rtf or publish to WordPress, dropbox or clarify-it.com (the latter is a free beta at the moment).
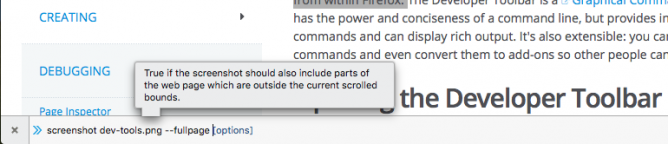
As you work through the clarify document you can resize the screenshots, annotate them and combine them. The defaults are sensible and the annotation tools are both simple and powerful.
The exports can be further enhanced with templates, but I’ve not tried that yet. The publishing to wordpress has worked well in a couple of tests.
To round up, clarify seems to save time buy improving the workflow, decreasing the amount of tinkering and adjusting to be done and exporting to several useful formats. The application costs £18.70 for mac or windows and there is a Mac/Windows Cross-Platform License at £24.94. Well worth the money in my opinion.

 I take a lot of screenshots. Mostly I use the standard mac keyboard shortcuts or the home + sleep buttons on iOS or less frequently the snipping tool on Windows. These are all covered on How to take a screenshot. I find the mac ones to be the best for general purposes, lots of options at your finger tips.