After seeing @adders on micro.blog posting some timelapse I though I might have another go. My first thought was to just use the feature built into phone. I then though to repurpose a raspberry pi. This lead to the discovery that two of my PIs were at school leaving only one at home with a camera. This we zero had dome sterling service taking over 1 million pictures of the sky and stitching them into 122918 gifs and posting them to tumblr. I decommissioned that when tumblr started mistaking these for unsuitable photos.

My first idea were just write a simple bash script that would take a pic and copy it to my mac. I’ve done that before, just need to timestamp the image names. Then I found RPi-Cam-Web-Interface. This is really cool. It turns your pi into a camera and a webserver where you can control the camera and download the photos.

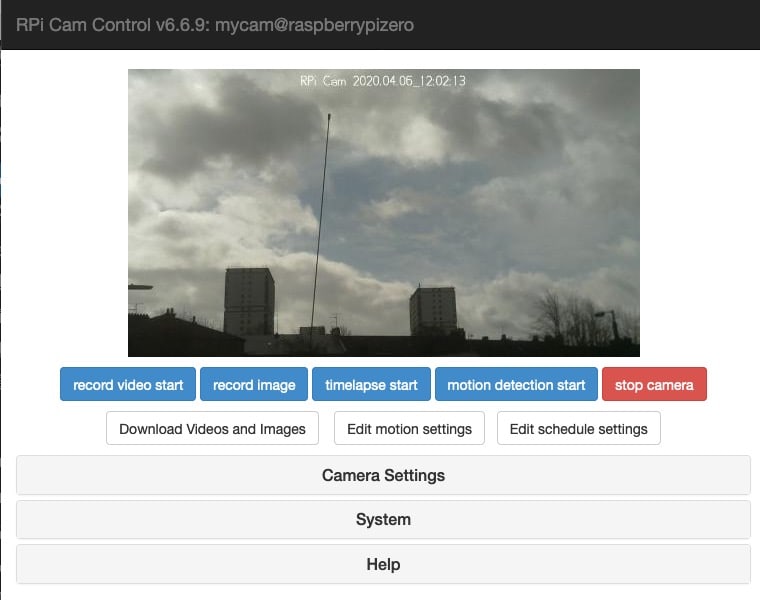
I am fairly used to setting up a headless pi and getting on my WiFi now. So the next step was just to follow all the instructions from the RPi-Cam-Web-Interface page. The usual fairly incomprehensible stuff in the terminal ensued. All worked fine though.

I then downloaded the folder full of images onto my mac and stitched them together with ffmpeg.

ffmpeg is a really complex beast, I think this worked ok:

make a list of the files with

for f in *.jpg; do echo "file '$f'" >> mylist.txt; done

then stitch them together:

ffmpeg -r 10 -f concat -i mylist.txt -c:v libx264 -pix_fmt yuv420p out.mp4

I messed about quite a bit, resizing the images before starting made for a smaller move and finally I

ffmpeg -i out.mp -vf scale=720:-2 outscaled.mp4

To make an even smaller version.

I am now on the look out for more interesting weather or a good sunset.

Snail Habitats For Mrs. Nations Class

These are student created snail habitats. Each habitat has a Raspberry Pi computer with a mini camera attached to it, which is programmed to take a snapshot photo every hour. This will allow students to see where the snails are hanging out the most and improve their habitats over time.

This looks like a great project. I wish we has seen it when we had our mud snails in class.

I don’t think we could have used Raspberry PIs on the school network but I am sure this could have been adapted to see the photos locally in the way we use our @naturewatch camera.

It also reminds me of my Raspberry Pi Gif Cam

Liked Quick Fix — a vending machine for likes and followers - Raspberry Pi (Raspberry Pi)
Art installation and social commentary from maker Dries Depoorter, with a Pi, and Arduino, and a nicely finished enclosure.

Quick Fix — a vending machine for likes and followers

Quick Fix is a vending machine (and art installation) that sells social media likes and followers. Drop in a coin, enter your social media account name, and an army of fake accounts will like or follow you


sounds like fun on several levels.

https://raspskypi.tumblr.com/post/184806077919

The 100,000 gif on Ski Pi was published yesterday. These are gifs create by one of my PIs which are automatically uploaded to tumblr every 15 minutes.

I think it might be time to repurpose that pi or switch to video or something else. The process was more fascinating that the result. I need a better view perhaps.

I was watching spring watch out of the corner of my eye as I did some prep last night. There was an article about making your own Wildlife cam. It looks a lot simpler than others I’ve seen and used a Raspberry Pi Zero. The BBC site had a link to My Naturewatch where you can get instructions.

This looked like something my class would enjoy using. My zero is busy taking gifs of the clouds (>70000 to date Gif Cam), so I decided to try to use a Raspberry PI 3 instead.

The instructions were really good, simple and worked first time! No soldering involved. You don’t need a monitor for the PI or any logging on through ssh in the terminal. All you need is a PI, a camera module for the PI and a power supply. I used a £2.99 phone charger. You need a plastic box and an old plastic bottle too. This is bargain basement stuff.

The way it works is the then the pi starts up it becomes a network. You connect to this with a computer or other device. You are then on that network and not the Internet. I forgot about this when showing the class and couldn’t project from an iPad;-) You then open a browser and connect to a local website on the PI. There you can start the camera and view or download the pictures.

Once the camera is started it takes a photo every time something moves in front of it.

It was raining fairly heavily this morning so we waited till about 10:15 before putting the camera out on the playground with a handful of peanuts in front of it. After 15 minutes we collected it and had a look at the photos. I am impressed. We need to think a bit about placing the camera, perhaps finding somewhere with smaller birds but the camera worked a treat.

I think this is a really useful tool for the classroom. I hope we can use it to catch some butterflies on sunnier days too. I have had a few failures with hardware Raspberry PI projects. I prefer software ones but this is certainly the most impressive for the least about of work I’ve tried. I’d recommend it highly.