ffmpeg -i inputfile.mp4 -vf reverse reversed.mp4
#tdc2420 #ds106

ffmpeg -i inputfile.mp4 -vf reverse reversed.mp4
#tdc2420 #ds106
#tdc2418 #ds106
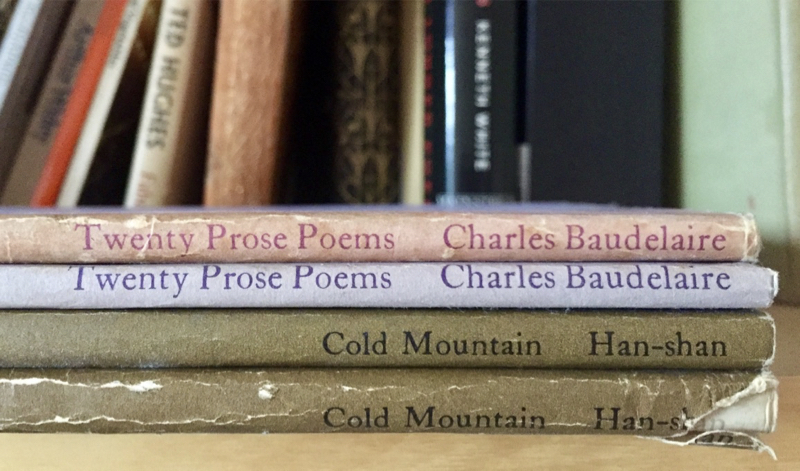
why do I need two?
a gift for a pal, but…
still on my shelf.
Sway has arrived for Glow users.
Sway allows you to
Create and share interactive reports, presentations, personal stories, and more.
I blogged a bit back in May.
Basically the app helps you present media online in a slick way. I’ve mostly looked at the iOS version. The different versions, Windows, web and iOS so far have different feature sets and a personal Microsoft account allows you do do slightly different things from a business/education account.
The app feels as if it is in pretty active development. Features that were coming soon in May are here.
What is particularly interesting, from my point of view, is that sways can be made public on the web and can be shared ready for remix.
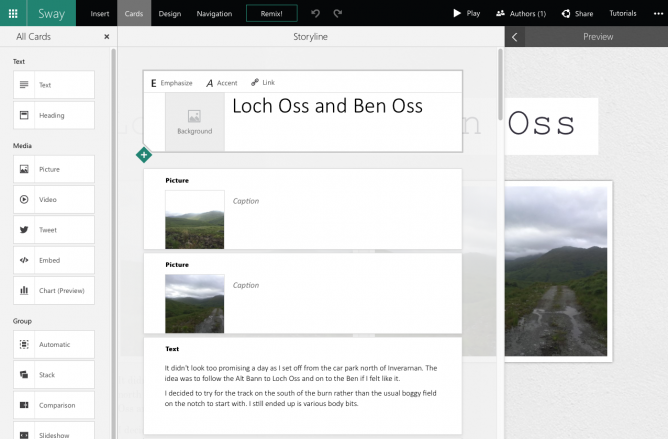
This evening I used the iOS app on an iPad to build another sway (The featured image on this post is a screenshot of the borwser version of the sway, not the iPad view):
It didn’t take very long to add text and images. One difference I noticed was if I was signed into the app with a personal account I could upload video in iOS, I could not do this with my Glow account. Hopefully coming soon.
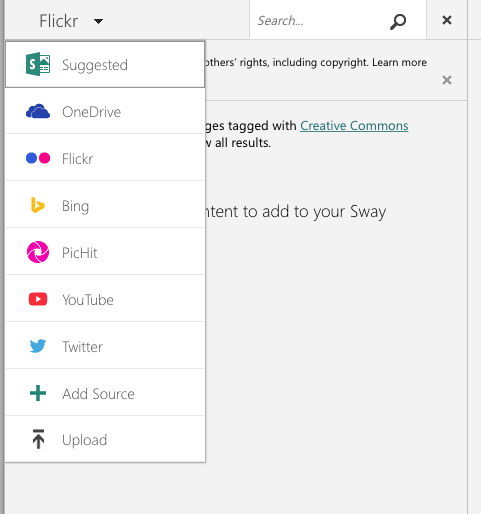
The browser app has a lot more options, including built in searches over flickr, youtube and other media sources.
It also looks like if you create or even edit a sway in the browser you cannot edit it afterwards on iOS (I might be wrong about this). I do not think either of these things are a great problem, we now know an iPad is a great content creation device and I would hope pupils would be using there camera and their own images for the most part on mobile.
I’ve got the same feeling about the slickness of the creations as I had back in May, mostly about the ‘automatic creativity’ but the most exciting two things about Sway are public sharing and remixing.
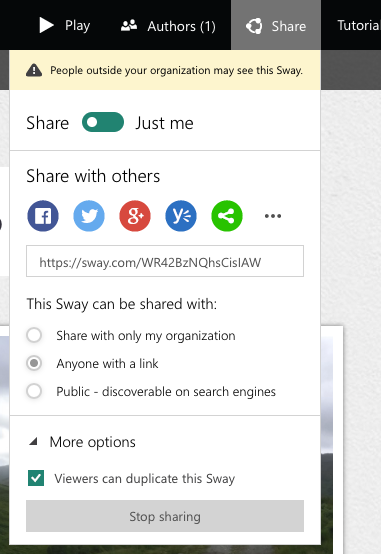
Users have control over who the Sway is shared with and if they will allow their Sway to be duplicated by others.
This is the first of the O365 services to allow public sharing which is very encouraging for those who see value on pupils sharing widely. I also think that the ability to remix, change and improve someone else’s creation is a important skill.
There is obviously the opportunity to discuss aspects of publishing in public, Internet safety and copyright. The copyright issue is also nicely lead into by the browser version:
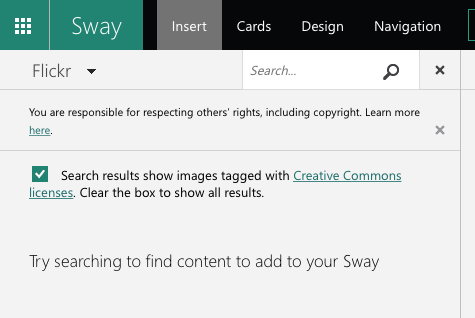
We want pupils (and teachers) to understand aspects of copyright and creative commons. Unfortunately the editor does not auto-add attribution but it can be copied and pasted in the browser.
I can embed a sway in this blog using the embed code. Unfortunately this is via a iFrame. iFrames are not supported in Glow Blogs. I do hope we can develop oEmbed like functionality in the Blogs soon in the same way as we have for ClickView video.
It looks like Sway itself supports oEmbed of other content so I’d hope that oEmbed of sways is at least under consideration.
I’ve barely scratched the surface of Sway, and look forward to seeing how it is used in Glow.
Update 11.11.2015 Glow Blogs support the embedding of sways, just paste the url to a sway into the editor: Embedding Media | Glow Blog Help.
DS106, digital storytelling 106:
is an open, online course that happens at various times throughout the year at the University of Mary Washington, but you can join in whenever you like and leave whenever you need. This course is free to anyone who wants to take it, and the only requirements are a real computer, a hardy internet connection, preferably a domain of your own and some commodity web hosting, and all the creativity you can muster.
from: About ds106
DS106 can be difficult to understand without becoming involved. It is easy to bounce off the surface of animated gif twitter chat, but there is a lot of learning going on both on the surface and by looking s little deeper.
It is worth having a look at the syllabus.
It covers the basics of setting up an online presence and space for the storytelling you will be come involved in, a blog, twitter and flickr accounts and the like.
The course then goes through theory and practice of digital storytelling, covering design, images, video and audio. In each section of the course participants can add to the assignments as well completing them, the course is, to some extent, built by the students.
What, in my opinion, has made ds106 stand out from the crowd of bigger online courses is the atmosphere and the guidance provided by the instructors at UMW, other locations and from repeat students. The dedication of the instructors to model what they expect from students and to openly comment on the students published work is phenomenal. What is more they do this for open online students. They have also managed to install this work ethic in the participants, there is a high level of engagement between learners and some blurring of roles.
The other exciting thing about ds106 is the riffing of one participant on artefacts produced by another, participants are encouraged to share their creations with cc licences and to remix the work of others. They are also encouraged, required for students at UMW, to give the back story, working methods and ideas surrounding their assignments.
This iteration of DS106 is a we bit different, there are no instructors:
What we are going to do is to publish every Monday a suggested set of activities and creative assignments that you are free to do as you see fit or interested. These are republications of previous materials from ds106 courses taught at the University of Mary Washington since 2011, but this time around, there are no registered students, just the open folks.
from: Getting Closer to Headless #ds106 – CogDogBlog
I’ve deliberately used the word participants above as there is a blurring or rolls between instructors, students and open-online-participants in a normal ds106 course, this one will push that a bit.
I’ve had a huge amount of fun (my ds106 blog), learned a lot about digital stroytelling and online learning dipping in and out of ds106, if you are interested in online education, learning about digital media and openness I cannot recommend it enough.
DS106 Fall 2013 Headless starts on the 26th of August. You can find out what to do here: Coming Soon! The Headless ds106 Course
At the start of this year I became involved with DS106 an open online course on Digital Storytelling. I posted 20 or 30 articles here categorised as DS106
This summer I have signed up again for the DS106 summer Camp Magic MacGuffin but will be posting at a new blog I’ve set up here: 106 drop in. This is a wordpress blog, which plays better with the DS106 aggregation scheme and will allow me to play a bit with WordPress.
There will be a minecraft element to the course this time, I’ve paid for the software but have only manages very short times on the server before being killed. A whole new world in may ways.
I recommend DS106 if you are interest in playing with digital media, it is easy to join in and you can do as little or as much as you like.
A few days ago I noticed that Alan Levine is mashing up ds106 assignments withThe ds106 Remix Machine. This, briefly, allows you to take an assignment from DS106 and add a filter. Shades of John Davit’s Learning Event Generators.
For example this remix: stop frame photography [remixed]: Uncle Bob — Remix Machine takes this original assignment stop frame photography and adds this remix card:

Use Existing Media
Remix is using the created media of others – it does not count as a remix if you use your own assignment work. As raw material for your remix, use media from examples created by other ds106 participants for this assignment.
I’ve not ds106ed for a while so, just for fun (is there another reason?), I took one of a series of images from here: ds106: Stop frame photography by Rowan Peter and did this:
Mole photo from Mole Flickr Attribution-NonCommercial-ShareAlike 2.0 Generic (CC BY-NC-SA 2.0)
This could be a lot better, but it didn’t take long. I am tempted to dust off a copy of flash and make a wack a ds106 mole game .
.
DS106 has been looking very interesting of late, especially the Kickstarter project which has gathered a pile of money for developing DS106 in lots of interesting ways. (I am in for a t-shirt). This looks like making ds106 increasingly interesting as time goes on.
Next time ds106 runs I am going to give it another shot, set up wordpress blog to make my tagging work a bit better. and have some more fun.
I am sure most of the #ds106 folk will have seen this, but this is a great wee movie with lots of interesting uses of animated gifs. I’ve been a long time disparager of those animated gif clip art things on the web but recently converted to a fan by Jim Groom and ds106.
Tell a story using nothing but sound effects. There can be no verbal communication, only sound effects. Use at least five different sounds that you find online. The story can be no longer than 90 seconds.
When I was working out what to do with this one I seemed to have missed sound effects and no longer than 90 seconds.
This is an idealised walk combining sounds I’ve recorded over the last year or two when walking, some as audioboos.
Starting with traffic, there is bird song & rooks, footsteps through some wet ground, ducks, footsteps on a rocky path, a raven, a hill burn (small stream) finishing with the sound of one lark. It is mostly pretty quiet. it is also about 5 minutes long.
This is as noted above a lot longer than the 90 seconds limit. While this particular example may not hold a listener for 5 minutes I do think that longer audio without speech has its place. Last year when I went to Field Recording at the Scottish Music Centre I noted:
what I’d take away was the quality of listening shown by the audience & presenters. The time taken. Timothy Cooper’s Blast beach gave plenty of time to look at the images: audio can be slower. I am thinking again about Ian Rawes’ “the ravenous eye and the patient ear”, Tim Nunn’s theatre performances in the dark.
Make a custom map using Google Maps.
Use Google Maps to create your own custom map that includes photographs of places.
I’ve been playing with google maps and the google maps api for a while so was please t osee some familiar territory for this Assignment.
This afternoon Dorothy, my wife, and I took a walk round Ardinning Loch, we do this nearly every week often twice a week in the summer, It is a short walk that is always interesting. Ardinning is a SWT reserve.
I used Trails on my phone to record a kml and gps track. The kml file was imported int oa new google map. I uploaded the photos it was then just a matter of dropping on some pins, filling in a title and pasting in the url to the image file.
View Ardinning in a larger map
Over the last few year I’ve played with developing a workflow for creating maps like this using the GoogleMaps API. For this I use SuperCard, a mac scripting application. The project allows me to import a gpx file exported from Trails, get exif data for some pictures, iPhone photos have location data imbedded (It also lets me add locations to other pictures by comparing the time taken with the gps file). It then exports a gpx file which I upload to this website and a php file created a map.
Here is the Ardinning Walk map 120303 Ardinning and a whole set of Mapped Walks. In my opinion this has a few advantages over using google maps, you can embed audio & video, and the popup boxes link in sequence. It is also a faster to produce. Obviously it has the disadvantage of being a wee bit trickier to set up.
I’ve a fair number of blog posts going into this in a bit more detail: tagged googlemaps.
I think these sort of maps add another dimension to telling a story or presenting information. helping to tell a story in space as well as time. I can see this being incorporated into all sorts of class room projects, either for mapping learning experiences or creating fictional maps. This one The Kidnapped Trail – Google Maps is a great example of the possibilities.
It loks like I can kill two birds here: Google Maps Story — MISSION: DS106