Pinboard

I’ve been using pinboard for collecting links for five years now. I like it a lot, it feeds the Links page here and most of the enviable stuff.

One of the main things I like about it is its simplicity. Pinboard lists the links, titles, and descriptions without any images or fancy stuff. Adding links via the bookmarklet is simple. It supports the delicious API and has RSS so you can pull sets of links onto blogs and webpages easily enough.

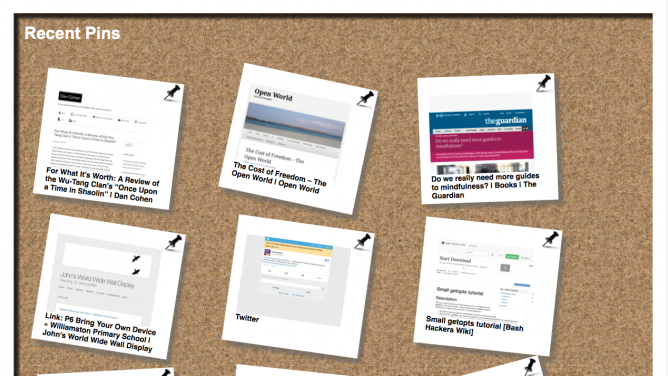
Last week I used the service to play around with python a little. To produce a more visual representation of my recent links. I appreciate the irony. This was an excuse to play with several technologies that I do not know much about.

Last month I had read: this post Homemade RSS aggregator followup by Dr Drang. This shows how to make an RSS reader with python.

I’ve very occasionally played with python for an hour or two but do not really understand the basics. I can however try things repeatedly until they worked.

Planing and playing

My plan was to use the code from Dr Drang, simplifying it to deal with just one RSS feed. Using my pinboard links to produce a webpage. I also wanted to make thumbnails of the websites linked and play with CSS and JavaScript a bit.

The idea was to create the webpage in my dropbox. This could be updated automatically by the script running on my mac. I’ve had dropbox long enough to have a Public folder that is very handy for publishing webpages. This is now a pro and business option only.

Here is the script: pinboardrecent.py and the current output: Recent Pinboard.

Problems

The interesting thing about all of this is the several problems I hit and their solution.

The problem included:

  • Not know how to do something
  • Errors in the code I wrote
  • Errors with webkit2png 1 which I was using to produce the thumbnails.

The answers all involved google and testing and re-testing until things worked. In some all cases I am sure my answers were not the best way of doing things but they worked. I’ve noted most of these in the source. The other think I see in my code is lots of print statements that are commented out. I deleted lots more. There are surely better ways to find out what is going on/going wrong with a script but this works for me.

I am never going to be a programmer, but I get a lot of fun and occasional utility out of playing around like this.

There is a huge push to teach coding to pupils in school going on at the moment. A major reason for this is getting the right skills for employment. I hope a small side benefit will be giving learners the chance to have fun. Producing things for themselves rather than just use services and applications produced for them.

Tinkering with code that you do not understand may not be the best way to get a deep understanding of a language. It may not even help with learning the fundamental concepts. It does in my experience hook you into engaging with learning.

This term at work I’ll be involved in providing training in starting primary pupils coding. I’ll be recommending tinkering as one possible way of getting started and engaing pupils. I am sure some will be as fascinated as me.

  1. webkit2png has problems when trying to get thumbnails of non https sites on El Capitan (Mac OS X 10.11) google allowed me to find a fix and edit the source of webkit2png (which turned out to be python for extra learning).

My raspberry pi, was having problems. For a while it had sat on the windowsill happily posting images to tumblr day and night on skypi and broomhill sky’s, it served up a small website itself too.

At some point it stopped working. I rebooted the device a few times, turned if off and on again, then left if for another day.

I had a bit of time on my hands on Thursday so decided to story it out. Since the device didn’t seem to be working at all, I could not connect to it via ssh and it was not serving the website I though I’d better just start from a clean install. So this is what I did.

  • bought a new SD card.
  • downloaded a new image from NOOBS for Raspberry Pi
  • wiped the card and copied the files over
  • moved the pi to the living room and hooked up the to and a keyboard
  • booted the pi and went through the initial setup
  • shut down the pi to prepare to move it back to the windowsill where I planned to connect via ssh and redo all the server and script stuff to get it working.

At that point, while the pi was still hooked to the tv I though I’d give the old card a final try. Of course it booted up straightaway!

I then took the pi with the old card back into the other room and connected to power and ethernet. Back to the Mac and tried to ssh on. Fail, check the website that sits on the pi, fail.

Finally I took the Ethernet cable out of the powering plug and put it back in again. Everything started working properly.

I do not know how many times I’ve repeated this sort of routine expecting the worst and skipping the obvious. I do hope I’ve learnt my lesson but somehow I doubt it.

Update 29-09-2016: the pi is no longer posting gifs and images. I’ve recycled it it. Also hat-tip to Oliver Quinlan for catching a mistake in the instructions, I’ve fixed it below (sudo pip install pytumblr). The archive of over 50,000 gifs is still there.

A couple of weeks ago I blogged about getting my Raspberry Pi to create gifs and server them to the web:Gif Cam.

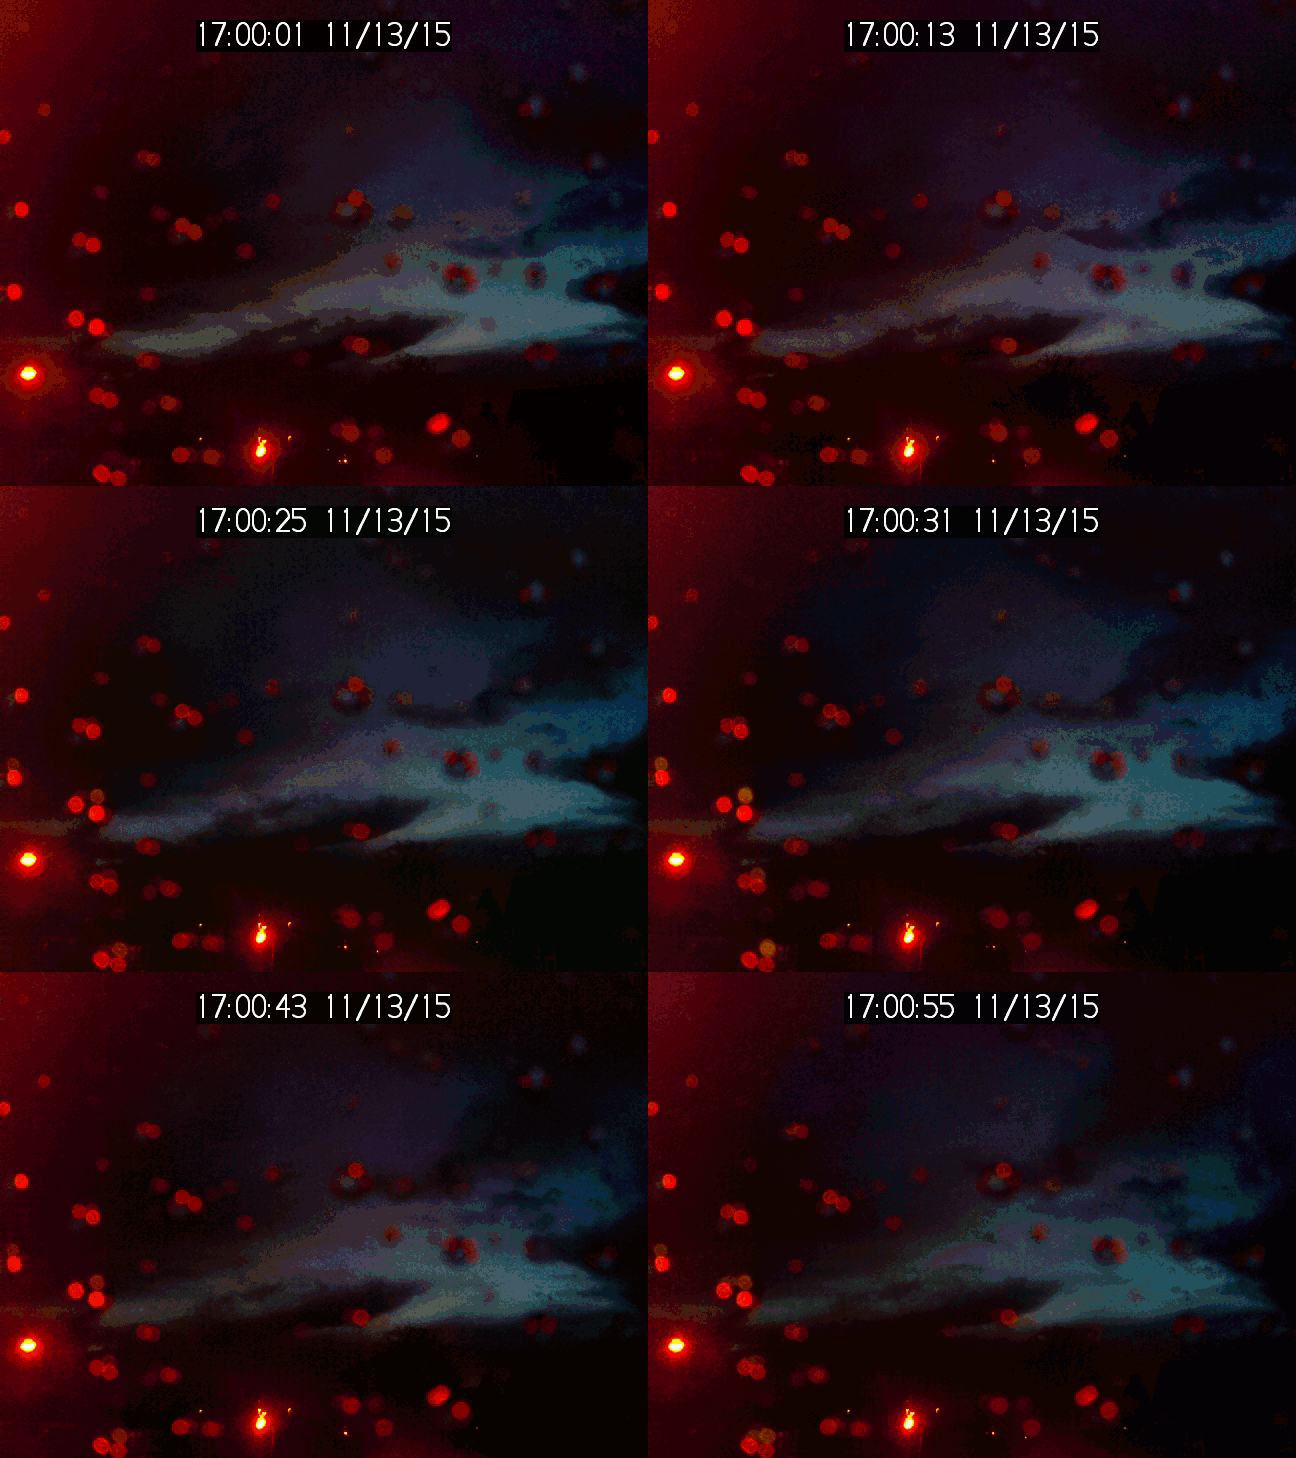
This only keeps the most recent gif. A couple of days ago I tried to set it up to catch the blood moon, and store a series of gifs but my scripts failed to work. It did lead me to changing the position of the camera from the local cross roads to the sky.

I then noticed a couple of interesting images, so though about how I could do that. There is not enough room on the pi’s SD card to hold images for very long. I started by uploading the gifs to a website via ftp. But this was still not a long term solution. I then though about Tumblr and after a bit of googling I’ve got a working solution that posts a gif of the Glasgow Skies to Sky Pi.

Here are some notes to show how I did some of it. You need to be able to use the termianl and a command line file editor such as nano. I am very much a newbie with this stuff.

My pi is on my home network connected to the router via Ethernet and a powerline. It is set up as a webserver with a domain, http://pi.johnj.info. I have ssh access to the pi and do any editing from my mac via ssh. None of these things apart from the connection to the Internet.

The pi is running from an SD card with NOOBS installed.

I’ve run: sudo apt-get update
and
sudo apt-get upgrade
before starting to get the pi up to date.

Code like the above is run form the terminal, either on the pi with a monitor and keyboard or by logging on via ssh. I create scripts on the pi in the terminal with nano, which is an uncomplicated text editor that is used in the terminal.

Taking Pictures, making Gifs

The whole thing runs from a shell script, which started like this:


    #!/usr/bin/env bash
    for (( i = 0; i < 10; i++ )); do
        raspistill -h 486 -w 648 -a 1036 -vf -hf --encoding gif  -o /var/www/tempgifs/cam${i}.gif
    done
    gifsicle --delay=10 --colors 256  --loop /var/www/tempgifs/cam*  > /var/www/tempgifs/camd.gif
    mv /var/www/tempgifs/camd.gif /var/www/camd.gif
    raspistill -h 486 -w 648 -a 1036 -ae +25+25 -vf -hf -o /var/www/camd.jpg

When the script runs, it takes 10 still pictures with the raspistill program. I am not too sure if these are the best settings, but

  • -h 486 and -w 648 set the dimensions.
  • -a 1036 stamps the date and time.
  • -vf -hf flips the image and turns it upside down (to put it the right way up)
  • –encoding gif outputs as a gif
  • -o /var/www/tempgifs/cam${i}.gif set the file path for the export.

I saved this file to regulargif.sh and then made it run-able with chmod +x regulargif.sh.

I’ve installed gifsicle with sudo apt-get install gifsicle and use that to create the gif file. The last line creates a jpg too. You can see the current gif and jpg on Gif Cam.

I need the script to run regularly so I set up a cron job. To do this in the terminal type crontab -w and add

*/9 * * * * /path/to/regulargif.sh

to the bottom of the file. This will run the script every 9 minutes.

Tumbling Gifs

The next problem is to upload to tumblr. Tumblr has a well developed API and libraries for several languages. After a fair bit of googling for a simple solution I decided to just use one of Tumblr’s own. I though it sensible to use Python as that language seems to have a lot of support on the pi. I don’t know any python.

First you need to install the pytumblr python module. So in the terminal:

sudo pip install pytumblr

You also need to have various keys for the API: consumer_key, consumer_secret, oauth_token and oauth_secret. To get these you need to create an App on tumblr. Here is what I did. (Well this was a second run through to document, the first time got a bit messy;-))

register an application Click the button and fill in the fields.
This will give you the consumer_key and consumer_secret.

key-and-secret

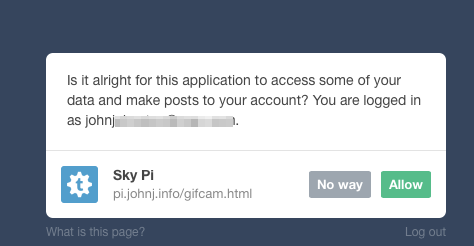
If you click the Explore API you will get a dialog to allow your new app to post for you (This did not work for me in Safari, I had to switch to Chrome and go through a couple of times).

permit-app

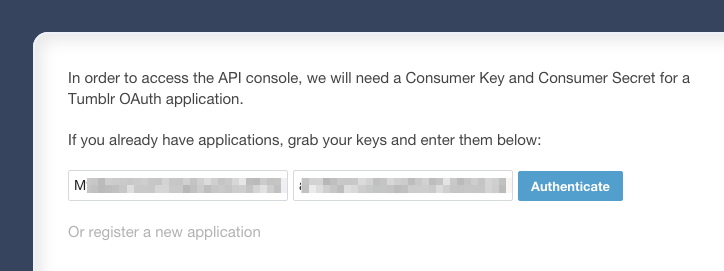
This will lead to a place to fill in your key and secret. Then the console.

add-keys

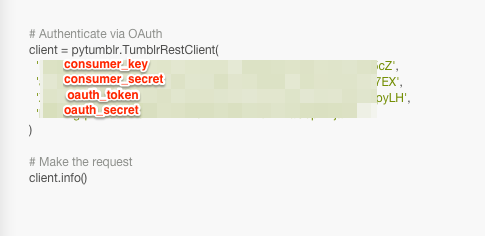
The Console will let you test various bits of code but more important will let you copy a block of code with the consumer_key, consumer_secret, oauth_token and oauth_secret.

all-info

It is worth clicking on Example output on the console to make sure everything is working.

Moving back onto the pi and the terminal I edited a new file with:

nano pytumble.py

And edit the file:


import pytumblr

client = pytumblr.TumblrRestClient(
 'consumer_key',
  'consumer_secret',
  'oauth_token',
  'oauth_secret'
)

# Make the request
o=client.create_photo('raspskypi', state="published", data=["/var/www/camd.gif"] )

print o

With the keys, tokens and secrets filled in. raspskypi is the name of the tumblr blog.

Save the file and make it executable. (chmod +x ) pytumble.py.

then type:

python ./pytumble.py

After a minute, if all is set up right you should see an id for the post returned and checking the blog should show a post with the image from /var/www/camd.gif

If all is well you can add:

python /home/pi/pytumble.py

To the bottom of the script that makes the gif.

Now every time the script creates a new gif, it should post the image to your tumblr blog.

Currently my pi has uploaded over 200 gifs: Sky Pi: Archive.

We had a good night at TeachMeet SLF 15

Here is some of the twitter stream: TMSLF15 (with images, tweets) Storify I tried to cut out re-tweets and duplication (but didn’t spend too much time on that).

The image view on twitter is nice: #tmslf15 hashtag on Twitter. As it highlights the amount of chat that went on in the breacout section.

We encouraged folk to post to the TMSLF15 Padlet about the ideas they discussed. I think the twitter stream is a bit richer.

Athole recorded a couple of periscopes, not sure how log they stay up: Mr M on Periscope: “#tmslf15” Mr M on Periscope: “Part 2 #tmslf15” This was well received by several virtual attendees.

We broadcast on Radio Edutalk, and I hope to edit the audio and post it soonish.

Here are some of the links extracted from twitter.


Image Credit Ian Stuart on Twitter.

I’ve got my raspberry pi working as a webcam posting gifs every 9 minutes and stills every 5. Gif Cam.

The pi has been sitting around for a while acting as a web server with a broken tweetbot. It took very little effort to get it taking photos from our window and showing them on the web. Little more to grab a bunch and gif them (Gifsicle again). A better view might be more interesting.

I’ve not spent as much time as I’d like playing with the pi but the potential for play, learning and work seems large.

sub_0010

 _________  ________  _________  ________  ___       ___           ___    ___ 
|\___   ___\\   __  \|\___   ___\\   __  \|\  \     |\  \         |\  \  /  /|
\|___ \  \_\ \  \|\  \|___ \  \_\ \  \|\  \ \  \    \ \  \        \ \  \/  / /
     \ \  \ \ \  \\\  \   \ \  \ \ \   __  \ \  \    \ \  \        \ \    / / 
      \ \  \ \ \  \\\  \   \ \  \ \ \  \ \  \ \  \____\ \  \____    \/  /  /  
       \ \__\ \ \_______\   \ \__\ \ \__\ \__\ \_______\ \_______\__/  / /    
        \|__|  \|_______|    \|__|  \|__|\|__|\|_______|\|_______|\___/ /     
                                                                 \|___|/      
                                                                              
 ________   ___  ___  ________  ___       _______   ________  ________        
|\   ___  \|\  \|\  \|\   ____\|\  \     |\  ___ \ |\   __  \|\   __  \       
\ \  \\ \  \ \  \\\  \ \  \___|\ \  \    \ \   __/|\ \  \|\  \ \  \|\  \      
 \ \  \\ \  \ \  \\\  \ \  \    \ \  \    \ \  \_|/_\ \   __  \ \   _  _\     
  \ \  \\ \  \ \  \\\  \ \  \____\ \  \____\ \  \_|\ \ \  \ \  \ \  \\  \|    
   \ \__\\ \__\ \_______\ \_______\ \_______\ \_______\ \__\ \__\ \__\\ _\    
    \|__| \|__|\|_______|\|_______|\|_______|\|_______|\|__|\|__|\|__|\|__|   
                                                                              
                                                                              
  ________  ___       ___  ___  ________                                      
 |\   ____\|\  \     |\  \|\  \|\   __  \                                     
 \ \  \___|\ \  \    \ \  \\\  \ \  \|\ /_                                    
  \ \  \    \ \  \    \ \  \\\  \ \   __  \                                   
 __\ \  \____\ \  \____\ \  \\\  \ \  \|\  \                                  
|\__\ \_______\ \_______\ \_______\ \_______\                                 
\|__|\|_______|\|_______|\|_______|\|_______|

For the last couple of commutes I’ve been hooked by a ~.

(I am cross posting this at my mainly educational blog and my ds106 one because I think this is so interesting.)

It started when I read I had a couple drinks and woke up with 1,000 nerds which touches on some many interesting things, online identity, ownership, internet history and made me think about about community, teaching about the web and some of the posts Jim Groom has be posting recently (/~space for example).

The ~tilde.club set up by Paul Ford while drinking is

not a social network it is one tiny totally standard unix computer that people respectfully use together in their shared quest to build awesome web pages

It mirrors what was the standard way to give university folk accounts and allows users to work on a remote computer through the terminal, communication and creating web pages. You will get a much better idea by reading the post and going to ~tilde.club and clicking some links.

It looked interesting enough to have a shot, but I had arrived at the party a little late. Fortunately there are other tilde clubs springing up and I got in to totallynuclear.club as ~troutcolor.

All I’ve done so far is created a webpage, set up a blog and visited other members pages. I had a quick chat on the commandline with ~maze who answered some questions.

Hopefully I’ll use the blog to document what I am learning as I go. I am certainly learning. I’ve use a terminal now and then locally on my mac and even very occasionally to play with my Raspberry Pi, but this is quite different. I find myself strangely drawn to the process. For some of the users on the tilde clubs nostalgia is a reason for being their, I missed that whole section of computer history as I started late. Any webpage creation I’ve done has been by uploading files via FTP or by using blogging software or social media. The ~tilde clubs work in both a older and modern modern way. I’ve noticed similarities in the way the developers for glow blogs work, not ftp for them, they talk of git, and are often logged into some cloud server via a terminal.

There are other interesting features emerging on totallynuclear and other tilde clubs I hope to get the courage up to try the IRC chat soon.

What could it be good for

Apart from fun which is a good enough reason.

Given that I an a teacher I wonder if this could be a good way to teach pupils/students about the web. I don’t think that there is anything Perhaps cover some technology history and web literacy. Although the technology is not very shiny and new it does feel quite exciting. It also, to some extent, remove a veil from the technology and perhaps could loosen the ties to silos.

What does it look like?

This is a very short screencast just touching on the basics, which is all I know at the present.

Starters for 10

Some links to interesting totallynuclear things:

Organic Networks - New Urban?
Photo: Organic Networks – New Urban?, Creative Commons — CC BY-NC-SA 2.0

The latest crop from from my Pinboard link farm.


Mozilla Webmaker

Webmaker moz

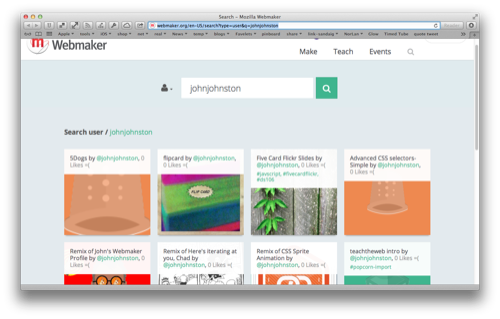
Mozilla Webmaker seems to have improved a lot since I last looked. In Doug Belshaw’s Things I Learned This Week newsletter, recently, he pointed out that thimble now supported JavaScript, I went over to lok and found that the site now lists your productions:
Search – for johnjohnston. I knocked up a couple of quick JavaScript examples: 5Dogs & flipcard, the later being an old one.

OpenShift

OpenShift by Red Hat, this is pretty amazing:

OpenShift Online is Red Hat’s public cloud application development and hosting platform that automates the provisioning, management and scaling of applications so that you can focus on writing the code for your business, startup, or next big idea.

What that means is you can easily and cheaply (first 3 free), set up websites with applications. It is pretty geeky for a teacher but there are plenty of instructions, and they work.

I gave it a quick test last week and managed to get a ‘server’ up and running with etherpad is short order: Etherpad Lite. Not sure what I’ll use that for, but I can delete it and start something else if I get to the max of 3 apps.

Openshif wp map

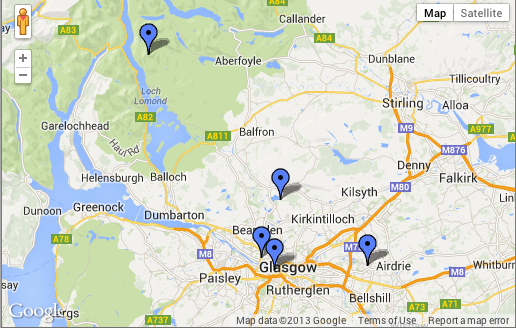
Slightly more useful, on an email list I am on someone asked how, using iPads, could a set of pupils construct a resource with a map and pins with images, text and video. I though this could be done with
WordPress a plugin and google maps. OpenShift allowed me to test this very quickly:

  1. Set Up a new app
  2. Installed WordPress
  3. Added the MyGeoposition plugin
  4. Added some posts and used the plugin interface to add positions to these posts.
  5. Knocked up a quick google maps page to display the blogs RSS, which now had geo info.
  6. Added that to the blog

Here is the blog and the map.

OpenShift made it practical to turn a bit of simple blue-sky thinking into reality.

I am not suggesting that everyone should dive over to openshift and start playing. You need a slight friendship with the terminal, at least have heard of ssh and git (I’ve used ssh a we bit setting up the piratebox and a raspberryPi, heard of git). If you do, the possibilities for trying things out are wide open.