
Reviewing use of tech in my classroom this year. I think it has been a slight mistake to think first about the network rather than local. Bandwidth limits made Airdrop more useful than external means of sharing. Next session I think I’ll be depending less on external stuff.
Tag: classroom
iPads: Words and Pictures
This is pretty basic stuff but I’ve found it useful in class.
I’ve often combined writing poetry with digital tools in the classroom. There are a lot of short forms that mean even the slowest typist can produce something good in limited time. From a pupil blogging perspective pupils of varying ability often get great results they can be proud of publishing.
When I started using iPads in teachers training and with pupils, I started using simple poetry forms as a way to produce something quickly that could develop from text be combined with images, video and audio.
Good, IMO, forms are kennings, lunes, haiku and six word stories.
Back then we used skitch and comic life to added text to pictures. More recently I moved on to the free version of pic collage 1.
When I arrived back in the classroom with a pile of iPads I’ve been using the technique quite a bit.
More recently 2 I’ve cut out third party apps to use the newish built in markup in the Photos app. Recently I demoed the process at an interview and saw Jenni Robertson show it at an Apple event in Glasgow. On both occasions I was surprised to find that it was a new concept to most of the audience. I though it might be worth a post here. There is a video embedded at the bottom of this post, but here are some written instructions.
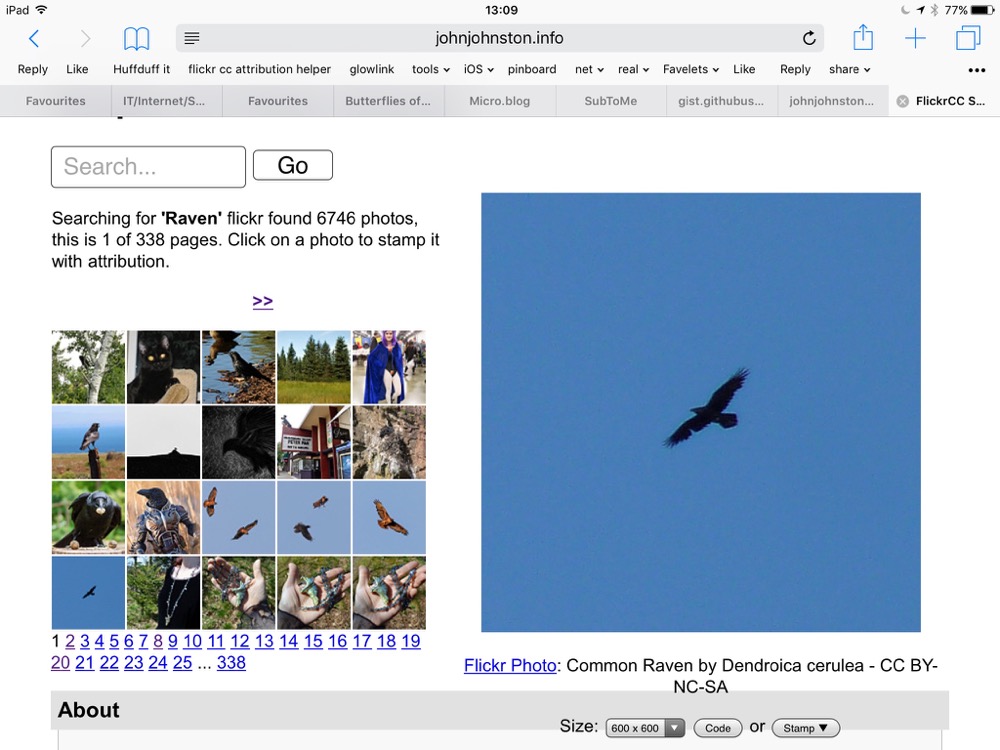
Start with an image
This is a good opportunity to talk and demo a wee bit about copyright and attribution. In class we often use the Morguefile or my own FlickrCC Stampr.
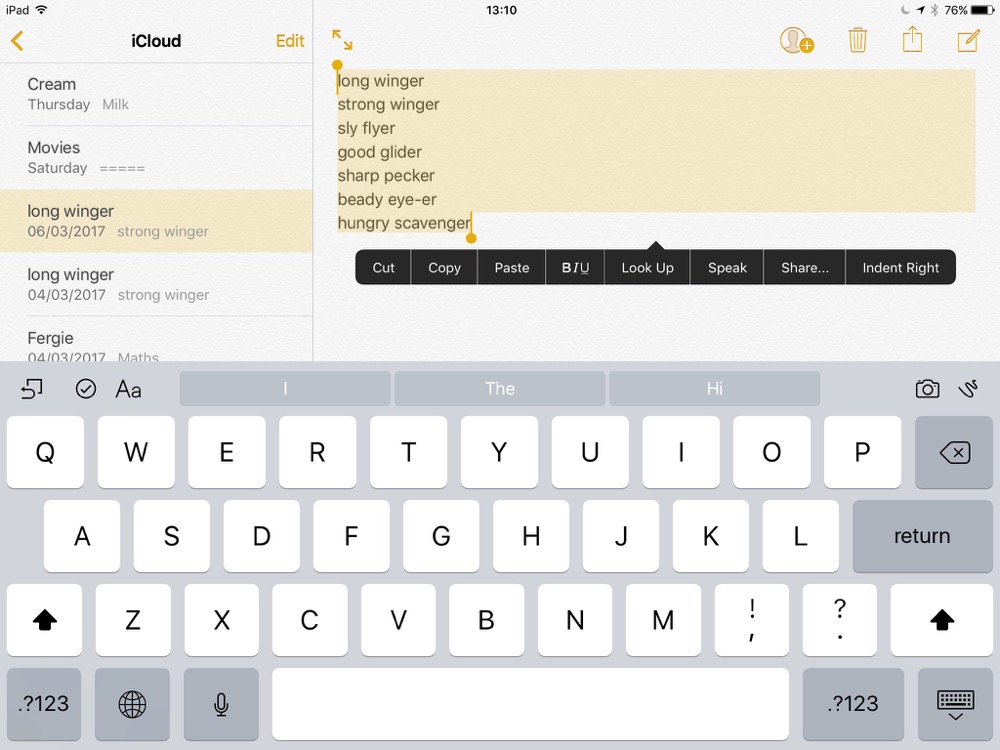
write some words
I believe it is best to use the notes app for this, avoiding thinking about how the text looks, where it goes etc.
Copy the text to the clipboard.
Combine the words and pictures
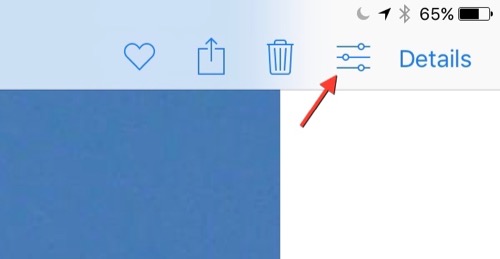
Open photos
Select and view the image.
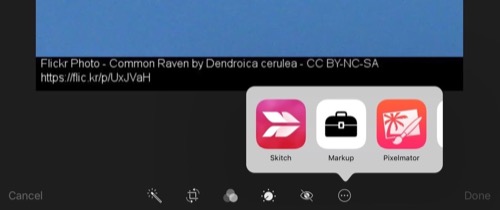
Click on the adjustment icon
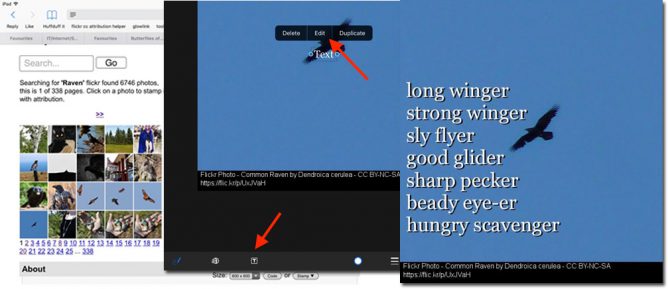
When the photo opens click on the ellipses and then Markup
On the markup screen click the T tool to add a text box and then press on the box to edit it.
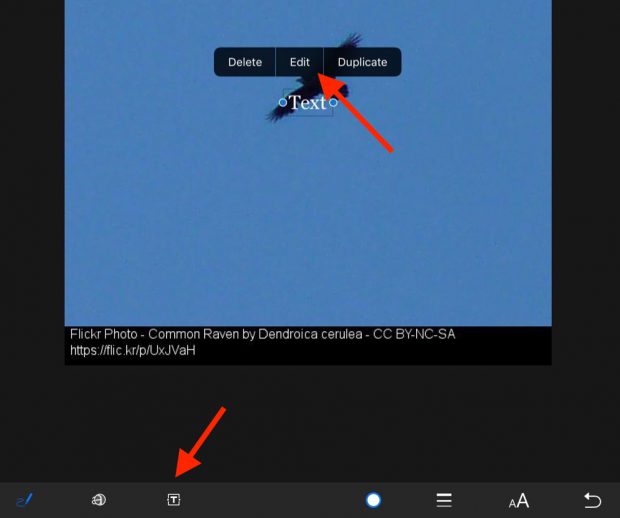
Paste in your poem.
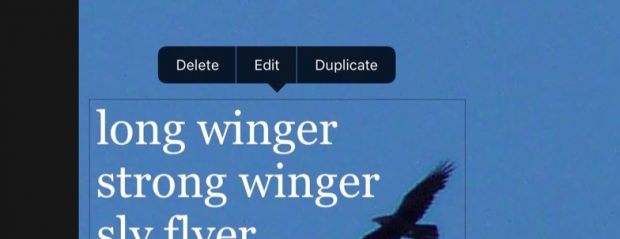
Adjust the size, colour and placing of the text.
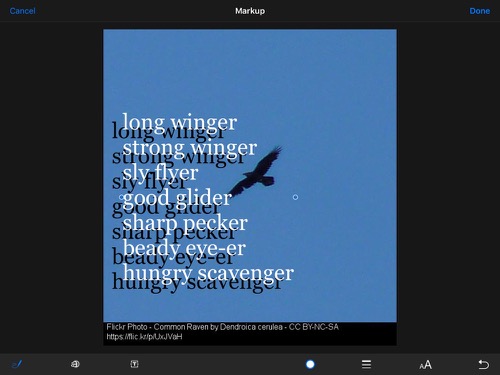
Bonus Tip – drop shadow
Duplicate the text, change the colour of one and move the top one over the bottom leaving a nice ‘old style’ drop shadow. I think this is worth it as a intro to layers in graphics. It can also hep readability on complex backgrounds.
Although this is a very simple lesson I think it give the opportunity to teach a few different things over and above literacy involved in the writing:
- Copyright and creative commons
- Combining apps (safari, notes, photos) in a workflow.
- Layers
It has the potential for being extended into video & audio editing (groups pictures perhaps) and sharing the results.
Here is a quick screencast.
1. Some examples from my class using pic collage Frosty Photos and Poems – Banton Biggies ↩
2. For example Kennings, we know about animals – Banton Biggies ↩
Organising Pupil Content on Blogs
This is hopefully a useful tip for organising pupil created content on WordPress blogs like Glow Blogs.
Most of the content posed to blogs consists of posts or pages. Posts join the stream, pages are static generally accessed from menus.
This is another way to organise content that can be useful. Especially if several pupils are posting similar content at the same time. It helps organise that content and the early posters don’t get pushed away down the stream.
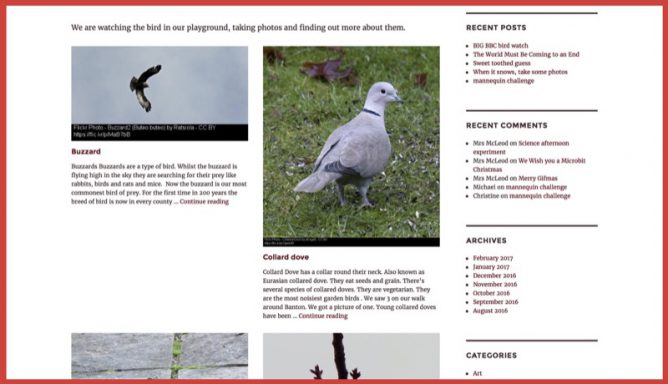
An Example Banton Birds
At school we are trying to pay attention to the local birdlife. We took part in the BIG BBC Bird watch with local Bird watchers, Mr & Mrs Carter. We started feeding the birds and trying to get some photos.
The pupils are doing a bit of research on the birds we saw (not too many it was a windy hour) and I hope they will continue over time adding other birds seen in the playground and around.
I want to organise these bits of research automatically collecting them together. To do this the pupils create, not posts or pages but a custom post type, project.
How it is done
This is just one way to do this but it is, at least on Glow Blogs, the most straightforward. It uses the JetPack Custom Content Types module and the unfortunately 1 named Portfolio Projects.
These projects are like pages in that they are out of the flow but like posts have Project Types (like categories) and Project Tags (like tags) that can be used to organise them. The also have a shortcode that can be used to create an index of the projects by type or tag2.
- Activate the Jetpack plugin.
- In Jetpack Settings Activate Custom Content Types.
- In Settings-> Writing Enable Portfolio Projects for this site
- Pupils create Projects for each item, add a project type (in this case Birds).
To create an index of these projects I add a page Banton Birds and add a shortcode to the page:
[portfolio include_type=birds display_types=false]
To make the index more visual the pupils make sure they have added a featured image to their posts. That automatically creates a thumbnail.
I’ve used this technique several times on blogs myself, including the Projects page on this blog. I’ve used it too to provide and organise photos and links on the Biggies blog for the pupils.
OneNote on 23 things

It is now Week Eight of 23 things and the topic is Digital Curation, OneNote and ClassNote
Thing 15 is tumblr. I’ve been using tumblr for a few years now for all sorts of different projects, but I though I’d skip by that to the next thing, OneNote.
Try using OneNote on your pc/laptop/device.
Create a new Notebook, add some sections, pages, and try out the features. Use the Interactive Guidance Videos to learn your way around the platform.
Write a short blog post detailing your use of OneNote and how this may/may not be of benefit to you.’
Week Eight: Digital Curation, OneNote and ClassNote – 23 Things
For two years I worked alongside Ian Stuart who is a OneNote expert. Despite Ian’s enthusiasm for OneNote and many powerful demos it didn’t at that time click for me.
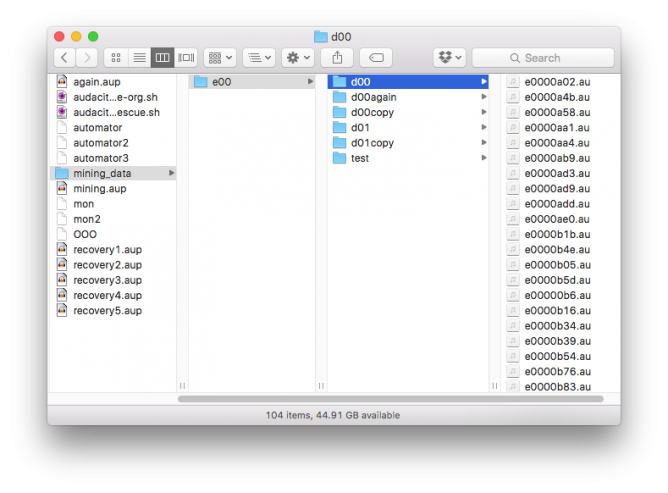
I tend to keep notes as text, HTML or markdown files in Dropbox. My _notes folder has nearly 1000 notes including over 300 in a blog posts subfolder and almost 100 in the snippets one. Searching via the finder is pretty effective for this sort of information[1].
When I moved to working in the classroom this August I though I should use the chance to revisit OneNote.
I am using the mac desktop version of OneNote, my pupils use the iOS app. So these notes pertain to those applications.
I started a ‘planning’ notebook, pulling in notes and information from the school and doing my weekly planning in a simple table. It was easy to archive these pages as I went and I could the simple syncing between work and home very useful.
The ability to combine files, images, media and text is useful and works fairly simply. The fact that I’ve kept using the system for planning and extended use to include a class notebook tells me I am finding it useful.
The only major flaw I’ve found using the mac app is an occasional failure of the copy and paste keyboard shortcuts. OneNote used the standard ⌘-c ⌘-v for pasting I find these often fail, especially the first time or two I use them after opening a notebook. The menus and contextual menus work fine, but the keyboards are my preferred method of doing this. Copying something and pasting to get the previous content of the clipboard pasted is alway annoying.
I would also really like to be able to have more than one notebook open at once. I believe this is supported on windows and not mac. Given that mac users are traditionally more likely not to have documents full screen and to use drag and drop between documents I find this a wee bit surprising.[2]
I’d also like to be able to set a page width rather than have a page of infinite(?) width.
I started a class notebook to use with the pupils in my class. They are using the OneNote app on iPad Airs.
I’ve used this to distribute information, worksheets and the like to the pupils and to gather in work. I started just before the addition of the class notebook tools. When the tools appeared I’d just had some fairly negative experiences with the class sharing and using Word and Onedrive on their iPads. I though I’d give OneNote a try for this instead.
When the tools work they have been very effective, I can create a page and distrubute it to all of the pupils easily, I can target the section of their notebook I want the content to go to. I can then easily find all of that content and mark it within the notebook.
I have also got a way of distributing shared resources to all of the pupils. The only part of the workflow that is missing was the ability to upload documents created in Word and saved to OneDrive to the web (glow blogs). But failures with that was the reason I started using a class notebook in the first place.
For the most part this has worked fairly successfully. When pupils are submitting written work they seem to prefer typing in the native iOS notes app (or even word) and pasting the finished text into OneNote.
Collecting a set of brief texts in the one place on a table in the collaboration section has been more successful that multi editing a word doc[3]
Occasionally I’ve had sync failures for particular pupils, while the distributed page gets to the rest of the class it will not sync to one pupil. Often logging off force quitting, going through the log on sorts this but not always[4].
I’ve had one really frustrating experience with adding notes to pupil work which did not sync at all consistently leading to a very confusing lesson but for the most part the class notebook has been a success.
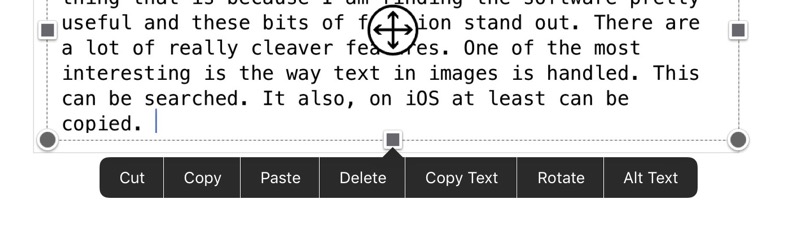
Reading back over this post so far I realise that I’ve dwelt on the negative aspects more than the positive. I thing that is because I am finding the software pretty useful and these bits of friction stand out.
There are a lot of really cleaver features.
The ability to share with pupils as a group, individually, and to distribute content to each of them is great. The choice between letting pupils edit that content or not is also useful.
Another useful feature is how easily the pupils can record audio in a page. This allow them to listen to themselves read and me to collect there reading.
One of the most interesting is the way text in images is handled. This can be searched. It also, on iOS at least can be copied.
Ironically in getting this screenshot I had a repeat of a problem I had in class this week. After I inserted an image, OneNote crashed. It then refused to sync.
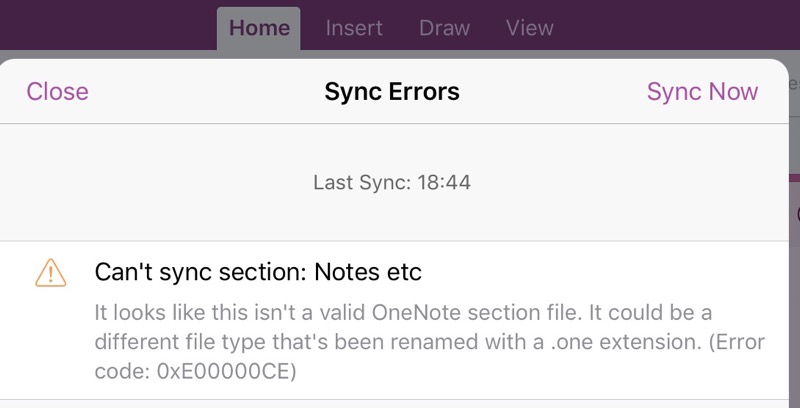
The answer was a tweet away.
@johnjohnston I get the id's message if one section is corrupt, rest of file sync ok. Try copying affected section, deleting old #MIEExpert
— Sarah Clark (@Sfm36) November 6, 2016
On iOS I couldn’t copy the whole section, but I could select multiple pages and move those to a new section. After deleting the, now empty, problem section all was ok.
It would be good if the error message was a wee bit more indicative of the problem and how to solve it. It looks like a hangover of the Window’s desktop app? Even if I sync the OneDrive, where my OneNote files are stored, to my desktop, the OneNote files are replaced by a weblink. This raises another worry, total reliance on the cloud.
I am going to continue using the class notebook for a while and see if we can work around the problems. The many affordances of the software certainly seem worth further exploration.
It also may be that updates will fix things. The app has been very frequently updated, in fact it feels slightly beta like sometimes.
I don’t think I’ll be converting my own notes out of text files any time soon. Having them in an open format that I can open with a myriad of applications on different platforms is important and Dropbox[5] certainly seems to have syncing down a lot better.
featured image: Inside cover and first page of Foshag’s Kaminaljuyu-Jade field book by Smithsonian Institution, No known copyright restrictions
- on iOS I mostly use the drafts app to keep notes, this syncs via iCloud and has been rock solid for several years. Draft’s ability to push text to different places is outstanding. The Apple notes app is pretty good too although a lot simpler than OneNote. ↩
- the first few times I used a windows computer this completely floored me, I could not understand why anyone would want full screen. ↩
- this took us into of lot of failure, repeated attempts to log on and a lot of wasted time. ↩
- I am not sure if these problems like others with the MS iOS apps are to do with the apps, authentication with glow or local network issues. ↩
- Dropbox is not a suitable choice for use with my pupils. Onedrive via glow takes care of account management, data protection etc without me having to do any work. ↩
Microcast 4: Audacity Disaster
Back in class, technical difficulties bite. some learning requires. I intended to record and post this this week but just put it together quickly after reading the ScotEdChat this week.
Back to class and classroom blogging
For the last few (twelve) years I’ve been a enthusiastic proponent of blogging by pupils. I only actually carried this out in the classroom from 2004 till 2008 when I started work in North Lanarkshire as an ICT staff development officer.
Since then I’ve run plenty of courses around blogging, continued to blog myself and investigated lots of blogging systems. I also support pupils setting up e-Portfolio blogs in many classroom in flying visits. I spent a couple of years working on Glow Blogs and continue to provide support for Glow Blogs on a part time basis.
I’ve got a strong opinion of the positive value of pupils posting about their learning. I hope as I provided support and encouragement for pupil posting that I kept in mind the difficulties of organising this in class.
I am now back to eating my own dog food and again in the position to blog about ‘Teaching, ict, and suchlike’ from the position of a classroom teacher.
In many respects I’ve landed on my feet. I’ve got a very small class of delightful pupils, a good range of hardware and due to the small numbers, bandwidth that is not awful.
However I am feeling pretty out of my depth in regards to the changes in curriculum and practise that have happened in my absence from the classroom.
Beginning with blogs
On the practising what you preach front I’ve started using Glow Blogs. We set up e-Portfolos a couple of weeks ago. I am pretty pleased all the hard work of the Glow Blogs team has paid off from a technical angle. I am not working to hard on the idea of profiling yet, just trying to get the class enthused about owning their own space.
We have also started a class blog Banton Biggies – The Tallest Class in Banton Primary and the pupils have made a couple of posts. Fell free to pop over and leave us a comment.
First thing I’ve noticed is that it doesn’t get any easier organising time for pupils to post. The ideal is to give them enough time to write a well written reflective post, but also not missing out on too much of the current classroom activity.
The other thing that has changed is the familiarity of current pupils with the Internet. There is a lot of that I need to explore and discuss. Being a YouTuber is an aspiration of more than one pupil I am working with.
Of course this familiarity with the Internet does not come packaged with some of the things I an interested, safety, copyright, controlling your own data, along with technical skills, knowledge of file types, urls, keyboard shortcuts and the rest. A lot of learning will hopefully be sparked by discussing blogging.
We have also started using Glow O365, mostly word and Onedrive so far and I’ll have a fair bit to reflect on that too. I also set up a Yammer group for the pupils, with little instruction about what to do with it. There was a huge wave of enthusiasm from the pupils, but left to their own devices they have mostly posted hi messages. I think I’ll have to seed the group with some ideas to get things going.
Joining some dots
What I am hoping that I can do with the blogging is to start the pupils reading other pupils posts making some connections perhaps with other small schools. Hopefully I can get a podcast together too, watch that space.
Get in touch if you have pupils posting that would like a few comments or would be interested in some sort of blog to blog communication. It might take me a wee while to get going but that’s the direction I hope to travel in.
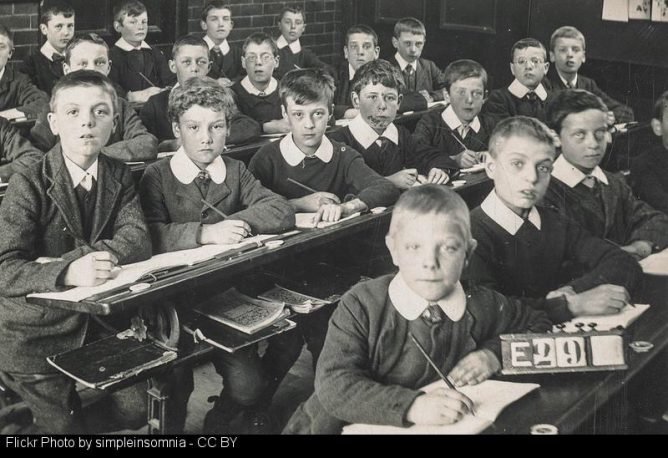
Featured image: Flickr Photo: simpleinsomnia – CC BY stamped with attribution with FlickrCC Stampr
Look back at random
Here’s a fun thing to try if you’ve been blogging for a while (Warning: may not actually be fun). Get a random date from when you started blogging until present (eg using this random date generator), find the post nearest that date and revisit it.
….
- What, if anything, is still relevant?
- What has changed?
- Does this reveal anything more generally about my discipline?
- What is my personal reaction to it?
from: Revisiting my own (blog) past | The Ed TechieThe Ed Techie
I’ve a random button1 here and occasionally look back without the the discipline that Martin Weller suggested. I gave this more thoughtful approach a go.
I came up with this: Impermanence and Comments from 10 years ago.
That post was just a placeholder to link to a favourite post by one of my pupils. There was not much analysis, but hopefully pointing out that pupils posting and engaging with an audience is a powerful tool in the classroom.
I do think this is still relevant, there are a lot more primary school using Social media and blogging now as there was then. I also think that it is good to have examples of pupils doing the blogging and that can have value. Now it seems like a lot of posts come from teachers as opposed to learners.
It is also particularly relevant to me as I’ll be returning, with some trepidation, to class teaching after more than eight years next week.
What has changes is the average 10 year old is a lot more used to publishing to the Internet, plenty use FaceBook, instagram or have a YouTube channel. I wonder if writing for the web will have the same excitement.
I am not sure such a short post reveals anything about my discipline, except that I’ve consistently believed that blogging should help to give an audience and purpose to pupil writing and learning.
My personal reaction was quiet pleasure at finding the pupil’s poem and the cross continent conversation that went with it. I do hope I can help provide opportunities for pupils to do the same again.
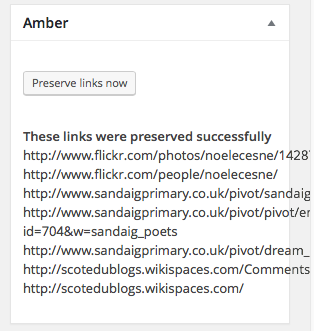
Finally I remembered that the Sandaig Site will probably be decommissioned very soon. This made me a little sad. It did let me edit the post and click the amber button to send the original poem post to the Internet archive.
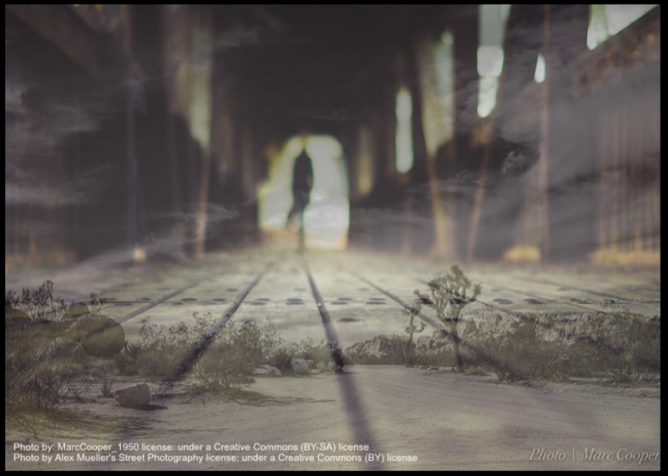
The Featured image on this post is one of my own flickr photos, created by blending two random CC flickr photos, with this toy or its slightly older sibling.
Microcast 3: Whose blog is it anyway?
Last week I attended the morning of the Always on (them) event at the University of the West of Scotland. This was organised by Professor David McGillivary. It looked at Digital and Social Media use in Education.
Back to Class
It’s doesn’t seem that long since I posted about leaving the classroom and now it looks like it is time to go back!
In the latest round of council savings my post has been deleted. In fact the whole team I work has been too (posts not people).
The council’s policy is to redeploy staff and it looks like I’ll be redeployed to a school in August.
Although I’ve just written that it does not seem my current post has lasted long, it does feels like a long time since I was organising learning for a primary class.
A lot has happened in that time. I suspect I need a fair bit of re-skilling, apart from changes in curriculum and practise, I’ve not written more than a few words by hand in the last eight years. Perhaps I should stop blogging and start a notebook to get in some handwriting practise.
I am now regretting the abandoning of resources, notes, lesson plans and the like!
I’ll need to think hard about my use of technology. In my previous school I added a lot to my workload by following personal interests and ideas with a bit too much enthusiasm.
I hope this time round I’ll be able to step back a bit and resist the tendency to spend my evenings preparing experimental tech. It may be a good idea to step as far from the keyboard as I can for a while to concentrate on the many other aspects of classroom practise I need to catch up on.
I do want to use technology for now to ask if there is any tips for going back to school after a break of this length. What have been the challenges? Were there any advantages in having a break?
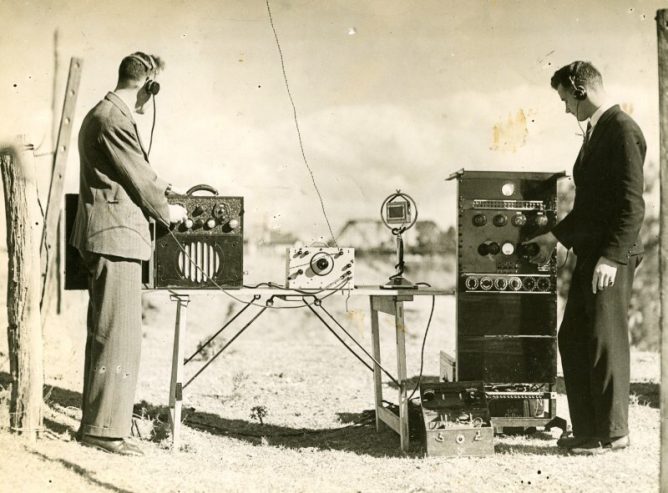
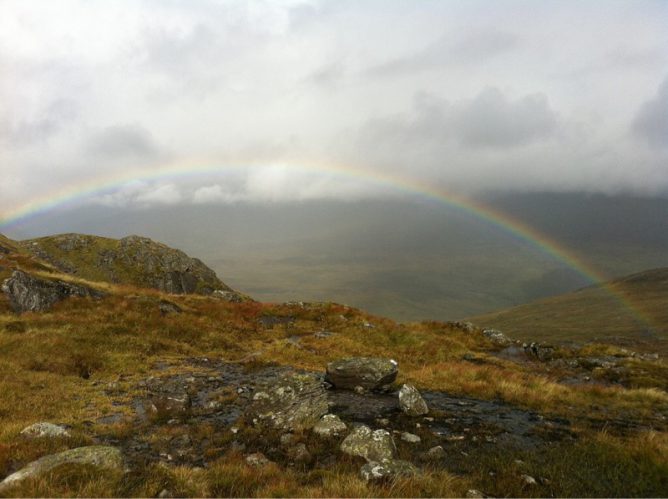
the photo is my own. Chosen as I found it on searching ‘return’, I am not sure if it is appropriate to this post or not but I reckon that a mix of clouds and rainbows probably hints at my feelings.
Blogging advice and Bootcamp #2

Top 10 Reasons for Students to Blog by sylviaduckworth CC-BY
I tweeted this lovely image the other day when I saw it on Classroom Blogging Options. The Glow Blogs option was not discussed 😉 but I’d hope that it would be under consideration for Scottish learners and teachers.
Saw the graphic again today along with this advice from Stephen Downes:
It has been a while since I ran a good ‘blogging in schools’ post, but the activity – and the advice – still makes as much sense today as it did in the heyday of blogging. Maybe even more sense, because unlike the early 2000s, there are many other shorter and less-structured ways students can communicate online, and blogging pulls them back into the realm of extended descriptions, arguments, explanations, and actual efforts to communicate thoughts and feelings rather than quips and reactions (or should I say, reax). Theere are many reasons to write; conveying information is just one of them. Wes Fryer also summarizes a number of the tools available as we start the 2015 fall session. Nice graphic, too.
Classroom Blogging Options (August 2015) ~ Stephen’s Web
Some great advice.
Just in time for Blogging Bootcamp #2 | Get your blogs up and running Autumn 2015 which we are starting to organise. If you want to learn a bit about classroom blogging over 5 weeks you can sign up