Using Microsoft Office for iPhone a lot today to capture text. I like it much more than Office lens. Much easier & quicker to get text to edit without having to open up Word. Straight to Drafts app in my case.
Tag: ocr
Office Lens
I tried this iPhone app out before the summer on the recommendation of Ian Stuart. At that time it was not integrated with O365/Glow and its main selling point seemed to be it took great pictures of whiteboards and straightened them up nicely.
Back then I gave it a try and it did that job, but not, IMO, as well as Scanner Pro. Scanner Pro is £2.99. (I like paying for apps, if you are not the customer…).
So last week when Ian mention that it was now integrated with O365 for business/school (ie Glow), I didn’t get that excited but I did download it. Not being at a conference or near a whiteboard I just did a quick scan of a newspaper and saw that it uploaded.
OCR via dropbox with Tesseract
This is going to be another slightly geeky post. The previous one, Testing a new system, was about a way to blog using dropbox and AppleScript folder actions had me thinking about other things that could be done using this sort of system. The way I am doing this relays on having dropbox and a mac that is on when you want it. If you don’t have a mac you might like Wappwolf which is a web service that can do a lot of things with files in your dropbox automatically.
So I already have a system for blogging by dropping files into a folder on my dropbox and was looking around for another idea to play with. There seems to be a few OCR apps for iPhones but I had noticed that Tesseract was available on Google Code and googled around to see how it could be installed and run on a mac. One I found was TesseractOCR Mac a Cocoa Front end to the Tesseract OCR program. I downloaded this and gave it a try. It worked well on my desktop. I then struck gold: Installing and using Tesseract 2.04 on Mac OS X 10.6.6 with Homebrew | Ramble On. This post explains clearly how to install Tesseract on a mac so that it can be used on the command line. It is also a good intro to homebrew.
Homebrew
Homebrew is the easiest and most flexible way to install the UNIX tools Apple didn’t include with OS X.
For someone who has struggled with this sort of thing before, homebrew is pretty straightforward. Installing homebrew is just a case of copying a line of code from the installation page, pasting it into the terminal and pressing return.
imagemagick
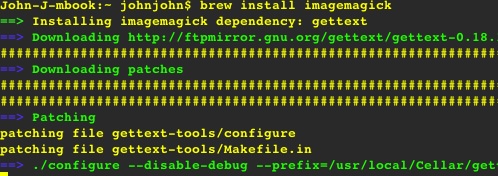
Following the instructions from Ramble On I just typed brew install imagemagick in the terminal and hit return. Lots of scary text scrolls by:

installing Tesseract
Once imagemagick was installed I repeated the process for Tesseract.
Testing Tesseract
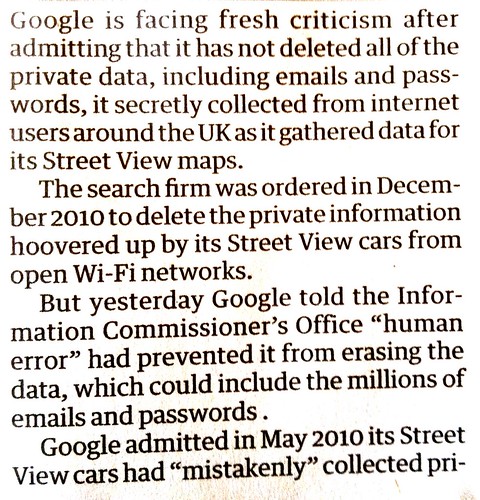
As I was wanting to figure out how to use my phoe for OCR I took a photo of a bit of newspaper, I used Camera+, the clarity filter, cropped and made the image Black and White:

Click the image to see fullsized on flickr
I used Wifi Photo Transfer to grab the photo from my camera and put it on the desktop.
The OCR process is in two steps using the terminal and the newly installed applications:
- Convert to 200dpi tiff:
cd Desktop
convert -density 200 -units PixelsPerInch -type Grayscale +compress fr_160.jpg fr_160.tif - Preform OCR on the tif
tesseract fr_160.tif fr_160 -1 eng
I now have two extra files on my desktop, fr_160.tif and fr_160.txt, the txt file contains the OCR text:
(_;oogle is facing fresh criticism after
admitting that it has not deleted all of the
private data, including emails and pass-
words, it secretly collected from internet
users around the UK as it gathered data for
its Street View maps.
The search firm was ordered in Decem-
ber 2010 to delete the private information
hoovered up by its Street View cars from
open Wi-Fi networks. r
But yesterday Google told the Infor-
mation Commissioner’s Office “human
error” had prevented it from erasing the
data, which could include the millions of
emails and passwords .
Google admitted in May 2010 its Street
View cars had “mistakenly” collected pri-
Which is pretty good.
OCR for dropbox
I now can see that tesseract works well and needed to make it work on images added to a particular dropbox folder.
There are a few folder action scripts that come with a mac, there are in /Library/Scripts/Folder Action Scripts/ several of these deal with images files ad contain routines for handling the dropping of files. These ‘standard’ routines move added files of the correct file type to a subfolder and then pass them on to a sub-routine that deals with the files. I could just duplicated one of these and edit the process_item sub routine. Basically I just scripted the process tested above. I’ve uploaded the script ocr folder action as html, incase anyone will find it useful or fun.
To use the script you put it in the Folder Action Scripts (copy the text of the html file paste it in the appleScript script editor.). Add a folder to dropbox and attached the script to that (right click on the folder and choose Folder Actions Setup…).
Most of my bit of the script just uses do shell script to run the scripts above, the only gotcha was that although I can use convert in the terminal, in a script I have to use the full path to the script:
set ocrscript to
"/usr/local/Cellar/tesseract/3.01/bin/tesseract '" & tif_file & "' '" & tif_file & "' -1 eng"
do shell script ocrscript
This is to do with the way homebrew installs applications and the fact AppleScript doesn’t access commands from /usr/local/….
My script is fairly crude, especially about file endings, if I add :Photo 28-07-2012 12 35 55.jpg to the dropbox folder, it is moved into the processed files folder and Photo 28-07-2012 12 35 55.jpg.tif and Photo 28-07-2012 12 35 55.jpg.tif.txt are created. Not elegant.
The whole process from taking a photo to opening the txt file in dropbox only takes a couple of minutes when using 3G. The system will not deal with columns or more than a single block of text but it does that fairly well. Mostly it was fun to figure out how to do.
