
The event is now over, view our round-up below:
Tag: microbit
Adding #microbit to our Steady Hand games. Now we can count the hits. #digiLearnScot @digitallearnNL pic.twitter.com/Fbgzw7JtmE
Some digital fun in class today
Adding #microbit to our Steady Hand games. Now we can count the hits. #digiLearnScot @digitallearnNL pic.twitter.com/Fbgzw7JtmE
— Banton Primary (@Banton_Pr) December 3, 2020
New micro:bits
Meet the new BBC micro:bit | micro:bit
Now with speaker and microphone!
Same great features, easier ways to use sound and touch to get creative in the classroomMore features, including easy ways to take AI and ML into the classroom, will be released throughout 2021. Watch this space.
More details:
Working together on the latest BBC micro:bit
I’ve been using micro:bits for a few years now and these look like great additions, especially the sound in and out.
Given we have a good number in school already I doubt we will get new ones so having a bit of latest kit envy.
The illustrations on the page make the boards look gigantic.
website to serve you the best/latest content from the #microbit community more regularly.
micro:bit classroom
This looks as if it might be a really neat idea, local storage, no sign-in for teacher or pupils. Download everything and resume session later.
I am wondering if it will, now or soon, work with the iOS micro:bit app?
micro:bit decorations
We finished the micro:bit decorations as planned last week.
I put a quick video of the result on the Class Blog
and twitter
The Biggies #microbit lights switch on. One microbit to rule them all. @digitallearnNL @DigiLearnScot pic.twitter.com/gWtmouvMbX
— Banton Primary (@Banton_Pr) December 9, 2019
micro:bit prep
A bit of rainy day prep today. Planning using micro:bits for simple Christmas decorations.
Last session we did a time consuming, but worthwhile, microbit guitar project. We’ve use them for decorations before and I thought this might be a simple intro for the new pupils in the class and a simple refresher for last years pupils.
Since I only use microbits now and then I need a wee practise too. I noticed a couple of things using the iOS app and the MakeCode for micro:bit editor.
The app seems to have improved even since June. At that point we started finding it easy to create code and flash the microbits form our iPads. Today I tried the app on my phone and was surprised as to how easy it was to code (simply) a microbit on my phone.
The other is you can now embed makecode, the code or the emulator. This one is a dice and number picker, we made ones like this for maths games last session. Try the buttons and ‘shake’.
Maybe you could always embed code I didn’t notice it before. I am impressed by how the editor has improved over the last few years. The first few times I used micro:bits in class we switched away from our iPads and used PCs, I can see no good reason for doing so now.
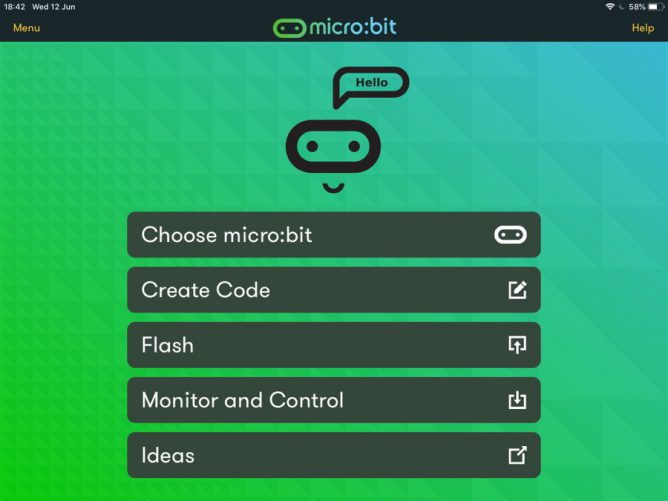
micro:bit iOS app: much improved
Since returning to the classroom I’ve been using micro:bits with my class of 8-11 year olds. We have had a deal of fun with them, some of this is on the class blog.
We normally use pc laptops and chrome to access the MakeCode editor. In the second year I tried using the iOS app but out of a class only one or two children managed to get their micro:bits connected. At the time I put this down to multiple micro:bits and iPads in close proximity.
I have occasionally tested new versions of the app and the most recent one seemed a lot better. It displayed the webpage code editor in app and flashing seemed simpler. Today wanting to move our micro:bit guitar project on when the PCs were in use elsewhere in the school I decided to give the app another run. I am very glad I did. Everything about the app seemed to be better. I think that coding and flashing to the micro:bit for an iPad is simpler than using a pc. We had no problems in getting code written and flashed to the micro:bits.
I’d highly recommend the app if you have both iPads and micro:bits in your classroom.
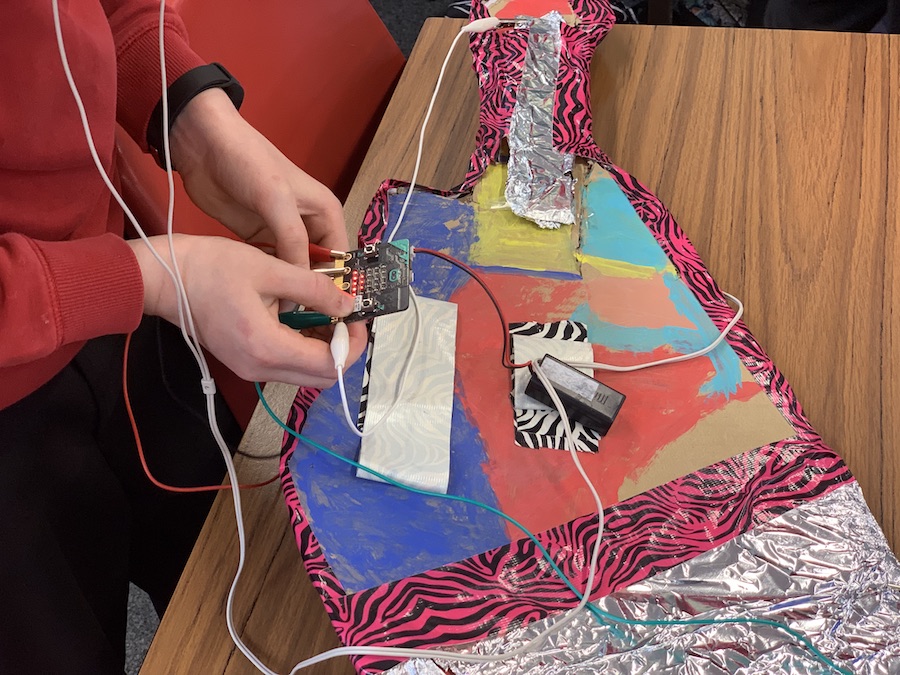
I’d also recommend the Microsoft MakeCode Guitar project. I’ve been working with a mixed age group class and the mix of tech and ‘art’ fits very well. Some of the younger children are getting their first experience with coding and the art and construction can keep them motivated when the coding concepts get tough.
A micro look at microbit
A lot of micro:bits from the BBC arrived in the centre where I work, ready to be distributed to North Lanarkshire schools. I’ve taken the opportunity to break one out and have a wee play.
The devices are aimed at secondary so outside my wheelhouse, but I could not resist a wee play.
The microbic works by creating code for it on a computer and flashing it to the device via USB (you can also use bluetooth from a mobile app). There are several different ways to create code. You can do in in the browser with severe different editors, Code Kingdom’s JavaScript, The Microsoft Block Editor, Microsoft Touch Develop or Python. I’ve had a quick try of most of these. You can also use the MU python editor that runs on Windows, OSX, Linux and Raspberry Pi.
Although I don’t really know any python I’ve found that the MU editor the most reliable. The browser based ones have been occasionally flaky, causing me to switch browsers a few times. I also like to have anything stored locally (the browser editor stores in local storage, but that means you need to either get an account sorted out or use the same browser on the same box all the time.)
There are already a nice set of resource building up, I found the Raspberry Pi and micro:bit Playground both useful.
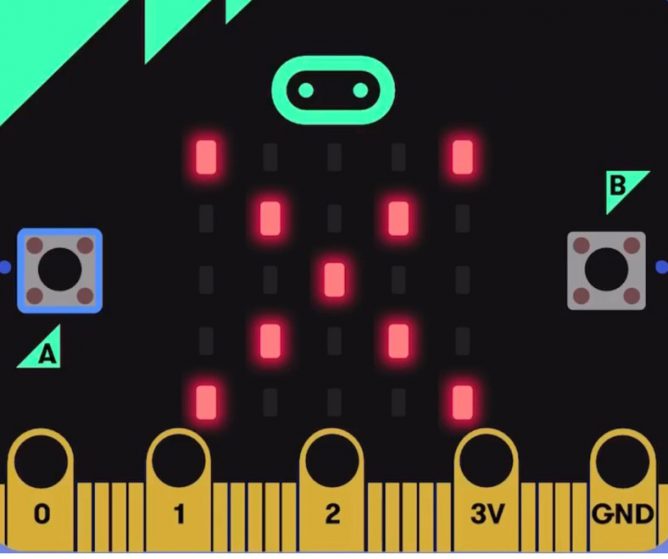
When I was looking at the Tilty Game from the micro:bit Playground I though I might be able to make a ‘paint’ editor. This is the result. (click to start the movie, I’ve just found you can use a gif as a poster frame)
The code allows you to draw on the microbes LEDs, the left and right buttons move the cursor in a horizontal and vertical directions and a double press toggle the lights.
And here is the code, I used hilite.me to make it look nicer. Not exactly rocket science. I expect there are better ways of doing this.
from microbit import *

Matrix = [[0 for x in range(5)] for x in range(5)]

#set initial position
x = 2
y = 2

def printmatrix():
    for x in range(5):
        for y in range(5):
            if (Matrix[x][y]):
                display.set_pixel(x, y, 6)
            else:
                display.set_pixel(x, y, 0)
    return;

#show cursor
display.set_pixel(x, y, 9)

while True:
    if button_a.is_pressed() and button_b.is_pressed():
        if (Matrix[x][y]==0):
            Matrix[x][y]=1
        else:
            Matrix[x][y]=0
        printmatrix()
        sleep(1000)
        continue

    elif button_a.is_pressed():
        x = x + 1
        if (x>4):
            x=0
        printmatrix()
        display.set_pixel(x, y, 9)
    elif button_b.is_pressed():
        y = y + 1
        if (y>4):
            y=0
        printmatrix()
        display.set_pixel(x, y, 9)
    sleep(200)
The idea is we store a matrix of which lights are on. The ones turned on are shown by the printmatrix function. They are displayed at a brightness of 6 to distinguish them from the cursor, which is full beam.
The cursor is moved with the left and right buttons. it loops (I wonder if it would be better to bounce it?) Clicking the left and right buttons toggles the light on or of in the matrix. The reset button clears the screen.
I had quite a lot of fun getting this to work, the formatting of the script caught me out a few times. I wonder, if I was smarter, could I take the same approach and make a noughts and crosses app?
- Some more resources
BBC micro:bit and the iPad by Steve Bunce on iBooks looks like an interesting resource. - A search of gists at git hub finds some example python code: Search · microbit
- microbit – YouTube Search
Featured image on this post a gif made from BBC micro:bit by Gareth Halfacree used under a Creative Commons — Attribution-ShareAlike 2.0 Generic — CC BY-SA 2.0 License.