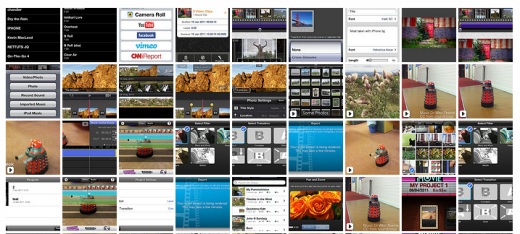
Ios movie thumbs

Over a month ago I started dumping screenshots of a few iPhone movie editors, iMovie, ReelDirector, Splice & Vimeo with the intention of writing a detailed comparison of the apps.

I’ve blogged before about taking and editing video in the classroom. I’ve found it a very valuable activity. Not big production stuff, more quick & dirty; gathering evidence, a change from writing a report etc. I think that iPod touches could be used to do this sort of work hopefully cutting out the computer from most of the work.

My notes and screenshots quickly got out of hand and I was heading for a lot more work than a blog post. I’ve decided just to post some of the main points here.

Part of the testing was to make with each of the apps a very short movie, combining a still, a couple of move clips, adding a background track and some titles (4 movies). I used the same media for all 4, a couple of very short clips and a photo of my colleague Ian’s birthday dalek.

This could by no means be described as a comprehensive review. I have tried to avoid reading any help and may have missed features completely. If I could not get a feature to work quickly an easily I gave up on it.

Project Screens
reeldirector
iMovie
SpliceVimeo movie list

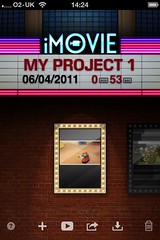
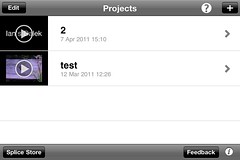
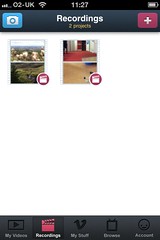
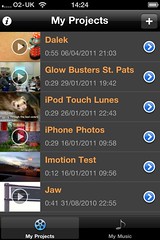
All of the apps have a screen where you can see a list of your projects, iMove uses a series of thumbnails under a cinema canopy, the rest more conventional lists. Splice differs by only offering landscape, Vimeo only portrait. Vimeo also opens with a list of your published videos on Vimeo which you can watch (you can also see video from your inbox and likes). The video you are editing are in Recordings in thumbnail view.

All of these interfaces work iMovie is possibles slightly more awkward but not much.

Creating a new project.

iMovie takes you straight into the editing mode. The project can be named later on on the projects screen.

ReelDirector: clicking on the + on my projects opens a screen to tile your movie, add credits and set the default transition. Then you are taken to the edit screen. You can go back and edit the ‘properties’ at any time.

Splice: clicking on the + on the Projects screen adds a project to the top of the list and opens the keyboard to name the new project. Once named you are taken to the project settings screen.

Vimeo: you go to the Recordings screen and again hit the + a new icon for the project appears, clicking on this opens the Project Details screen, where you can title, open in video editor, add video clips, export or upload.

Again these all work well and are intuitive, I’ve a slight preference for iMovie which lets you get straight to work. iMovie is also the only one that opens the app at the last place you were working rather than the project list (ReelDirector & Vimeo do too unless you quit the app).

Adding media

Adding video and still images

  • iMovie: click on media button take you to a three tabbed screen; video, photos & audio. The video screen allows you to select a section of video from videos on your camera roll and add it to the project.
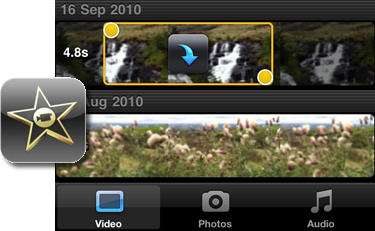
    Imovie import video

    The photo screen gives access to your photos and allows you to select one this is added to your project set at 4 seconds with a basic Ken Burns effect.

  • ReelDirector: clicking the + give you a dialog with a choice of media. Clicking Video/photo open up your camera roll. Clicking a video adds the whole clip to the timeline. Adding a photo adds it to the timeline as a 4 second still. You need to edit the image to add a Ken Burns effect.
  • Splice: when you create a new project the editor opens with buttons to add a choice of Video/Photo, Transition or Title. Clicking Video/Photo opens your photos and lets you add multiple photos and or video clips. You can move though different albums adding media by clicking and adding a tick. After you have selected a number you are asked if you want to add a transition to all of the selected media.
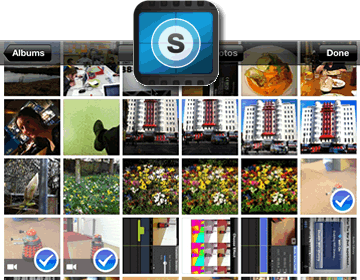
    Splice Import

  • Vimeo: in Vimeo you see the three tracks, video, titles & audio. Clicking at the + at the end of the video track allows you to choose a clip or still from your photo library. If you choose a still it comes in at 3 seconds. You can ‘Enable Basic Pan/Zoom Effect’ and easily adjust the length by dragging the handle at the end of the photo clip on the timeline.

The two standout import features are iMovie’s select a section og video and Splice’s multiple file import.

Adding audio

  • iMovie allows you to import audio from your iTune library, for the theme music in the app and sound affects. The sound affects go onto the time line where the playhead is but music track are placed along the whole movie. Adding another music track replaces the one that is there. You can have recorded sound orsound effects over background music.
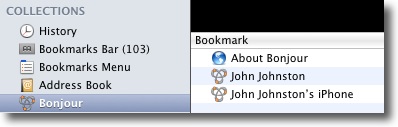
  • ReelDirector allows you to import audio from the iPod library and the Imported Music library. What is really nice is that you upload music to this library via a web browser on the same wifi network. This is especially simple with Safari, you click bookmarks, then bonjour and then the name of your phone, a webpage allowing you to upload files is served from your phone. You have one audio track in addition to the video audio.
  • Vimeo allows you to pick music from its Audio Library, you can add music to this via USB & iTunes or vis Wifi unfortunately I could not get the Wifi to work, the webpage loaded but choosing and uploading a file produced a blank page in the browser and no MP3 on my phone, (With Firefox the upload button didn’t produce a file dialog). Luckily the USB/iTunes option worked very well.There is one Audio track in vimeo, I could not see a way to have voice, or sound effects and background music at the same time.
  • Splice allows you to two track with audio files and one recording track. Splice You can import audio from iTunes or from the Splice Library this comes with some sound effects and a couple of sound tracks, there is a button to buy more clicking this opens a screen were you can buy music, sound effects and borders. I’ve not bought any.
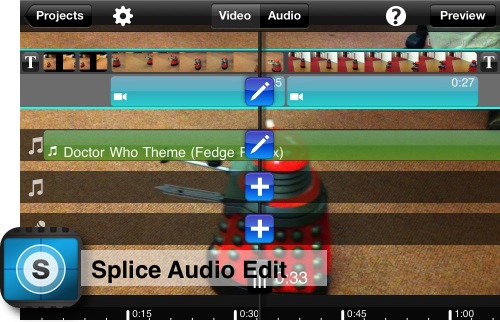
Splice Audio Edit

Titles

All the editors allow you to add titles

  • iMovie the titles style is linked to the theme you choose. A movie must have a theme.
  • ReelDirector allows you to have titles on any clip, to set text styles, placement and title styles.
  • Vimeo titles can be adjusted for placement, colour and size, not fonts choice.
  • Splice titles can only be on a block background not on a clip.
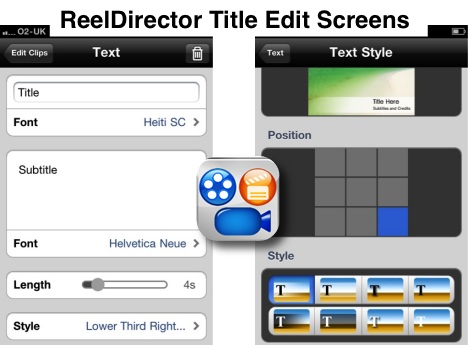
Reel Director Titles

Editing

The above briefly covers some of the main features of the apps but probably the most important part is the actual editing. An iPhone or ipod touch has very limited screen space and it is interesting to see how each app has handled this.

    • iMovie

      iMovie Edit

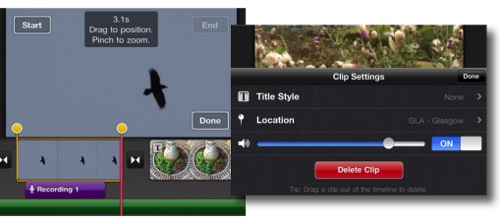
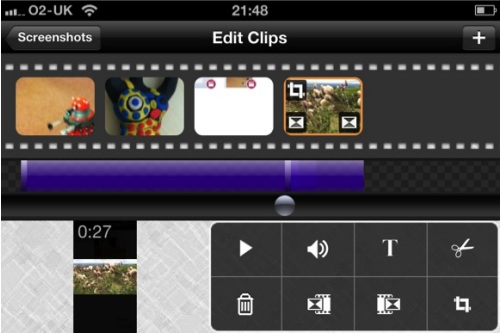
      most of the basic editing is done on the time line, the video is trimmed or the length of photo display is controlled using the yellow handles on the timeline screen, I found it much easier to do this in landscape orientation. Double tapping on a clip opens a screen to set titles volume control and delete the clip. As mentioned above the title stiles are limited by the theme set in the project properties. You can also delete the clip here. Changing the transition settings is done by double clicking on the transition. Transitions are limited to none, cross dissolve or a theme one, you can set the transition length too.

    • ReelDirector

      Reel Director Edit

      All of the editing is done on another clip apart from the audio volume which opens at the bottom of the screen. I found the trimming of clips to be rather tricky and am not sure if I really understand the interface. As noted above ReelDirector has more options than iMovie for titles and indeed transitions. You do not seem to be able to set transition lengths.

    • Vimeo

      Vimeo

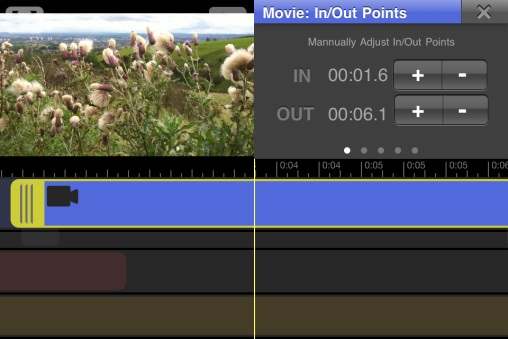
      Clicking on a clip or still allows you to adjust the length with the handles, you can also set the in and out points manually in the pane at the top right of the screen, this swipes to other edits, volume, fit, pixel effect( filters) and a basic on off pan zoom effect. You can slide audio clips and title back and forth but I found in too difficult to get end credits at the end of my movie.

Splice
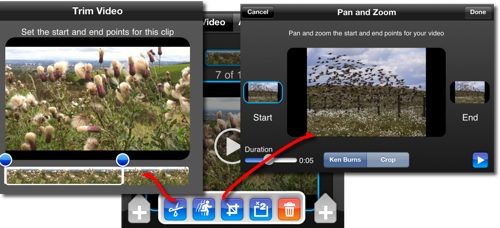
  • Splice Edit


clicking on a clip shows a set of small buttons to trim, adjust video speed, crop, duplicate or delete. clicking on most of these show another screen. The trim is at least as easy to manage as imovie and the Pan & Zoom (Ken Burns) very clear. The controls on splice are big enough not to miss a clip. Is, as far as I could see, is the only app to allow you to change the video speed. The Audio is reached from a different timeline view but offers similar trimming for the three audio tracks, fading in and out and volume control.

Export

  • iMovie you can export to your camera roll at Medium, 360p; large, 540p pr HG, 720p. You can also export to youtube, facebook, vimeo or send the project to iTunes. I’ve only sent to camera roll.
  • ReelDirector you need to Render a movie before exporting, the export give a choice of Camera roll, email or youtube.
  • Vimeo allows you to upload to your viemo account or export to camera roll. When you export it renders and then saves to the camera roll.
  • Splice, you first preview a movie then export the choice is medium 960 x 540 or High 1280 x 720.

Favourite things

  • iMovies basic ease of use, the app seems to jump screens less than any of the others. The ducking of background audio.
  • Splice the ability to add multiple photos and clips and the easy clip and still editing.3 audio tracks.
  • ReelDirector the way you can import audio over Wifi from a desktop. The titles are a strong point.

Dislikes

  • iMovie, the way the title tie in to themes
  • ReelDirector, felt like the most fidgety on the small screen although it probably has more features. (On the iPad it has a different interface and is great)
  • Splice titles, over black, not over clips
  • Vimeo just turned up in the iTunes store as I was reviewing the others, it feels a less mature product.

What I’d like the apps to do

I’d like more of them to support the favourite things above. Especially the multiple selection and audio import over Wifi.

Audio import, it is easy to grab images from the browser on an ipod (CC ones of course) but audio is more difficult. Im my dalek movies I used some CC music from soundcloud it would be great to be able to use an app to save audio for there or elsewhere to iTunes on an iPhone/iPod and use it. This would really cut down the need for a desktop.

What I’d use

For the most part I think I’d use iMovie on my iPhone. If splice had titles over video I’d pay for it and get rid of the ads. I am setting up some iPod touches for use in schools and an installing splice to save a few quid.

What I’d use it for

I’ve shot precious little video since owning an iPhone, thousands of photos and quite a lot of audio recordings I might start taking a few move videos now I’ve played with the apps.

If I was in class I’d use this all of the time, perfect for children to record all sorts of learning. I’d also use for making videos of still pictures with a recorded sound track, something I used to get my pupils to do on iMovie on the desktop. sonicPics woulds be easier for this sort of thing than the movie editors as you can easily adjust the length the stills play while recording audio. (I reviewed SonicPics)

Any of these apps would do a good job in the classroom, with the demise of the Flip camera it may be time to look at iPod touches as a video device for teaching & learning.

Glow has added wikis to it list of features.

What is a wiki? (from wikipedia):

A wiki is a page or collection of Web pages designed to enable anyone who accesses it to contribute or modify content. Wikis are often used to create collaborative websites and to power community websites. The collaborative encyclopaedia Wikipedia is one of the best-known wikis.

Examples of wikis edited by pupils( not glow ones):

  1. australiatopic
  2. A Broken World
  3. Year 7 Mathex
  4. Sandaig Primary Wiki

Background on using wikis, blog posts by Neil Winton (Perth Acedemy):

  1. SLF08 – Wikis Part 1
  2. SLF08 – Wikis Part 2

Example of wikis used by teachers to share resources ( not glow ones):

Sample Glow Wiki with information on wikis which you are free to edit (glow logon required)

Wiki category of Glow Help blog

The Glow folk have started a Scotland Schools Wiki

“Over time we hope that this wiki will build into a ‘Domesday Book’ of schools in Scotland in the 21st century.”

Any glow user can add pages for their school and edit pages

Nice things about wikis:

  • collaboration
  • tracking of edits you can see you did what
  • easy to roll back to previous version is someone makes a mistake.

Best thing about glow wikis: Much easier than glow pages to edit, think a Text Editor that works.

This post is the third in an attempted series about getting started blogging loosely linked to the launch of glow blogs.

Conversation by Rishi Menon
Attribution-NonCommercial-NoDerivs License

I’e always considered blogging to be 3 pronged activity, providing purpose, gaining an audience and starting a conversation. All of these factors can motivate pupils. Blogging can be seen as a ‘real’ activity, writing for a world outside the classroom. It has a real audience who may start a conversation through comments.

Back in the day when I first started blogging at Sandaig there was not a lot of other classroom blogging going on, none at all in Scotland. This gave my class a bit of an advantage in gaining comments and we picked up a few folk who my class felt they had a relationship to. ‘Andy from Aberdeen’ who regularly added a good number of comments to our new blog and after a while Carol Fuller who became our fairy blogmother!

Comments added a lot to our blogging and podcasting in those days. Now with blogs popping up all over the place, the landscape has changed a bit. One one hand there is a bigger potential audience than before but that audience has more choice.

For a teacher who is already active online gaining an audience is not to difficult, they can publish links and requests for comments on their own blog or through twitter. If you get picked up by the right folk you can gather a lot of comments, i recently and responded to a twitter request for comments on a pupil blog as did many others, in a couple of days the pupils 68 word post had 45 comments!

A lot of the new blogs that are popping up now are not necessarily being run by teachers who have spent a lot of time in creating an online network so how do they get comments for their class? I’d suggest a few basic ideas:

  • In the process of explaining blogs to the class visit other blogs and as a class make comments.
  • Once your class are blogging confidently have them individually comment on other blogs.
  • As a teacher visit a couple of class blogs every week, leave a comment or two. Think of this as a sort of cross marking exercise.
  • As a class visit a particular blog regularly, find one that ‘fits’ in with your class and perhaps some sort of regular commenting will build up.
  • If something on another blog stimulates your pupils curiosity , ask questions, try out the activity, blog about it( example).
  • Respond to comments on your own blog. Often this will provide a useful learning activity and some fun.
  • Get in touch with another blogging teacher, do some lightly joined up planning.

In all of this commenting activity leave the url to your blogs in the URL field of the comment form. Teach the children to copy and paste this rather than typing it in, it is easy to make a typo, or put a semi colon instead of a colon and break the link.

Don’t assume that because children find the technology simple that they will write good comments, in the same way as with blog posts, they need advice and modelling. Some teachers might like to provide rules or a check list:

  1. Is the comment relevant? is it worth saying? (just cool is probably not).
  2. Is it generally positive & friendly? I suggest 2 stars and a wish for classmates work.
  3. Would you like a comment like this?
  4. Is the spelling and punctuation a good reflection on the commenter?

Anne Davis provides some comment starters: EduBlog Insights » Blog Archive » Thinking about the teaching of writing which are well worth sharing with pupils, I think I used to have them displayed on the wall.

If you are looking for somewhere to find blogs ScotEduBlogs aggregates blogs from across Scotland.
Glow blog list can be found for each local authority, for example the url for North Lanarkshire is: https://blogs.glowscotland.org.uk/nl/ each of the other LAs has its own initials at the end of the url (full list).
Further Afield Tom Barrett has be collecting primary class blogs on delicious which provides a great list.

If you know of other ways to encourage commenting you could leave me a comment;-)

Last session I was lucky enough to be involved with a small ipod touch pilot; Glencairn iPod and blogged about it and various iPod Touch things several times.

10ipodtouch FtgroupImage Courtesy of Apple

A few things have made me think about iPod touches in class recently that I though might be worth a blog post.

I’ve been using some new, to me, bits of software on my iPhone which have either classroom potential or some concepts that could be transferred to the classroom.

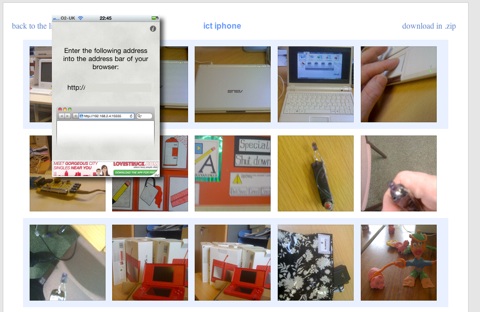
Wifi Photo Transfer (App Store) is a simple application that turns your iPhone or ipod touch into a web server which displays the photos on the device on a web browser on any computer (or iPad) on the same WiFi network:

Wifi Photo Transfer

The photos can easily be downloaded to the computers. The application show a single screen on the phone with an IP address that can be typed into your browser to see the photos. Even better with Safari you just click Bookmarks and then Bonjour where you will see your phone listed:

Bonjour

A click opens the webpage with out any tricky typing.

I imagine photos taken with a new camera equipped iPod being distributed to a class full of children without resort to cables or pen drives.

I mentioned The UK SoundMap in the previous post this mashup which adds Audioboo audio to a google map could be replicated for all sorts of sound recording in class. A map full of music recorded in classrooms around the world or some language swapping springs to mind.

I’ve also been using mappiness, the happiness mapping app to record how I am feeling when the app on my phone prompts me twice a day. This sort of collaborative data logging could be done through a google form on a touch.

The other stimlus for this post is the new ipod touch, this adds the long awaited still and video camera and in my mind turns the iPod touch into one of the most useful bits of tech you could have in a classroom.

A few possibilities:

  • A replacement of your camera and easy photo distribution. The low res (960×720) is not any sort of problem for classroom use when huge digital camera images can slow things down.
  • A replacement Flip (you can use Wifi Photo Transfer to download videos).
  • A video editor, I’ve tested ReelDirector (App Store) briefly and it seems as good a video editor as you would get for £2.39.
  • Air mouse, pass a touch around the class to control the computer connected to a projector for a Whiteboard substitute.
  • With the right software and a class set you have a response kit.
  • Nintendos lots of brain training type apps.
  • Many tasks that are normally carried out on desktops or laptops.

Comparing the £159 before vat price of iPods with the cost of a smartboard or a couple of laptops makes these a real option for expanding technology in the classroom.

Glow light came online today yesterday:

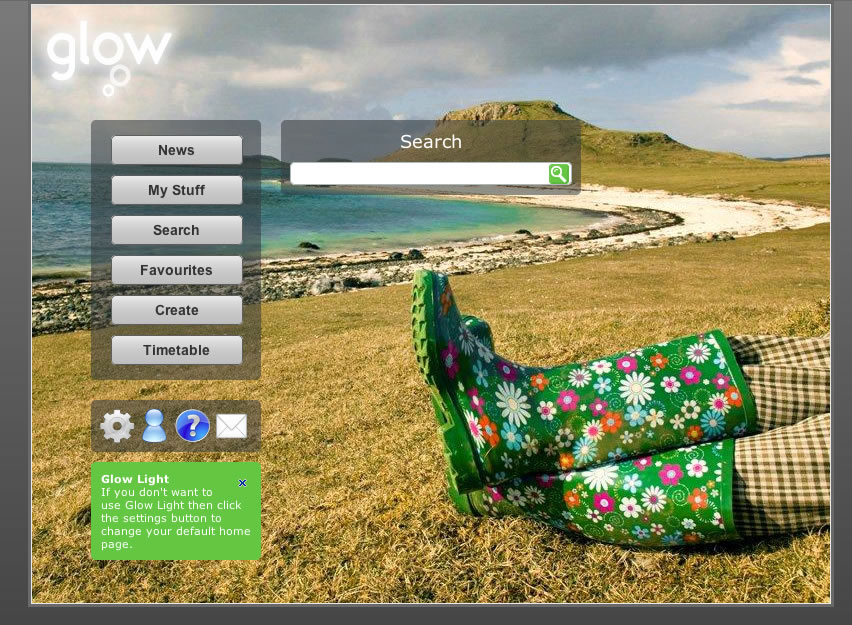
Glow Light is a new alternative Glow interface designed with a simpler ‘splash’ page. This ‘splash’ page will display a list of user specific links to allow easier navigation to other areas within the Glow portal.

LTS have a video to show how it works:Glow Light – Making Glow better clicking on the thumbnail above will show a full-sized screenshot.

Lighter

In my opinion this is a great improvement over the ‘Staff’ home page that loads when you log onto glow, much less cluttered and easier on the eye. The branding is subtile and the page has indeed a light feel and it is lighter:

this is the NLC Central Services home page (Staff page) load:

And this is the glow light load:

Showing glow light is just over half the load of the Staff page.

Glow Light also combines the functionality of more than one glow page so it should save quite a lot of time. As a default it comes with 6 ‘navigation’ buttons on the left side 4 ‘settings etc.’ buttons at the bottom and a search box. (see popup image at top.)

Features

Advanced Search

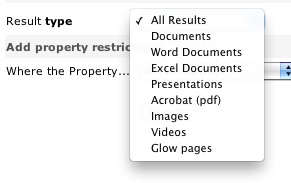
The search is much better than the old glow search. When you get to the results it gets even better linking to an advanced search with allows you to filter by type, and by various properties. The search is pretty fast (on the bases of a few Saturday tests). I never used the old search finding it nearly worthless, this new one looks like it will be valuable.

The six main buttons are as follows:

  • News: links to the old Glow Staff home page.
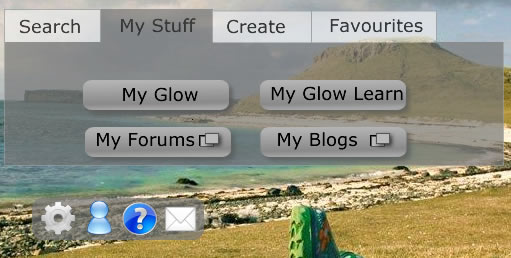
  • My Stuff: shows a further four buttons;
    • My Glow: opens the my glow page.
    • My Glow Learn opens the glow learn page.
    • My Forums: opens the forums in a new window.
    • My Blogs: opens your list of blogs in a new window.
  • Search: shows the search box as it is hidden when ‘My Stuff’ is clicked.
  • Favourites: opens your list of glow groups.
  • Create: shows buttons to Create Glow Groups and Glow Learn Courses. The Glow Groups button shows, or loads, a list of groups where you can create groups, clicking on the list opens the Create Glow group page for the group selected.
  • Timetable: opens your timetable page.

These are frequent tasks inside of glow and in the past would take quite a few click to get to.

You can customise the lists of buttons from the setting and add ‘link’ buttons of your own to the list. I ‘ll probably turn off the Timetable as I don’t have any classes and the Create button as I would normally work down to the site I am creating while I think about it.

There are 4 smaller buttons at the bottom of the main list: Settings, which opens the glow light settings. Profile, Help and Mail which are self explanatory.

My Suggestions

Although glow light is a vast improvement I think it could be made even better. Here is my 2 pence worth:

I like the way the create button loads the groups list on the page and although I don’t think I’ll use it I’d like the favourites button to load my favourites (and just my favourites) in the same way rather than take me to my ‘My Glow Groups’ page.

The other thing that I think could be improved is the buttons. As indicated by the bold & italic text in the description above the buttons have different tasks. Some hide or show elements on the page, some open links and some open links in a new window. I think this is potentially confusing and would prefer something a little more straightforward:

Glowlightidea

This is pretty quick and dirty but should illustrate the idea: Tabs hide an reveal elements and action buttons show if the link is in a new window or not.

The Future

The future of glow is looking a bit brighter, this is a long overdue facelift and perhaps indicative of the way glow is going. It now is starting to look like hub linking out to different services: glow, blogs (these were updated yesterday too, forums, glow learn and mail. The move to using open source, (phpBB, WordPress) familiar web tools is surely a move in the right direction. I hope too glow will move in the direction of constantly upgrading, or perpetual beta that is popular with open source and web technology (google, flickr) generally. Five years ago I had no idea what sort of web applications I’d be using now and I hope that the next 5 years will bring improvements and completely new ideas. If glow was a portal they services could be easily added when necessary we could have phpMotion ( a youtube clone) or laconi.ca (a twitter one) dropped into glows safe & secure environment at the drop of a hat.

Looking at the Glow futures tender notice:

  • Interoperatability of Web Services using Open Standards
  • Scalable with capacity to expand the scope to serve a wider population
  • Glow Futures will apply open standards aiming to achieve unhindered data flow and interoperability. This model will help Glow to constantly evolve and remain modern.
  • The current Glow portal and data centre infrastructure is provided by a single supplier. We envisage that the new service could be procured in a series of lots which may be provided by a single supplier or by a variety of suppliers to allow for a flexible and dynamic approach to respond to evolving requirements.

Gives me a fair bit of hope. I just hope we have, in Scotland, enough money to resource it and the hardware to use it.

I saw a tweet mentioning me and the Flickr Search and Stamp for the iPod touch project on Friday. Clicking the link took me to Searching for CC images – SHea iPod Touch Project a post on Ian Guest’s posterous about:

a year long project between two schools, one in the London area and the other in Yorkshire. Students in two classes will be loaned an iPod Touch, for use both in school and at home.

The post contains a youtube video of how to use the Flickr Search and Stamp on an iPod touch and the blog has a lot of other interesting iPod Touch educational information.

I had mentioned this tool in a blog post and added it to the Interesting Ways to use an iPod Touch in the Classroom collaborative google presentation but have not blogged about it here..

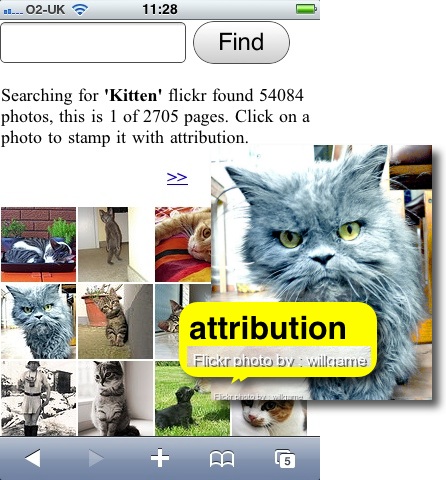
The idea was to get around some copyright issues for children searching for images to create with on an ipod touch. Ideally children would save a photo, figure to the attribution and edit the photo to add this. That can be quite difficult and time consuming on an iPod touch so I though up this workaround. It searches flickr, only returning images that can be used and edited under a cc license, it then will produce an image with the attribution stamped onto it in the same way as my flickr CC search toy.

Flickr cc attribution

It is based on the iPod Touch Poems webapp I knocked together and has quite a few rough edges. I am sure I could improve the performance, interface & a lot more but it seems to work.

Here is Ian’s video, which should give you an idea of how the app works:

I’ve added a link from the page/Web app to the video to act as in app help so many thanks Ian for this. You can also get an idea of it the app work in this Simulator.

I’d appreciate any feedback on using the app, especially in class and ideas for improving it.

This post is the second in an attempted series about getting started blogging loosely linked to the launch of glow blogs.

Have you see this:

This is an example of a WordPress page, you could edit this to put information about yourself or your site so readers know where you are coming from. You can create as many pages like this one or sub-pages as you like and manage all of your content inside of WordPress.

Portrait Of The Unknown Saxophonist by an untrained eye
Attribution-NonCommercial License

anywhere recently?

The above quote gets me 751,000 hits on google if I search for it. Why? Because it is the out of the box About Page on a wordpress blog.

Most education blogs I know are wordpress ones, and a fair number of them have never edited their About page. I don’t think this need to be seen as self promotion, just politeness to your reader. When I see a link to a blog post and end up on a blog I’ve not visited before the chances are that I’ll be interested in who is writing it and something about them. I click on the About link.

Schools blogs too, I want to know the sector, who the authors are, age & stage and where in the world the schools is.

We are expecting a new batch of educational bloggers in Scotland this session as blogging become simple to set up via glow I am hoping that these new bloggers will add themselves to ScotEduBlogs and I’ll be able to read them and to find out a little about the writers.

As an aside, I’ve twitter set to send me a mail when I get a new follower, often these are folk who have not tweeted much, if I can tell from their tweets and they do not have a description or a link on their twitter page I often don’t follow back.

My own About John page may not be very interesting or even spelt correctly, but it is there.

Strip designer

This week I have added five new apps to my iPad and thought I’d post them here. 

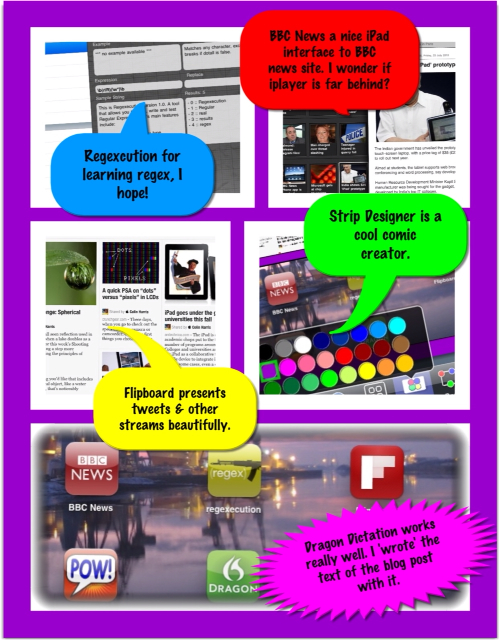
The whole post was made on the iPad all text ‘written’ with Dragon Dictation.

The first is BBC News and this is just a translation of the BBC’s new site for the iPad that it works very nicely. It’s pretty slick there is a series of all news feeds on the left and you could see the articles on the right. You can customise the feeds so I’ve already remove sport and added the Scottish news  it seems very iPad friendly and like quite a few  designed read and access media in an attractive way.

Another media viewer I’ve  installed is FlipBoard which has been getting a lot of attention on the Internet and on twitter. This app pulls information from different sources, Facebook or twitter and from collections and about different things, say technology or entertainment.the app presents these streams in an attractive way.   You can to flip through the pages with some pretty effects.   What I think is really impressive that is with the tweets from your twitter stream it doesn’t just to show the tweets, if a tweet has an article linked it will present some of the article, with a photograph that will present the photograph.  FlipBoard has been a little controversial as it is pulling in content by scraping rather than they’re getting it from RSS feeds. To me this doesn’t seem too much of a problem most of the longer articles are shortened so you need to display the source along with any adverts and branding to read the whole thing. This viewing is done in the app rather than in safari. 

The next  app is regexecutioner which is an app  to help learn about regular expressions.   I do occasionally attempting to learn and to  use snippets of regular expressions. Hopefully this may  get me up to speed.  It is a pretty straightforward app were you can see  examples and you can take a regular expression and  a text block instantly see it’s result.

StripDesigner  is more of a creative app.  You can see from the screen shots that are  illustrating  this post that I have used it to present and annotate some screenshots of these application.  It’s a really nice ComicLife clone.  I tried on the iPhone first there the screen space is a wee bit limited but on the iPad and it just works very nicely indeed.  You can choose different layouts of up to five pictures.  You can add texts and the other things, adjusting fonts, text size and drop shadows in an easy and intuitive way.  I think it would be a great application to use in a classroom and I imagine I’ll be using it quite a lot.

The final application I’ve installed this week is Dragon Dictation which is an amazing application.  I have recorded all of this post and it turned into text using Dragon Dictation  it is very straightforward to use: you press a record button, you talk, you hit the Screen to stop.  Dragon  then analyses this (I imagine it sens the audio to a server) and brings back the text. You can quickly clean up and edit the text.   I tried it first on my iPhone you can tweet straight from Speech.  I then they tried on the iPad  and had one crash so made sure  to a copy of each section of this post as i  recorded six different sections. I had to do a little cleaning up, but given my accent and the fact that there is no training period make this application seem like magic.


With Glow blogs looking like they may stimulate the use of blogs in more Scottish classrooms I though I might put together a few posts about some ideas around starting to use blogs in the classroom.

A few years ago I blogged about Starting Blogging in the Classroom with some advice that I still think holds good. I’ve published some general notes at OpenSourceCPD Blogging, Introduction to blogging & Blogging with Pupils which may be of some use.

The above still stands but I want to pick up some details and tips, starting with short term blogs in this post.

Setting a date by Damon Duncan
Attribution-NonCommercial-NoDerivs License

I couple of weeks ago I was following a lovely class blog: International Week. The blog uses posterous’s ease of publishing media very well, the children are recording short pieces of audio with easi-speak mics and uploading them to the blog. The mics are in my opinion a great tools for the classroom.

In the week the blog has also had pictures, animoto, youtube, a survey, google maps and writing. It is a great example of using posterous in the classroom.

Kevin McLaughlin has produced an inspiring post about the week: A week of blogging and creative learning

One of the things I like about this blog is the length of time it ran: 1 school week, 5 days.
I spent a fair bit of time moving old posts across when I left Sandaig to here. I am a digital hoarder. I love the ability to look back through a year or 3 of a blog and I really like the connections that build up and grow on a long term blog. When I was teaching at Sandaig Primary my main blogging focus was Sandaig Otters which ran for 5 years at that url and is still being updated at a new home: Sandaig Otters.

But I also organised quite a few other blogs some for individuals, some for particular projects and these included a few short term blogs.

Short term blogging is, I think, a great way to add any short term project, trip or collaboration in class.

One of the first blogs I organised for short term use was The Listeners – Primary Six Writing Week which only has 11 posts. I probably spent more time customising the design than the class did blogging. I still feel it was a success, the children in the class were very much focused by publishing their work online and very much encouraged by the comments they received.

Since then I’ve organised quite a few short term blogs, including trip blogs and blogs for short school projects. Of course if you have a established weblog you could just use categories or tags to organise a set of posts round a theme or project, but this can be a great way to dip your toe into blogging and finding out how it could help your teaching.

Scottish teachers now have easy access to blogging tools with the release of glow blogs. At he time of writing the blogging facility is fairly basic but several improvements will be made before the start of the next session. Setting up a glow blog is very straightforward and LTS have produced some introductory material: Glow Blogs – An Overview « Glow Help Articles, glow blogs can be set to be private with only glow users, or a subset of those users having access or open to the public. I would recommend that you open the blogs up to the public. If I didn’t have access to glow I think I’d be very tempted by posterous as a simple way to set up a blog and get pupils started.

Although setting up and using a blog is technically very simple you need to think a wee bit about the attitude of the pupils, they need to know that they are not using bebo, facebook or messaging their friends, that they have a responsibility to themselves, their class and school.

Short Term Advantages

  • The pupils will not have time to forget the safety information or become fedup with you reminding them.
  • The initial excitement of publishing online will hopefully not fade over a short term project.
  • By setting limits in time and scope for the blog makes it more doable and less likely to lose focus or drift off which can happen with long term class blogs.
  • If the blog is collaborative with another school setting a fixed period will give all parties a target that is easier to met and give attention to than an open ended project.
  • If you are hoping that an audience will have an effect on your pupils organising that is simpler, and your audience will be more likely to stay the course.
  • It is probably easier to give pupils more control over the organisation of a short term blog with simple aims.

Short Term Tips

  • Makes sure the blog is set up and you are comfortable with using the interface
  • If you are going to use photos make sure the pupils know your rules for posting, (probably no named faces).
  • Pupils can use the cameras, edit and resize pictures independently. I am alway surprised at how many school taking photos is a job for adults.
  • Similarly with other media, make sure that you are not going to be needed to get it sort out and posted. If your pupils are not regularly handling cameras, importing and editing media files make sure you have at least a couple of experts before the project starts.
  • You can prep an audience, contact another school, explain to parents how to post, do a wee bit of online publicity (twitter).

Short Term Examples

International Week the blog mentioned at the start of this post is a great example. The rest are ones that I have organised, not that I think they are particularly good examples but I know more about them.

Snakes and Ladders, this blog was set up for a project designed to help integrate children joining our school when the one across the road closed down. Half a dozen primary sevens were given the responsibility of keeping the project blog up-to-date and did a great job. Another team were tasked with creating a video which was posted at the end of the project. The pupils were not in my class and basically organised themselves during the project.

The Dream Dragon – A log of the dream dragon project quite a different blog, mostly updated by myself and used as a teaching tool for a fairly long project with sporadic activity, I wanted the class to have an overview of the project.

World Cup 2006 I noticed quite a lot of classroom blogging about the current World Cup, this one stimulated a few reluctant boys, unfortunately the Scottish term cut it short.

We blogged trips to Holland in 2005, 2007 and 2008 these blogs were much appreciated by parents as were the Holland 2010 posts which kept my ‘tradition’ going after I left school. Trip blogs are a great way to demonstrate some of the powers of the internet to your class and to get parents interested in blogging.

I blogged a weeks trip to Glencoe 2006 to do outdoor activities. When a class I had previously taught to blog went with their next teacher to Blairvadach they were perfectly capable of organising the blog themselves.

Elephants was another week long poetry blog which gathered some of very interesting comments I’ll return to some ideas about comments in a later post. Like the The Listeners blog having a separate blog meant we could customise it for a particular project.

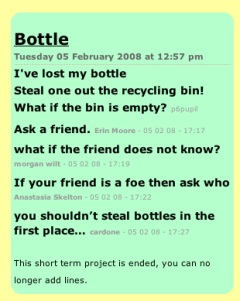
Bottle Poem

McClure – Sandaig is a collection of 3 blogs for a collaborative project with a class in Georgia in the USA.

In one of the blogs I made some fairly crude customisations that allowed comments to appear with the same weight as posts. I did this, as usual, at the last minute but I think it was a nice idea it reminds me that blogs are not fit for every purpose and were not designed with the classroom in mind, hopefully in the longer term we will get blog like software that will allow even more customisation than is available now.

This particular hack was performed quickly at the last minute and I would not have been able to do it if the blog had been a long term one. Short term blogs are ideal for all sorts of experimentation.

I am sure I’ve only scratched the surface of the use of a short term blog I hope these examples show that it can be a useful tool in the classroom and would allow folk unfamiliar with blogging to make an achievable and worthwhile start or experiment.

I hope produce a few more posts about classroom blogging which might be helpful to people starting out with glow blogs next session and will tag them glowblogs. I would be interested in collecting any other short term use of blogs in the classroom.