#tdc2034

#tdc2034 Today be on the lookout for your one tree!

Prerequisites, you need ffmpeg installed. I did that with Homebrew .

In Photos app. search from Tree, this works pretty well.

Export all the photos to a folder.

You need to rename all the photos to be sequential, 0001.jpg, 0002.jpg etc.

So open the terminal and cd to the folder of images. Write the following to a file, rename.sh and run with ./rename.sh

a=1
for i in *.jpg; do
  new=$(printf "%04d.jpg" "$a") #04 pad to length of 4
  mv -i -- "$i" "$new"
  let a=a+1
done

This give you a nice sequence of images. I made an extra image with the music credits too.


then:

ffmpeg -f image2 -i %04d.jpg -c:v libx264 -pix_fmt yuv420p trees-1.mp4

slow it down a bit

ffmpeg -i trees-1.mp4 -filter:v "setpts=4.0*PTS" trees-2.mp4

and add some music from an mp3 file in the same folder.

ffmpeg -i trees-2.mp4 -i Faster_Does_It.mp3 -map 0 -map 1 -codec copy -codec:a aac -strict experimental -b:a 192k -shortest tree-audio.mp4

Upload to YouTube:

5 minute job.

Commandline gifs: Cartoon The Nitty Gritty

I’ve covered most of this before, but given the news that someone reads this stuff, I though I’d document it a bit more.

Prerequisites: ffmpeg, imagemagick, gifsicle, I’ve installed all of these commandline apps via Homebrew.

Cartoon Fred’s ImageMagick Scripts: CARTOON.

I downloaded this then made it executable using the terminal:

chmode +x cartoon

I then moved in into /usr/local/bin/

the proper way is probably
mv cartoon /usr/local/bin/

but I did open /usr/local/bin/ which open the folder in the finder and dragged the file across.

I ned a movie so:

Which I downloaded with YouTube downloader tool – Fastesttube!.

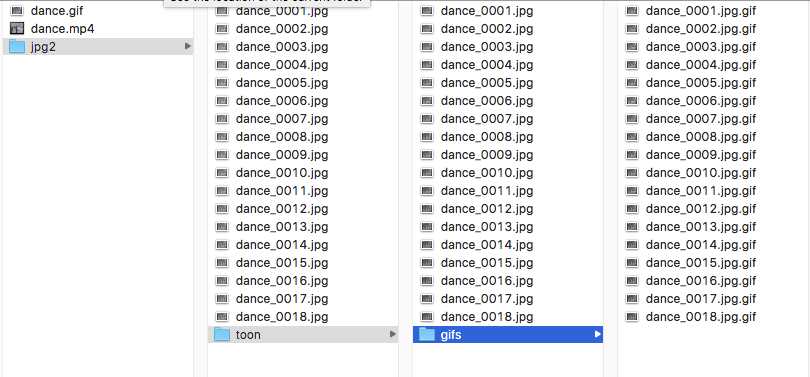
I copied the download into a folder and renamed it dancer.mp4

In the terminal I move into the folder by typing cd and dragging the folder int the window and pressing return.

I then made a new folder mkdir jpg2

I switched to the finder and previewed the movie to find out where I want to start extracting frames, which turns out to be at 26 seconds, and I want to get 3 seconds worth at 6 frames per second:

ffmpeg -ss 00:00:26.000 -i dance.mp4 -t 00:00:03.000 -r 6 jpg2/dance_%04d.jpg

This give me 18 jpgs in a folder.

I move int othat folder and make a new one:
cd jpg2
mkdir toon

I then use cartoon to make a cartoon image for each jpg in the toon folder:

for i in *.jpg; do cartoon $i toon/$i;done
(cartoon uses imagemagick)

This takes a wee while, I then make yet another folder:

mkdir gifs

and convert all the cartoon jpgs into gifs:

for i in *.jpg; do convert $i gifs/$i.gif;done

(convert is part of imagemagick)

Finally I make a gif

gifsicle --delay 12 gifs/*.gif --loopcount -O3 --colors 16 -o ../../dance.gif

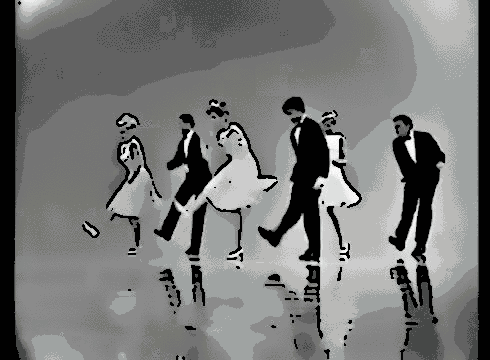
You can see the gif ends up in the top folder. There is a 12/100 of a second delay, it loops forever, is reduced to 16 colors and optimised (O3).

Screen Shot 2016-07-15 at 15.58.07


Along the way there are a lot of other possibilities, convert for example can adjust the brightness and contrast (and a raft of other things). I brightened these ones up a bit:

gunstick

stickgun2

In reaction to

Like the cartooning of videos a couple of posts ago there is the opportunity to see and understand a bit more about film using this technique. Jim might be thinking that (says Alan) but so far I am just having fun.


This ain’t no Rotoscope

As usual it started with a tweet:

The referenced tweet looked interesting:

I’ve tried Rotoscoping before, but this looked good. I hied over to MacOS/OSX – Paint of Persia community – itch.io, read about it. paid $5 and set things up.

At that point I realise that the app helps you to manually trace frames, seemed a wee bit time consuming. I though I’d leave it for another day. I did start musing on doing something similar, I was thinging FFmpeg & ImageMagick.

Google takes me to Fred’s ImageMagick Scripts: CARTOON.

so the plan is:

  1. export a movie to a series of images.
  2. cartoonise those image
  3. create a move from the cartoon images

Bounus points for getting the sound track back in.

I already have ffmpeg & imagemagick installed on my mac. These are commandline tools.

I downloaded the cartoon script

First find a video:

YouTube downloader tool – Fastesttube!

Rename the downloaded file shower.mp4

Open the terminal and cd into the folder that has the cartoon script and the movie in it.

First extract lots of still images (make a folder shower first mkdir shower):

ffmpeg -i shower.mp4 -r 6 shower/out_%04d.jpg

this takes the input file (-i) at 6 frames per second and create jpg files in the shower folder with the file name out_0001.jpg ,out_0002.jpg ect

Given the movie is 3 minutes 22 seconds long I end up with 1212 images in the folder. I delete the last few manually to give me 1023 images.

I now need to loop through all of those images and create a cartoon version.

the use of cartoon is basically:

./cartoon face.jpg temp.jpg

There are some paramaters you can use but I stuck to the default.

This would take the image on the left and create the one on the right:

face.out

So I move into the shower folder cd shower

mkdir out;for i in *.jpg; do ../cartoon $i out/$i.jpg;done

this script:
makes a nother folder called out

for i in *.jpg for each file with a .jpg extension in the current folder do does:

../cartoon $i out/$i.jpg runs the cartoon script from the folder above (../), and saves the output file in the out folder with the same name.

When I kicked this off I quickly realised it would take a while to r=un through 1212 images, so went to bed.

The next morning I have 1023 cartoons (I don’t imagine that it took all night).
out_0672

Time to stich these together, it took me a few goes to get the paramaters right. (google helps).

ffmpeg -f image2 -framerate 6 -i out_%04d.jpg -c:v libx264 -pix_fmt yuv420p out.mp4

  1. -f chooses the format image2 which makes an image sequence.
  2. -framerate 6 to get the smae length of movie as I started with
  3. -i infiles confusinging names out_0001.jpg ect the %04d means look for 4 figured numbers starting with 0001
  4. -c codec
  5. -pix_fmt is the pixel format, I dn’t know much about these but the script failed until I added it in

It took me a few shots until I got this right.

I then moved the out.mp4 video to the same folder as the original and

ffmpeg -i shower.mp4 -acodec copy -vn shower-audio.mp4

To extract the audio from the original file.

then:

ffmpeg -i out.mp4 -i shower-audio.mp4 -vcodec copy -acodec copy -shortest final.mp4

To add the audio from the original to the out video to give me a final one.

the -shortest parameter gets rid of the audio at the end to make up for the frames I removed.

Bingo:

At this point I remembered iMovie has a comic filter…

This post is mostly as an aid to my occasional dip into the world of commandline video editing. Posting helps me remember. It also plays a wee bit fast and loose with copyright.

The featured image is a gif giffed from a few of the stills.

ps this is quite a disturbing clip, I didn’t really watch it till I finished, could have picked a nice one!

Update, Ron commented:

What would it look like if you’d run the result videos through the script one more time. Keeping the same number of jpegs but making the lines more stand out and the fills less so you’d have black outlines and white?

That didn’t make much difference os I did some tests with the parameters for cartoon, and Ron went with increasing the brightness: ../cartoon -b 300

This gave me this:

Making some Adjustments

As I had to get up early this morning I though I might make good use of my time. I popped into the Village shop and bought a screwdriver.

I wanted to have a closer look at the TV in my accommodation after last night’s blip.

I also need to get some more credits and decided on doing a wee bit of audio work. I am still trying to get an understanding of The Village by looking under the bonnet.

I had already taken a bit of audio from on of the surveillance tapes:

I ran it through the reverse filter in audacity:

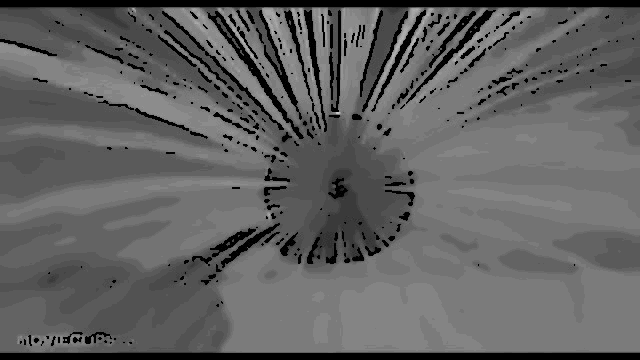
Which was interesting and make some sort of sense if you are in a hypnagogia state. But it required further investigation. I found some instructions which lead to a new tool to add to my toolbox. PaulStretch is quite fascinating, and after spending quite some time testing the settings I fell back on the basic preset:


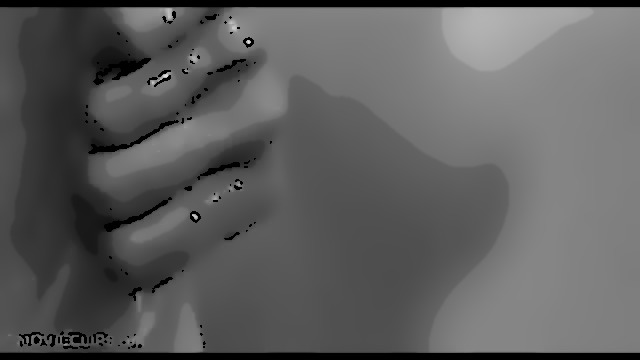
Feeding this into some video footage from the archives:

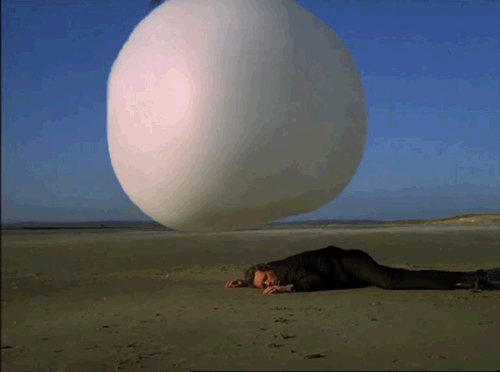
Tells us quite a lot about the state of Rover’s mind, or perhaps his master’s?

Some information

Movie clips extracted with MPEGStreamclip from video taken from dvd with HandBrake.

Movie clips concatenated with ffmpeg.

Slowed down with ffmpeg:
ffmpeg -i rovercon.mov -filter:v "setpts=4.0*PTS" rovercon.mp4
Which turned into mp4 too

Added the stretched audio:

ffmpeg -i rovercon.mp4 -i the-prisoner-backwards-strech.mp3 -map 0:0 -map 1:0   -shortest rovercon-audio.mp4

I am finding ffmpeg interesting as you can try different variations out quickly.

Rover normally seems to be a cold mechanical creature, this view suggests something deeper, organic perhaps, hints of ancient chants and secrets. Perhaps the Village is not as rational as we think.


The Village 106

I’ve resigned myself to Prisoner106, this looks so far like an interesting twitter account and lovely webpage. No schedule or anything else I’ve seen which give us free range to explore the village.

prisonerdvd

I decided to go all in for £17.90!

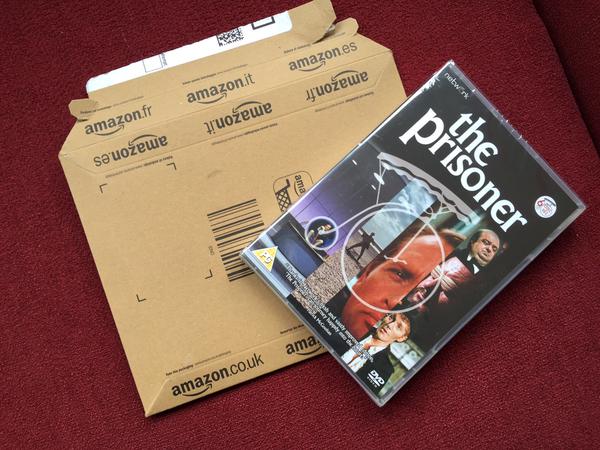
Given I want to watch this on my commute I am afraid the first thing I did was rip a few episodes to m4v files. HandBrake: Open Source Video Transcoder works well, it prompted for another install to remove drm and I just followed through with that. I don’t feel that makes me a bad person.

After watching the first episode I was compelled to knock out a few quick gifs.

patient-sing the-prisoner-ep-wobble-2rover-jim

I used the usual method, open in MPEG Streamclip. Set in and out points. Press cmd-t. Export to image sequence. Open the first image in FireWorks (CS3). Drag the other files into the FW window. Open he Frames window. Select all the layers and choose distribute to frames from the frames window menu. Mess around. Export to MP3.

Taking Command

I’ve started exploring episode 1 from the terminal, relying and developing techniques that I’ve posted about here. I am getting quite interested in the fun that can be had through random and unexpected results and the ability to generate different files & views at a cracking rate. Instead of working hard to produce a single artifact this will allow me t oexplore the

A lot of this relies on various command line applications that I’ve installed over the years in a fairly messy way. I tend to try things that, if they go wrong, leave me googling like mad.

I am just going to note what I’ve played with so far and not give details of installing the software for now. Much can be installed on a mac via Homebrew.

FFmpeg

FFmpeg

A complete, cross-platform solution to record, convert and stream audio and video.

First I split the video into images (How to extract images from a Video using FFmpeg | Linuxers helped)

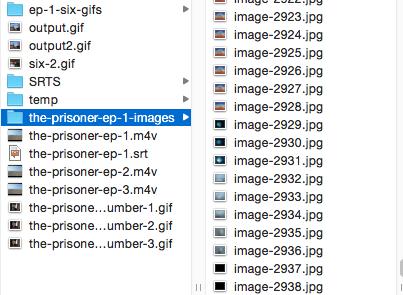
ffmpeg -i the-prisoner-ep-1.m4v -r 1 -f image2 images/image-%4d.jpg
I now have 2938 jpgs to play with.

the-prisoner-files

Recently I’ve been interested in averaging images so into the image folder, make an average folder and:
ls *.jpg | xargs -n 10 sh -c 'convert "$0" "$@" -average average/"$0" '
Which gives me 294 files, each an average of 10 of the original jpgs.

I googled most of that code, the average command is part of ImageMagick.

To my mind these look rather lovely losing the clean 60’s lines of the original for something rather more dreamy and dark:


Duplicate the folder move, in the terminal into the new one and:
sips --resampleWidth 240 *.jpg Gives some thumbnails:
Averages which I’ll perhaps figure out what to do with later.

Next up I moved on to supercuts and gifboard, but I’ll leave the reporting of that to another post.
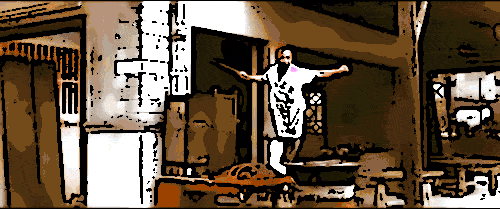
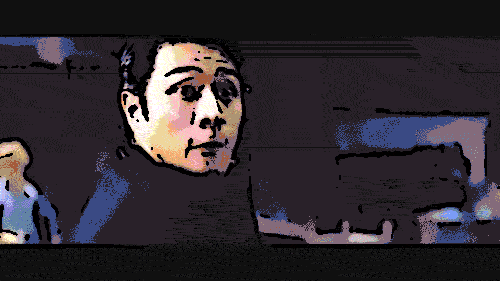
Update: adding tags AnimatedGIFAssignments & AnimatedGIFAssignments1744 for the new ds106 Assignments: Animating #Prisoner106