Photo Bending with Audio Shop

highpass

Alan knows what I like:

Which leads me to robertfoss/audio_shop: Your friendly neighbourhood script for mangling images using audio editing tools

This turns out to be a much quicker way of databending than the convert to RAW, open in audacity, add effects, export to RAW dance I’ve tried before.

I’ve not done much more than a quick trial, but am adding this for later reference.

  1. Downloaded the script for the link above.
  2. It needs ffmpeg and Sox. I’ve aready got ffmpeg and quickly installed sox with handbreak.
  3. then I ran some tests.

It is much quicker than I expected, with images of 1200 pixels taking a few seconds.

I am looking forward to start trying some different effect, changing parameters and combining effects. The script handles video too!

./mangle.sh /Users/john/Desktop/Ben-Lui-Munros-from-Meall-an-Fhudair.mp4 /Users/john/Desktop/Ben-Lui-Munros-from-Meall-an-Fhudairtest2.mp4 overdrive 17 hilbert -n 5001 --color-format=yuv444p --bits=8 --blend=0.5

Taking Command of Gifs

These are some notes on creating gifs and manipulating images on the command line on a mac. I am pretty much at the limit of my knowledge here so some of the details may be sketchy. It seems to me that this allows one to iterate through various ideas quite quickly. I do often take the result into Fireworks for some tweaking of colour palettes.

GIF IT UP – DigitalNZ is on.

Calling all GIF-makers, creatives, history nuts, and animators! GIF IT UP is a challenge coordinated by DigitalNZ and the Digital Public Library of America to find the best GIFs created from copyright-free heritage material.

The early entries look formidable GIF IT UP 2015, but I am trying out a few things in the hope of getting to something worth entering.

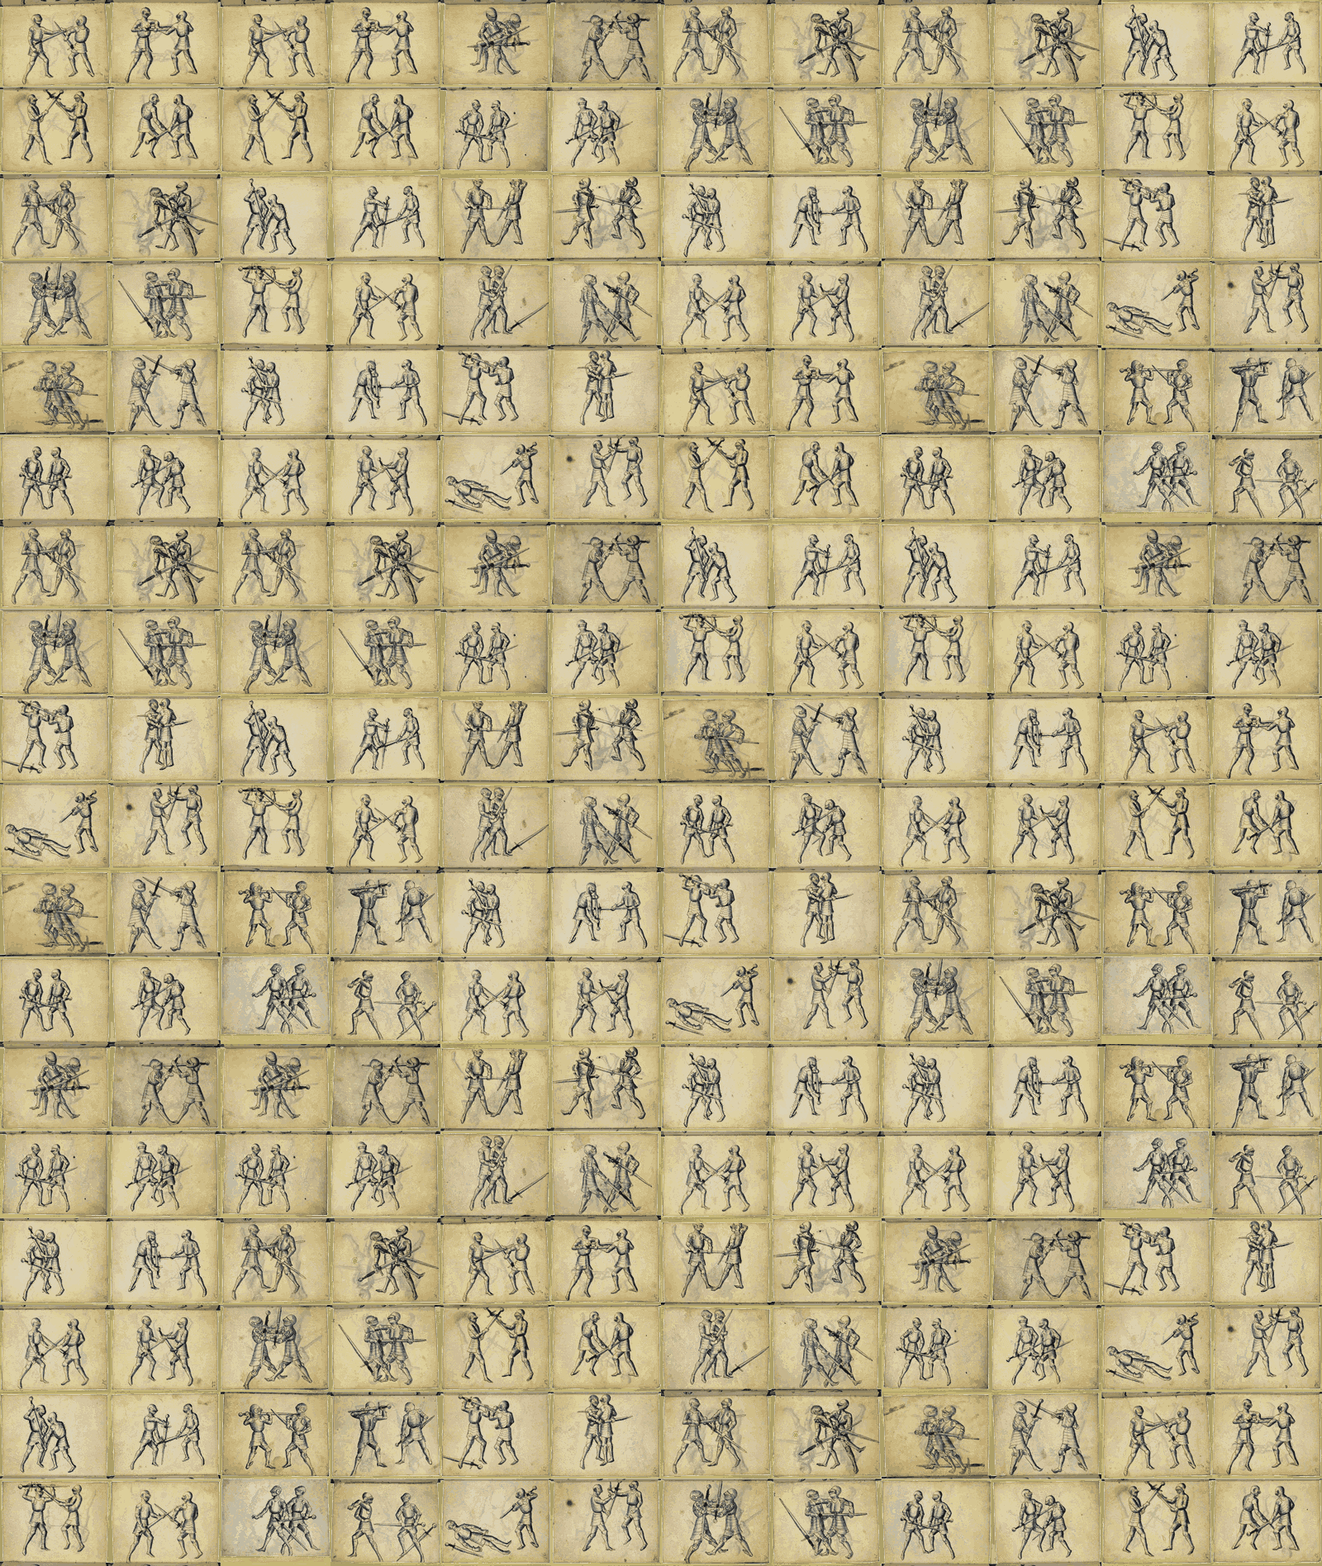
One of the suggested sites for source material is Europeana and I found a nice set of images: Book on Swordsmanship and Wrestling from the mid 15th century. I though a selection might make a nice flip-book. Here is the process:

Gather the images

This was a pretty manual process. I decided to grab the ones for fencing. Loaded each pages in the browser then right clicked and downloaded all of the jpgs to a folder.

Resizing images

I now start to use the terminal.

To move into the folder of downloaded jpegs I type cd and then drag in the folder, which gives me:

cd /Users/john/Desktop/DS106GifitUP15/swords2

I hit return and I am in the right folder to do some work.

Then I make a new folder for smaller pictures:
mkdir 500
This produces a folder called 500.

Next resize all the downloaded jpgs to smaller versions in the 500 folder:

for i in *.jpg; do sips --resampleWidth 500 $i --out 500/$i;done

What this does:
for i in *.jpg for every jpg

do sips --resampleWidth 500 $i --out 500/$i; sips in an image manipulating programme build into OS X, the $i variable refers in turn to each file. so for a file 5055078.jpg we are doing this:

sips --resampleWidth 500 5055078.jpg --out 500/5055078.jpg

done lets the loop know where to finish.

For all the jpgs, resize to 500 pixels wide putting resized version in the 500 folder with the same name as the source file. The semicolons separate sections of code creating a loop.

Making Gifs

I then cd 500 to move into the new folder and mkdir gifs to create a folder for gif files. Then:

for i in *.jpg; do sips -s format gif $i --out gifs/$i.gif;done

Which uses sips to create gifs from the jpgs, name like 5055078.jpg.gif Not the most beautiful names but these are only temporary files.

Animation

Now I had 49 single gifs, not yet animated. To animate them I use Gifsicle. This needs to be installed, there is an installer on that link or it can be installed through homebrew 1

49 frames is a few too many I decided to try 11. Gifsicle had a lot of options, I just used a few typing: gifsicle --delay 20 --colors 64 --loop then dragging 11 single frame gifs into the terminal window to add them typing -o fight.gif This looks pretty messy but hitting return gives me a gif fight in the current directory (500).
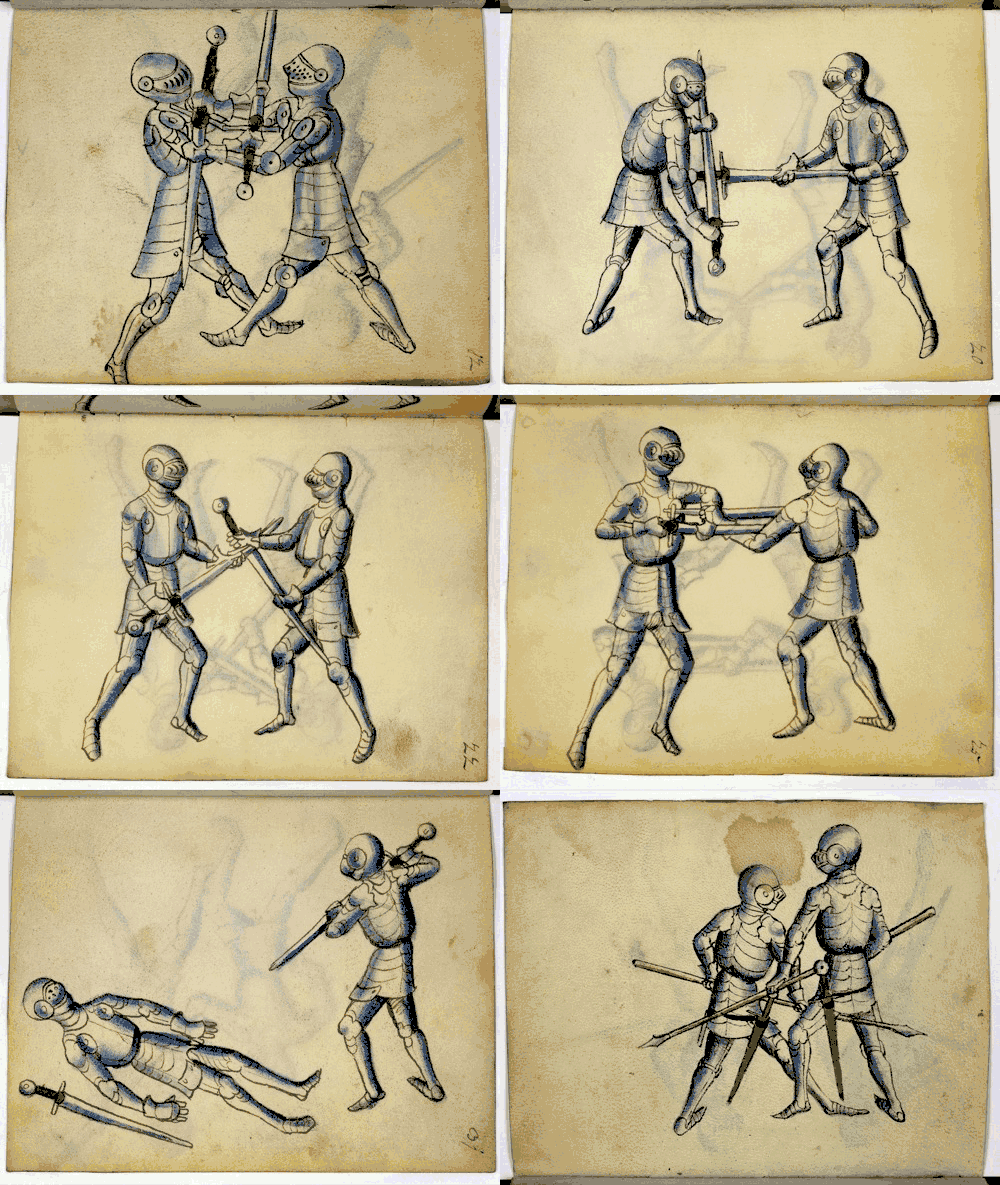
fight

Montage

The next idea I had was to have several fights going on at the same time. For this I needed to make a set of images made up of 4 of the original images in a 2×2 grid.

There is a commandline application montage 2 that is installed as part of ImageMagick This can be installed via a download or with homebrew (or macports). Homebrew will take care of installing any dependencies as it goes.

Basic use of montage might be:
montage -tile 2x -geometry +0+0 5055069.jpg 5055123.jpg 5055228.jpg 5055280.jpg montageexample.jpeg

If you were in a folder containing images named 5055069.jpg, 5055123.jpg, 5055228.jpg and 5055280.jpg the -tile 2x parameter tells montage to make a 2x wide grid, -geometry +0+0 means there is no gsap between images and seems to stop the auto thumbnailing.
This gives you an image like this:
5055262

But I want to go through the images creating lots of different sets of 4 images. I don’t want to do this by hand.

By this time I am a fair way out of my comfort zone and need to scrape my memory and google a bit. What I need is xargs.

I am still in the folder with all the 500 pixel versions of the jpgs. First I make a new folder for the montages mkdir mont.

Then:
ls *.jpg | xargs -n 4 sh -c 'montage -tile 2x -geometry +0+0 "$0" "$@" mont/"$0" '

The first bit: ls *.jpg , just get a list of all of the jpg files, and the pipe, |, sends it to xargs.
The -n 4 means that xargs uses sets of four out of the list, sh creates a command for these sets which is:

'montage -tile 2x -geometry +0+0 "$0" "$@" mont/"$0" '

The “$0” “$@” just lists the set of 4 images, I did some testing with

ls *.jpg | xargs -n 4 sh -c 'echo "$0" "$@" '

To figure that out.

I end up with a set of jpgs with a different grid of 2×2 images in a folder.
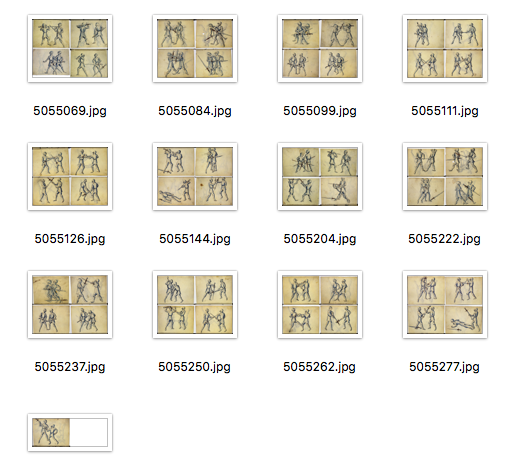
Screen Shot 2015-10-19 at 15.01.35

I delete the single one at the end and now I can make a gif with sips and gifsicle, repeating the process above:
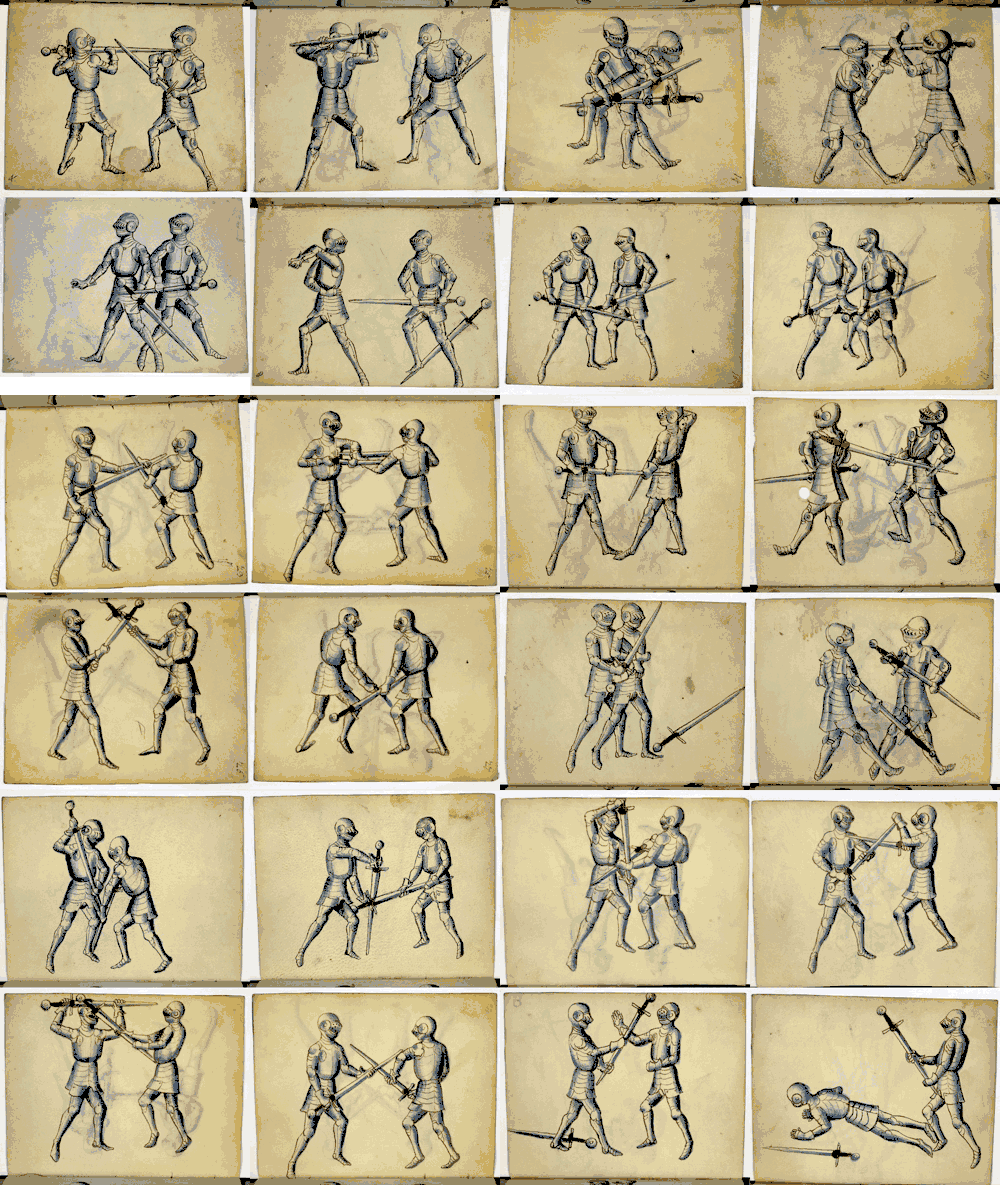
fourby4-32colors


And:

fencing-6x-6

I tweaked the colour pallet in fireworks for this last one, getting rid of the white borders.

There is a lot more to explore in this, I am starting to test gifsicle’s dither and colors options and will probably post a bunch of tests soonish of the results. I am also wondering if I can do some sort of zoom effect, like a movie zooming out from one fight to a battlefield…

Update: Gifsicle Comparison some tests of gifsicle parameters.
  1. homebrew installs the stuff you need that Apple didn’t. You can get a lot of interesting command line applications using it.
  2. ImageMagick: Command-line Tools: Montage Use the montage program to create a composite image by combining several separate images. The images are tiled on the composite image optionally adorned with a border, frame, image name, and more.

Colour of the Wire

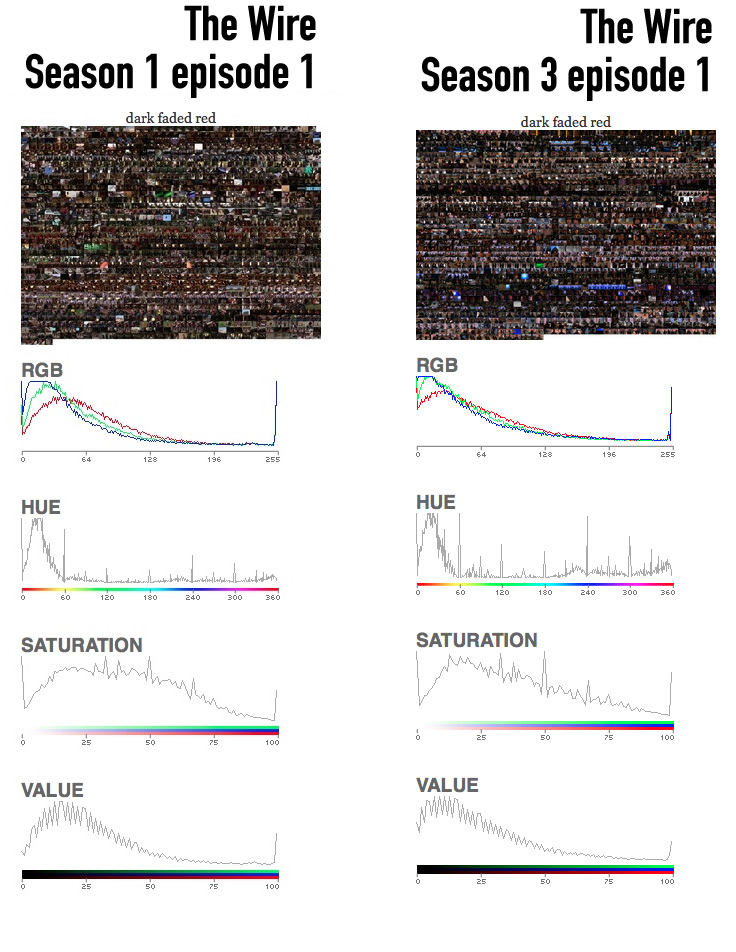
After the last post I’ve watched a few more episodes and have arrived in Season 3 of the wire. I though it might be interesting to see the overall colours of different episodes or seasons and compare them.

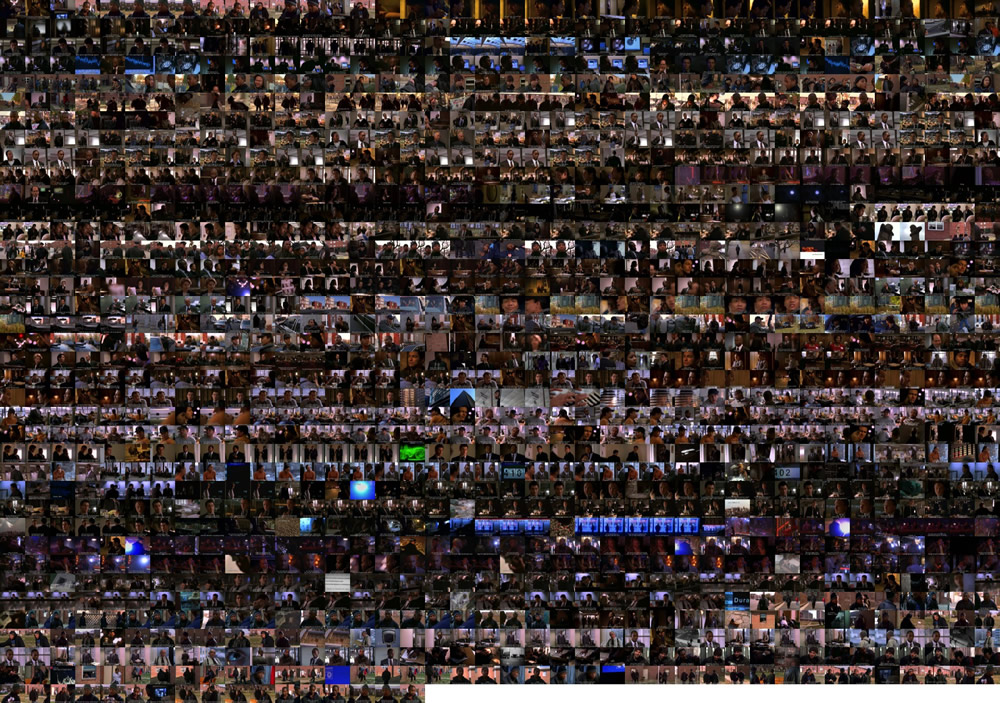
Following the same path1 as in the previous post I created a montage of screenshots from Episode 1 of season 3. I sort of expected it to be a bit brighter but:

out-1000

A bit of googling took me to Image Color Summarizer – RGB and HSV Image Statistics and:

Image Color Summarizer – RGB and HSV Image Statistics Season 1 Episode 1

Image Color Summarizer – RGB and HSV Image Statistics Season 3 Episode 1

Both described as dark faded red.

colours-of-the-wire

I wonder if it would be interesting to expand this to other episodes and series or if everything looks dark.


Footnotes:

1. I had a few problems with Storyboard this time as the .srt file I downloaded didn’t work, a quick google found one that did. I also noticed that the montage code I posted last time was missing a parameter --geometry +0+0 to remove padding

Chain of Command

wire01
(the above gif has nothing to do with the rest of the post, other than it is to do with the wire.)
A while back I posted about gifboard and it’s bigger brother storyboard. I’ve played a bit with storyboard and the wire this week.

Storyboard is a command line application which creates pdfs from movies with subtitles, one page per subtitle.

I just started with a bit of playing round with no particular destination in mind. The first thing I did was rip a pdf of subtitled frames from Episode 1 using storyboard. This gave me a 30mb file with >1400 ‘pages’.

I then thought that it might be an idea to get all of these pages out as images, a quick google suggested pdfseparate. This is another commandline app. I generally have no idea what commandline options are available, so I typed: man pdfseparate in the terminal and got back the man page, so it was installed.1

For once I though ahead and moved the pdf into its own folder, I then, in the terminal, cd into the folder and:

pdfseparate The\ Wire\ Episode\ 01\ -\ The\ Target.pdf  wire-ep-1-%d.pdf

The %d bit just gave me a numbered set of jpegs. I ended up with a folder full of 1497 pdfs. I really wanted images rather than pdfs so:

mkdir jpgs; sips -s format jpeg *.* --out jpgs

This command first makes a new folder called jpgs and then uses sips (built into OSX) to convert each pdf into a jpg and put it in the folder. These jpgs were quite big so I cd into the folder and:

sips --resampleWidth 300 *.jpg

Which resizes them nicely. I also duplicated the folder and made a set of smaller jpgs and some gifs with sips too.

My first thought was to make some animated gifs2, but a gif with 1497 frames turns out to be pretty big, even if you reduce it to 8bit. There are probably a few interesting gifs in this project which I might return to.

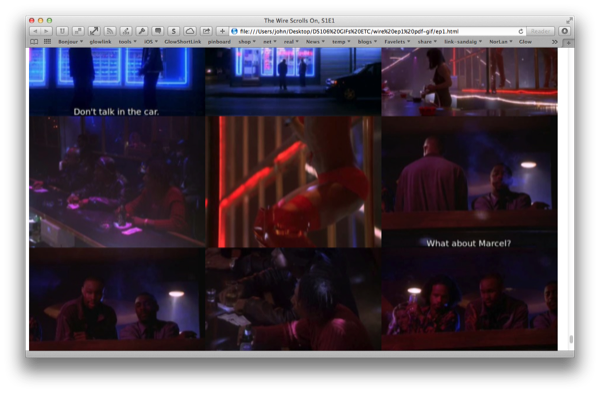
My next idea was to make one of those infinite scrolling web page with the jpg, and this turned out ok: The Wire Scrolls On, S1E1.

infinite-scroll

This gives quite an interesting view of the episode, it is pretty dark and there are a lot of closeups and expressive faces (this might be skewed by the fact we grab bits of dialog). I was quite surprised that the page loaded quite well.

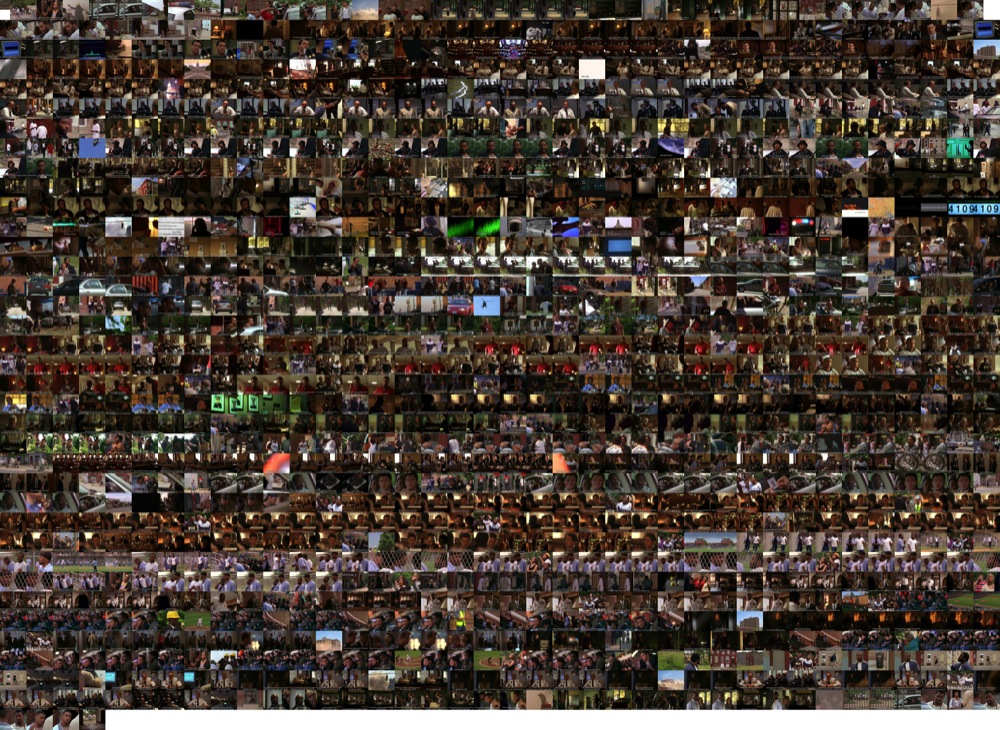
After seeing that page I thought a montage would be the next obvious step. Again a quick google suggested the ImageMagick set of command line tools. Again I’d already installed these at some time in the past so it only took another google to suggest that the montage tool was the way to go. So inside the folder of smaller jpgs:

montage wire-ep-1-[1-1497].jpg out.jpg

out-1000
I can’t imagine how long it would take to do something like this with a gui application. I can imagine that quite a few folk would not be all that interested in this process or the results, am thinking that it is somewhat analogous to looking at large sets of data. These image manipulating commandline tools allow different views of video to be created quickly. They also give an overview of a whole section that can be analysed and mused over.

I am not really much of a command line user although I’ve dabbled over the years and installed a fair number of applications along the way. I would recommend that dipping toes in, with say gifsicle before jumping in to install and try a pile of stuff. Google is your friend here and you can often find a command line way to do something by adding ‘command line’ to the search. In addition to the tools above, or even before, ffmpeg for example.

Update: The Wire EP 1 Mashup.


Footnotes:

1. I little digging around reminded me I had installed this as part of poppler. Poppler I’d installed using homebrew (the chain is tangling already). If you want to install various command line apps I’d recommend homebrew as a good option.

2. gifsicle is a wonderful command line application for creating animated gifs.

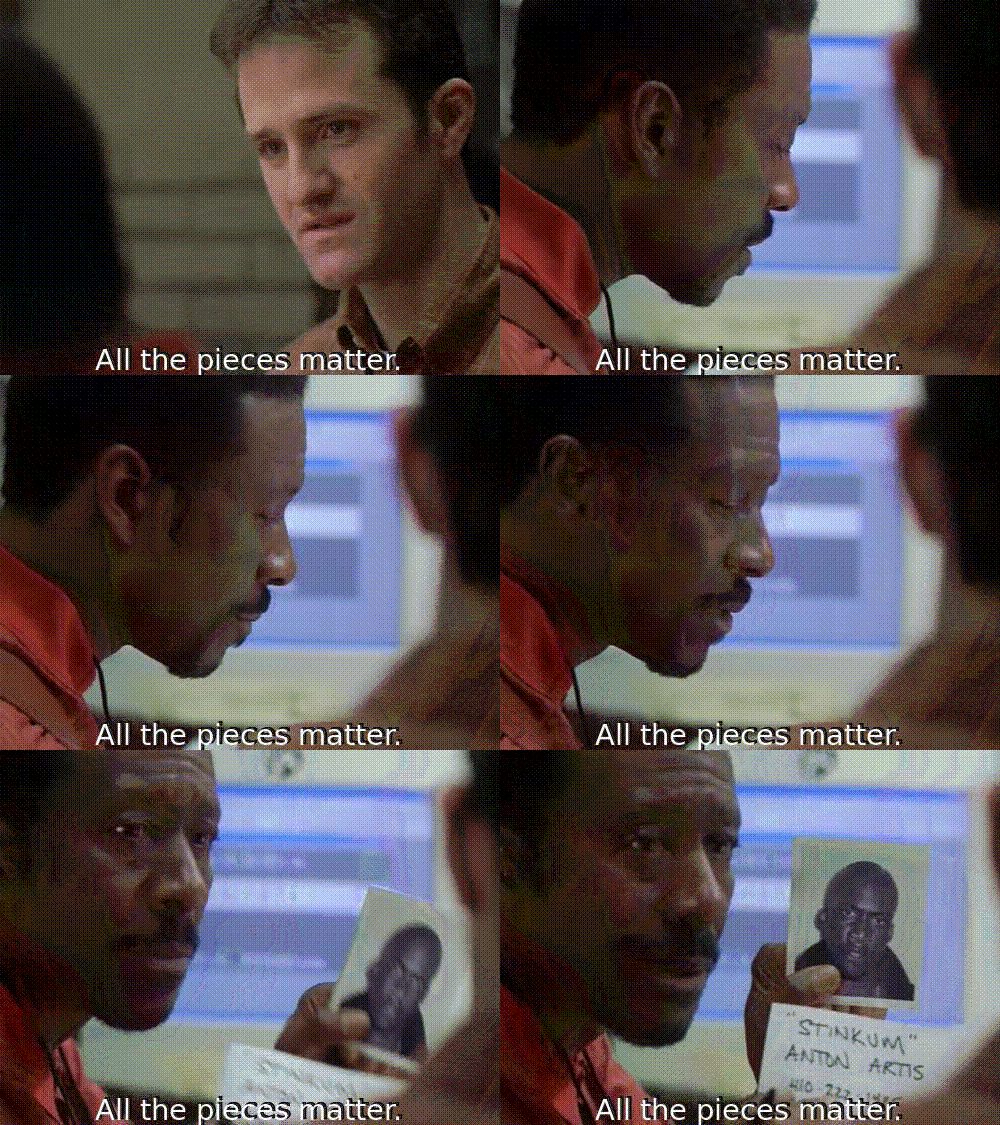
and all the pieces matter

and-all-the-pieces-matter
Gif using gifboard

This is a quick intro to installing videogrep.py a tool for making supercut movies. Written in haste, consider it a rough draft.

Videogrep is a python program run from the command line. This is quite different from using applications with a GUI. I am hoping to write up a few different tools I use for playing DS106 and will try and come back and expand on this.

More about Videogrep: Automatic Supercuts with Python – Sam Lavigne.

Code: antiboredom/videogrep · GitHub.

Caveats

  • I am no expert in using the command line. I’ve failed on quite a few attempts at installing.
  • As with a lot of software you can make mistakes, bad things can happen. You will be giving the software author control over your computer.
  • I am using Mac OS X
  • There is not a lot of detail here, I’ll come back and improve if it seems useful.
  • It is probably sensible to read all of the linked pages here rather than just go on trust.

Dependencies

Videogrep depends on a few python modules and programs. These are installed with pip (A tool for installing and managing Python packages) which you may need to install.

You also need to install FFMPEG (FFmpeg is a free software project that produces libraries and programs for handling multimedia data. ). One way to install FFmpg is with homebrew, which you need to install first!

Homebrew and ffmpeg

Homebrew, is a package manager it is installed and used via the commandline so you will need to open the terminal app.

You run stuff in the terminal by typing (or pasting) after the prompt my prompt is johnj:~ john$ if I am in my home directory which is called johnj

On the Homebrew site you can copy a line of text which if pasted into the terminal will install homebrew when you press return. I’d go to the site and copy from there rather than from here.

ruby -e "$(curl -fsSL https://raw.github.com/Homebrew/homebrew/go/install)"

The script explains what it will do and then pauses before it does it.

Once the script has finished it will recommend running:

brew doctor

To check all is ok, so type that and hit return, wait a while and the prompt returns. you can now install FFmpeg. The videogrep notes suggest you do with this:

brew install ffmpeg --with-libvpx --with-libvorbis

So try that, type it in at the prompt in the terminal, lots of text should stream by, by the time it stops FFmpeg should be installed. You can check by typing

ffmpeg -h

Which will display the help.

pip

Next you want to install pip, which lets you install other stuff. Again at the prompt type:

easy_install pip

Some text will go by and the prompt should come back.

Videogrep

Finally

Down load the zip file from antiboredom/videogrep · GitHub unzip and put it somewhere handy, your desktop folder for example.

The folder is called ‘videogrep-master’ I’ve just left it as that.

Inside the folder is a txt file requirements.txt this lists the python modules that you need to install, you don’t need to open it. Back in the terminal, cd into the videogrep folder:

cd path/to/folder

to do that type cd at the prompt and drag the folder into the terminal window, I see:

johnj john$ cd /Users/john/Desktop/videogrep-master

hit return and type:

pip install -r requirements.txt

and return again a ton of text will scroll past as past.

At the end, unless you have errors you are ready to go.

First cut

You need a video file and an srt file to match, there names must be the same except for the extension, eg:

  • The Wire Season 1 Episode 06 – The Wire.avi
  • The Wire Season 1 Episode 06 – The Wire.srt

If you followed the above steps your prompt should show you are in the videogrep-master folder:

johnj:videogrep-master john$

type:

python videogrep.py --input path/to/srt file  --search pieces --output pieces.mp4

more text scrolls past the terminal. A video pieces.mp4 appears in the folder, it is the supercut video.


Problems along the way

I had a couple, first in installing the requirments.txt I kept getting errors about pattern. To solve this I went to pattern, downloaded pattern and installed it. I then removed that line from requirments.txt and saved it before running pip install -r requirements.txt again.

The second problem I had was the movies created had no sound. I didn’t fix that, I just used miro video converter to convert the files to apple or iphone ones which did the trick. I am guessing this could have been fixed with ffmpeg too as miro video converter is, as far as I know, a gui for ffmpeg.