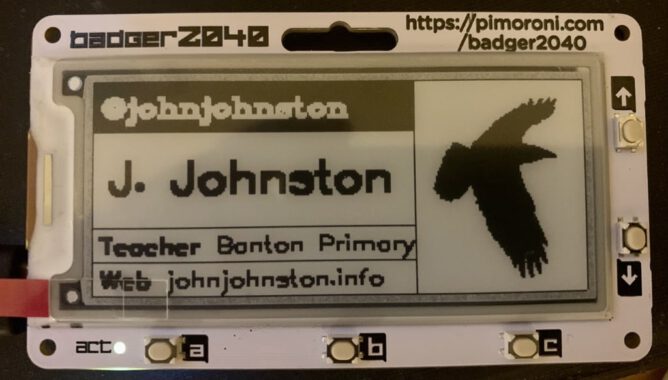
I just got a Badger 2040 on a bit of a whim.
A hackable, programmable badge with E Ink® display, powered by Raspberry Pi RP2040.
I’ve only followed the basic tutorials so far & don’t know python but I think this could be an interesting wee device.

I just got a Badger 2040 on a bit of a whim.
A hackable, programmable badge with E Ink® display, powered by Raspberry Pi RP2040.
I’ve only followed the basic tutorials so far & don’t know python but I think this could be an interesting wee device.
A lot of micro:bits from the BBC arrived in the centre where I work, ready to be distributed to North Lanarkshire schools. I’ve taken the opportunity to break one out and have a wee play.
The devices are aimed at secondary so outside my wheelhouse, but I could not resist a wee play.
The microbic works by creating code for it on a computer and flashing it to the device via USB (you can also use bluetooth from a mobile app). There are several different ways to create code. You can do in in the browser with severe different editors, Code Kingdom’s JavaScript, The Microsoft Block Editor, Microsoft Touch Develop or Python. I’ve had a quick try of most of these. You can also use the MU python editor that runs on Windows, OSX, Linux and Raspberry Pi.
Although I don’t really know any python I’ve found that the MU editor the most reliable. The browser based ones have been occasionally flaky, causing me to switch browsers a few times. I also like to have anything stored locally (the browser editor stores in local storage, but that means you need to either get an account sorted out or use the same browser on the same box all the time.)
There are already a nice set of resource building up, I found the Raspberry Pi and micro:bit Playground both useful.
When I was looking at the Tilty Game from the micro:bit Playground I though I might be able to make a ‘paint’ editor. This is the result. (click to start the movie, I’ve just found you can use a gif as a poster frame)
The code allows you to draw on the microbes LEDs, the left and right buttons move the cursor in a horizontal and vertical directions and a double press toggle the lights.
And here is the code, I used hilite.me to make it look nicer. Not exactly rocket science. I expect there are better ways of doing this.
from microbit import *

Matrix = [[0 for x in range(5)] for x in range(5)]

#set initial position
x = 2
y = 2

def printmatrix():
    for x in range(5):
        for y in range(5):
            if (Matrix[x][y]):
                display.set_pixel(x, y, 6)
            else:
                display.set_pixel(x, y, 0)
    return;

#show cursor
display.set_pixel(x, y, 9)

while True:
    if button_a.is_pressed() and button_b.is_pressed():
        if (Matrix[x][y]==0):
            Matrix[x][y]=1
        else:
            Matrix[x][y]=0
        printmatrix()
        sleep(1000)
        continue

    elif button_a.is_pressed():
        x = x + 1
        if (x>4):
            x=0
        printmatrix()
        display.set_pixel(x, y, 9)
    elif button_b.is_pressed():
        y = y + 1
        if (y>4):
            y=0
        printmatrix()
        display.set_pixel(x, y, 9)
    sleep(200)
The idea is we store a matrix of which lights are on. The ones turned on are shown by the printmatrix function. They are displayed at a brightness of 6 to distinguish them from the cursor, which is full beam.
The cursor is moved with the left and right buttons. it loops (I wonder if it would be better to bounce it?) Clicking the left and right buttons toggles the light on or of in the matrix. The reset button clears the screen.
I had quite a lot of fun getting this to work, the formatting of the script caught me out a few times. I wonder, if I was smarter, could I take the same approach and make a noughts and crosses app?
Featured image on this post a gif made from BBC micro:bit by Gareth Halfacree used under a Creative Commons — Attribution-ShareAlike 2.0 Generic — CC BY-SA 2.0 License.
I’ve been using pinboard for collecting links for five years now. I like it a lot, it feeds the Links page here and most of the enviable stuff.
One of the main things I like about it is its simplicity. Pinboard lists the links, titles, and descriptions without any images or fancy stuff. Adding links via the bookmarklet is simple. It supports the delicious API and has RSS so you can pull sets of links onto blogs and webpages easily enough.
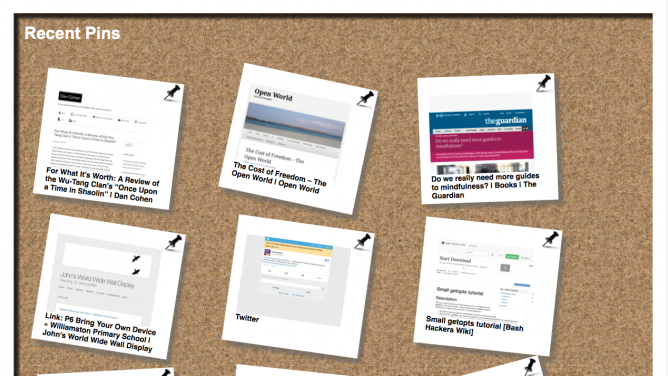
Last week I used the service to play around with python a little. To produce a more visual representation of my recent links. I appreciate the irony. This was an excuse to play with several technologies that I do not know much about.
Last month I had read: this post Homemade RSS aggregator followup by Dr Drang. This shows how to make an RSS reader with python.
I’ve very occasionally played with python for an hour or two but do not really understand the basics. I can however try things repeatedly until they worked.
My plan was to use the code from Dr Drang, simplifying it to deal with just one RSS feed. Using my pinboard links to produce a webpage. I also wanted to make thumbnails of the websites linked and play with CSS and JavaScript a bit.
The idea was to create the webpage in my dropbox. This could be updated automatically by the script running on my mac. I’ve had dropbox long enough to have a Public folder that is very handy for publishing webpages. This is now a pro and business option only.
Here is the script: pinboardrecent.py and the current output: Recent Pinboard.
The interesting thing about all of this is the several problems I hit and their solution.
The problem included:
The answers all involved google and testing and re-testing until things worked. In some all cases I am sure my answers were not the best way of doing things but they worked. I’ve noted most of these in the source. The other think I see in my code is lots of print statements that are commented out. I deleted lots more. There are surely better ways to find out what is going on/going wrong with a script but this works for me.
I am never going to be a programmer, but I get a lot of fun and occasional utility out of playing around like this.
There is a huge push to teach coding to pupils in school going on at the moment. A major reason for this is getting the right skills for employment. I hope a small side benefit will be giving learners the chance to have fun. Producing things for themselves rather than just use services and applications produced for them.
Tinkering with code that you do not understand may not be the best way to get a deep understanding of a language. It may not even help with learning the fundamental concepts. It does in my experience hook you into engaging with learning.
This term at work I’ll be involved in providing training in starting primary pupils coding. I’ll be recommending tinkering as one possible way of getting started and engaing pupils. I am sure some will be as fascinated as me.
I found this interesting project from One Thing Well‘s rss feed, in my nearly done for, google reader.
Levinux is A Tiny Version of Linux for Education byMike Levin.
Levinux (download ~18 MB) is a tiny virtual Linux server that runs from USB or Dropbox with a double-click (no install) from the desktop of a Mac, Windows or Linux PC—making it the perfect learning environment, and a great way to run & keep your code safe for life! Think of it as an introduction to old-skool “short stack” development—more relevant now then ever as Linux/Unix gets embedded into everything.
from: Levinux – A Tiny Version of Linux for Education – Mike Levin
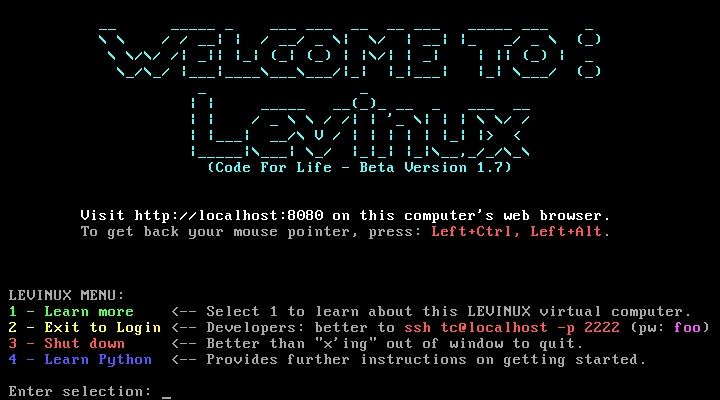
Basically when you run the application (on mac, windows or linux) you get a very small linux server running in a virtual machine:
After that you can create and edit html files on the server via ssh and the commandline (or PuTTy on windows).
This fits in very nicely with mty recent excursio into editing on a server via ssh on the PirateBox.
You can also install Python, vim and git very easily, basically by typing 4 and enter at the screen above:
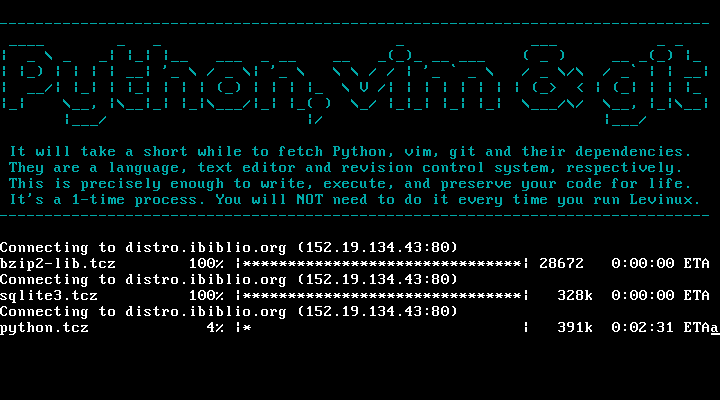
This gives you a simple environment to learn python git and vim.
Mike Leven has produced a nice YouTube playlist of instructions to get started: Levinux – YouTube, I’ve followed the first few without any problem at all.
On of the interesting ways this can be used is by adding the Levinux folder to your dropbox, you can then run the same server on different computers and even different operating systems.
One of the thing I feel might be tricky in getting young people started with programming might be the complexity of a modern operating system. Even relatively recently when I started using my first mac, it had a tiny hard drive, and after a short while I had seen about every file on it. A simpler setup might be a lot quicker to get started making on. A virtual server that can be reinstalled in a couple of minutes gives a very low risk playground.
Finally here is a quote for a parent, using levinux to teach his child programming which points to some interesting possibilities:
Now one week later I see something happening with my oldest son that was not happening before. He is spending his free time sitting in front of the computer with his Levinux terminal open feverishly typing away on simple little scripts and creating ASCII art while games and movies are just a click away.
Something has changed in the way he sees a computer that I was not expecting. He is no longer consuming media he is creating. The family computer has changed from a flashy pass time to a tool for creativity.
from: ken morgan – Google+ – Something occurred to me today when I was going over Python…
and there is a Levinux Google+ community.
A while back I joined the Mechanical Mooc with a two fold intention, one to further explore MOOCs in a practical way and two, to learn a bit of python. I am afraid I only managed to stay the course for two full weeks. This was in part due to my underestimate of the time involved. I probably spent five or six hours a week over the first two weeks and would have been better taking seven. I don’t consider the time wasted, I learnt a minuscule bit of python and had a fair number of interesting (to me) thoughts about my approach to learning and online learning in general. I also began to pay a little attention to posts about python that turned up in my browsing and reading on the web.
Recently I’ve seen a few posts about a iPad app Pythonista
Create interactive experiments and prototypes using multi-touch, animations, and sound – or just use the interactive prompt as a powerful calculator.
I read a few of these but didn’t plunk down my £2.99 until I saw this, Automating iOS: How Pythonista Changed My Workflow and The Power of Pythonista 1.2, both blog posts show how to use pythonista, on the iPad, to get things done as opposed to playing or learning. I found I learn how to do things better as part of a ‘real’ task rather than playing. This is not to say my learning is not playful. Often there will be simpler or better ways to do things but I learn something for taking a DIY approach. For example most of my recent posts tagged dropbox are about ways I’ve figured out how to do something that could be done in many other ways.
One of these Dropbox posts is about Blogging via Dropbox, which I am doing with this post. At the time I posted that I had no way to upload images. I do now thanks to macdrifter whose post has code for pythonista to take an image copied to the clipboard, resize it, upload the resized image via FTP and finally copy the URL of the uploaded image to the clipboard.
It was simple enough, even without understanding python to alter the script with my FTP details, change the size and produce jpg files rather than pngs.

To produce upload this image and show it I had to:
This seems as a simple as uploading a file through the blogs web interface.
There seems to be a few schools using python in computing. I wonder if this app would be useful. Some of the examples involve games or graphics, which I found off-putting and difficult, these may be just the thing to engage pupils (who possible have less interest in resizing and uploading graphics).
Recently I was discussing the various mobile projects running in Scotland with a friend, they mentioned that they though that iPad projects relied too much on Apps that make things to easy for the learner, iMovie trailers being one example, and compare this to a ‘richer’ learning environment provided by scratch. There is a whole other discussion waiting there but I see several interesting and powerful ways of coding developing on the iPad, Pythonista being one. Codea – iPad and ScriptKit – Drag and Drop Programming for iPad. another two. These two use The Programming Language Lua.
ScripKit looks interesting because:
ScriptKit is a touchable programming environment for building simple mobile prototypes on iPad using native iOS UI components and social media APIs, available via an intuitive drag and drop interface.
The social media APIs is exciting cause it means access to Dropbox, Facebook and Instagram. ScriptKit comes with some nice example but needs an in app purchase at £7.99 to edit the scripts. I am not ready to use it so have not bought it yet.
And Codea
Codea for iPad lets you create games and simulations — or just about any visual idea you have. Turn your thoughts into interactive creations that make use of iPad features like Multi-Touch and the accelerometer.
For me it is early days I just bought the app yesterday, I already appreciate its design and have had hints of its power. It might just keep my python learning curve moving ever so gently upwards.
It is also becoming more apparent that iPads are not only good for creation as well as consumption they are good for tinkering too. As someone who like tinkering this is a positive turn compared to the idea that Apple, and others, are making tools that are increasingly locked down.